Deploying Workloads Lab
Overview
In addition to storage, VM creation, management, and monitoring can all be performed for Nutanix AHV directly through Prism.
Note
Prism also offers native support for VM CRUD operations for Nutanix clusters running ESXi when the vCenter has been registered in Prism.
Deploying Workloads
In the following exercise we’ll walk through creating VMs from source media and from existing disk images.
Creating a Windows VM
In this exercise you will create a Windows Server VM from a Windows installation ISO image.
AHV provides an Image Service feature allows you to build a store of imported files that you can use to create a CD-ROM from an ISO image or an operating system Disk from a disk image when creating a VM. The Image Service supports raw, vhd, vhdx, vmdk, vdi, iso, and qcow2 disk formats.
Note
You can explore the available images and upload additional images under > Image Configuration in Prism Element.
In order to provide high performance IO to VMs, AHV requires the installation of paravirtualized drivers into the guest (similar to VMware Tools). For Windows guests specifically, these drivers must be loaded during installation in order for the VM’s disk to be accessible by the Windows installer.
Nutanix validates and distributes these drivers via http://portal.nutanix.com. The ISO image containing the drivers has already been uploaded to the Image Service.
In Prism Element > VM > Table, click + Create VM.
Fill out the following fields and click Save:
Leave other settings at their default values.
Name - Initials-Windows_VM
Description - (Optional) Description for your VM.
vCPU(s) - 2
Number of Cores per vCPU - 1
Memory - 4 GiB
- Select next to CDROM
Operation - Clone from Image Service
Image - Windows2016.ISO
Select Update
This will mount the Windows Server ISO from the Image Service for boot/installation
- Select + Add New Disk
Type - DISK
Operation - Allocate on Storage Container
Storage Container - Default Container
Size (GiB) - 30 GiB
Select Add
This will create a 30GiB vDisk on the selected Storage Container
- Select + Add New Disk
Type - CDROM
Operation - Clone from Image Service
Image - Nutanix VirtIO ISO
Select Add
Boot Configuration
Leave the default selected Legacy Boot
- Select Add New NIC
VLAN Name - Primary
Select Add
This will add a single virtual NIC to the VM on the selected Virtual Network
Click Save to create the VM.
Note
At the following URL you can find the supported Operating Systems
Select the VM, then click Power On from the list of action links (below the table) to turn on the VM.

Select the VM, then click Launch Console from the Actions drop-down menu to access an HTML5 console to interact with the VM.
Progress through the standard install questions until you reach the Windows install location.
Note
Choose Datacenter with GUI and Custom installation when presented with the choice.
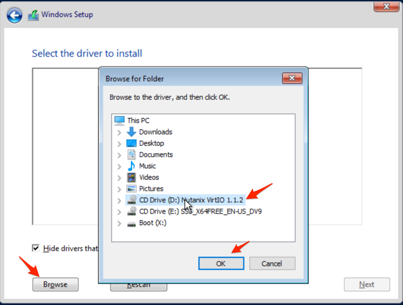
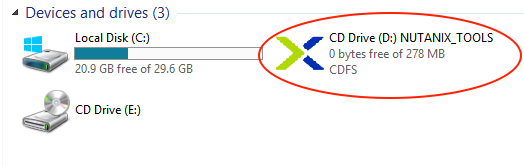
Click Load Driver and navigate to the CD where the Nutanix VirtIO is mounted.
Browse the CD, and select the directory that corresponds to the Windows OS being installed.
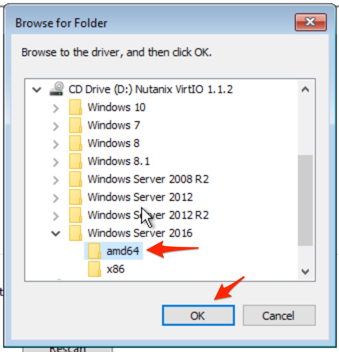
Select the three Nutanix drivers displayed (Press and hold the Ctrl key and select all three drivers):
Balloon
Ethernet adapter
SCSI passthrough controller

Click Next.
After the drivers are loaded, the disk created in Step 2 appears as an installation target.
Select that disk and continue with the normal install process.
After the installation completes, if desired, the Windows install and the VirtIO ISOs can be unmounted from within Windows, and the CD-ROMs can be removed from the VM by selecting the VM in the table, clicking Update from the list of action links, and removing the CD-ROM disks (VM must be powered off).
Note
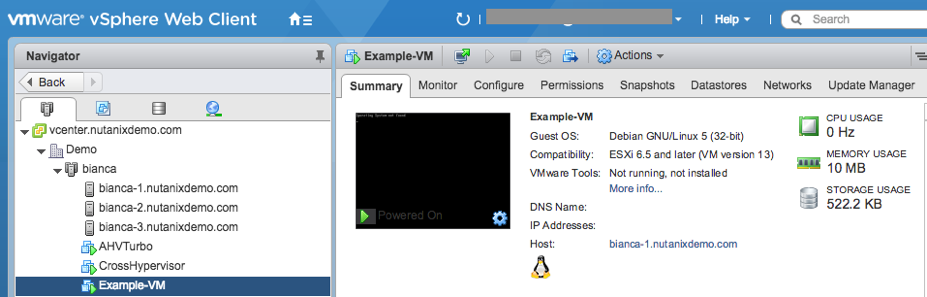
For ESXi clusters, if a VM is created via VMware vSphere, it appears in the Prism VMs list. Alternatively, if a VM is created via Prism, it appears in the VMware vSphere UI. No manual syncing or waiting is required.
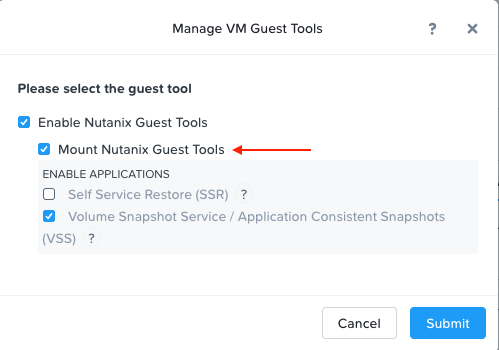
Following OS installation you can complete the Nutanix Guest Tools (NGT) installation by selecting the VM in Prism and clicking Manage Guest Tools > Enable Nutanix Guest Tools > Mount Guest Tools, and clicking Submit.
This will use the virtual CD-ROM device to mount the NGT installation ISO to the VM. NGT includes the previously installed VirtIO drivers, as well as services to support Self-Service File Restore (SSR) and Application Consistent (VSS) snapshots.
Return to the VM console to complete the NGT installation by clicking on the Nutanix Guest Tools CD.
Creating a Linux VM
In this exercise you will create a CentOS VM from an existing, pre-installed disk image in the Image Service. It is common in many environments to have “template” style images of pre-installed operating systems. Similar to the previous exercise, the disk image has already been uploaded to the Image Service.
In Prism Element > VM > Table, click + Create VM.
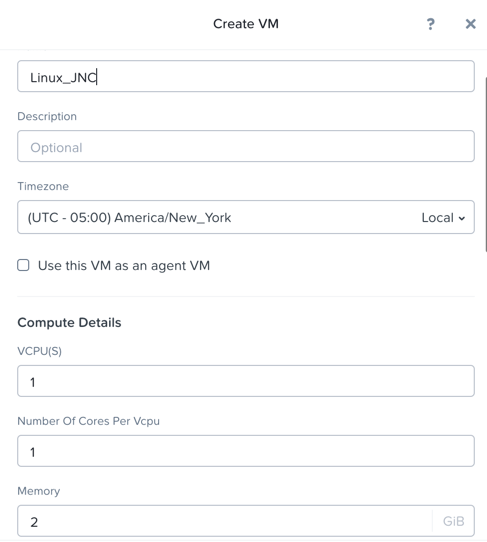
Fill out the following fields and click Save:
Name - Initials-Linux_VM
Description - (Optional) Description for your VM.
vCPU(s) - 1
Number of Cores per vCPU - 1
Memory - 2 GiB
- Select + Add New Disk
Type - DISK
Operation - Clone from Image Service
Image - CentOS7.qcow2
Select Add
Boot Configuration
Leave the default selected Legacy Boot
This will create a thin clone of the existing CentOS disk image
- Select Add New NIC
VLAN Name - Primary
Select Add
Click Save to create the VM.
Launch the console to see the VM being started.
Takeaways
In this lab you saw how simple it is to deploy a Windows VM and a Linux VM.
The Image Configuration tool allows you to have a catalog of available images to be used in VM deployments as needed and covering a broad format support which includes qcow, qcow2, vmdk, VHD, VHDx, RAW, and ISO.