Calm: Windows Workloads
The estimated time to complete this lab is 60 minutes.
Overview
In this exercise you will explore the basics of working with Windows workloads in Nutanix Calm by building and deploying a blueprint that installs and configures a multi-tier bug tracker web app using Microsoft SQL Server database & IIS webserver. This lab assumes you are familiar with basic Calm functionality or have completed the Calm: Linux Workloads lab.
Creating the Blueprint
Within Calm, create a new Multi VM/Pod Blueprint.
Fill out the following fields and click Proceed to launch the Blueprint Editor:
Name - Initials-CalmWindowsIntro
Description - [BugNET](http://@@{MSIIS.address}@@/bugnet)
Project - Initials-Calm
Note
Using the description value provided will create a hyperlink to the BugNET application to launch once deployment has completed.
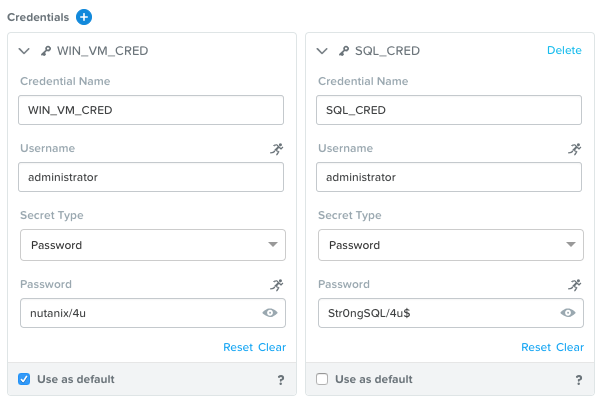
Click Credentials and create the following two credentials:
Credential Name
WIN_VM_CRED
SQL_CRED
Username
Administrator
Administrator
Secret Type
Password
Password
Password
nutanix/4u
Str0ngSQL/4u$
Click Save and return back, using the BACK button, to the Blueprint Editor.
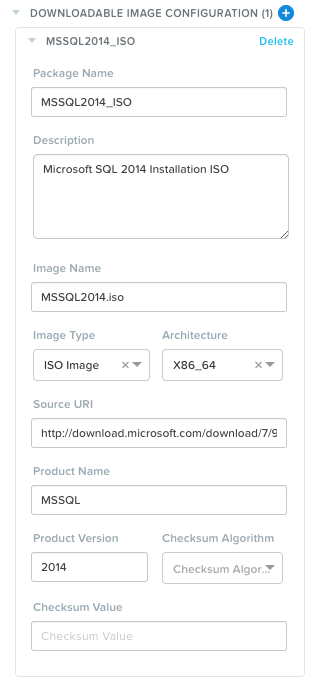
Click Configuration and create the following Downloadable Image Configuration:
Package Name - MSSQL2014_ISO
Description - Microsoft SQL 2014 Installation ISO
Image Name - MSSQL2014.iso
Image Type - ISO Image
Architecture - X86_64
Product Name - MSSQL
Product Version - 2014
Checksum Algorithm - Leave blank
Checksum Value - Leave blank
Click Save and return back to the Blueprint Editor.
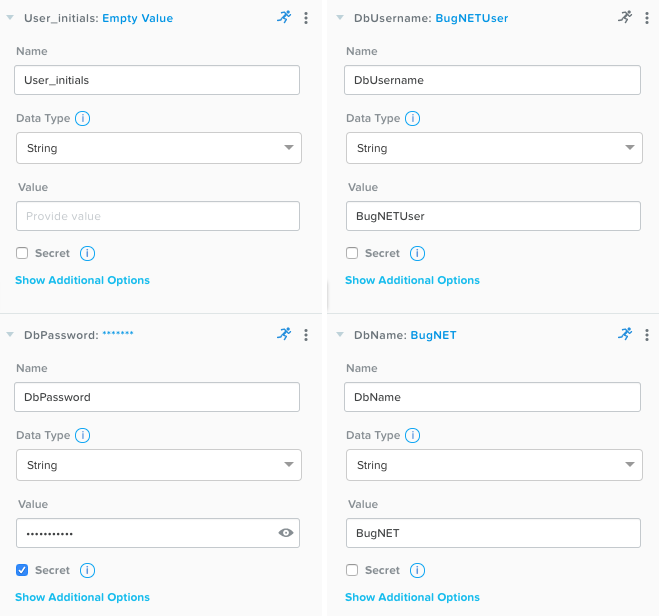
Using the Default Application Profile, specify the following Variables in the Configuration Panel:
Name
Data Type
Value | Secret
Runtime
DbName
String
BugNET | No
Yes
DbUsername
String
BugNETUser
No
Yes
DbPassword
String
Nutanix/4u$
Yes
Yes
User_initials
String
Leave blank
No
Yes
Click Save.
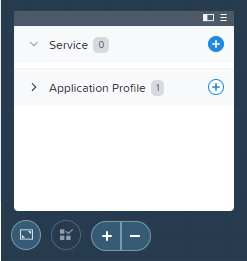
Adding Services
Under Application Overview > Services, click twice to add two new Services.
Use the table below to complete the VM fields for each service:
General setings
Service Name
MSSQL
MSIIS
VM - Name
MSSQL2014
MSIIS8
Cloud
Nutanix
Nutanix
Operating System
Windows
Windows
VM Name
@@{User_initials}@@-MSSQL
@@{User_initials}@@-MSIIS
vCPUs
2
2
Cores per vCPU
2
2
Memory (GiB)
6
6
Guest Customization
Yes
Yes
Type
Sysprep
Sysprep
Install Type
Prepared
Prepared
Script
Copy script below table
Copy script below table
DISK 1
Device Type
DISK
DISK
Device Bus
SCSI
SCSI
Disk Image
Windows 2016
Windows 2016
Bootable
Yes
Yes
DISK 2 (click the + sign)
Device Type
CD-ROM
N/A
Device Bus
IDE
N/A
Bootable
No
N/A
Image
MSSQL2014_ISO
N/A
Extra disks needed
Additional Disks
1
1
Device Type
DISK
DISK
Device Buse
SCSI
SCSI
Size (GiB)
100
100
Rest of the settings per VM
VGPUs
None
None
Categories
None
None
Network Adapters
1
1
NIC 1
Primary
Primary
Private IP
Dynamic
Dynamic
Check log-in upon create
Yes
Yes
Credential
WIN_VM_CRED
WIN_VM_CRED
Address
NIC 1
NIC 1
Connection Type
Windows (Powershell)
Windows (Powershell)
Connection Protocol
HTTP
HTTP
Connection Port
5985
5985
Delay (in seconds)
Increase to 90
Increase to 90
Take a minute to review the Sysprep script, a short description follows after.
<?xml version="1.0" encoding="UTF-8"?>
<unattend xmlns="urn:schemas-microsoft-com:unattend">
  <settings pass="specialize">
     <component xmlns:wcm="http://schemas.microsoft.com/WMIConfig/2002/State" xmlns:xsi="http://www.w3.org/2001/XMLSchema-instance" name="Microsoft-Windows-Shell-Setup" processorArchitecture="amd64" publicKeyToken="31bf3856ad364e35" language="neutral" versionScope="nonSxS">
        <ComputerName>@@{name}@@</ComputerName>
        <RegisteredOrganization>Nutanix</RegisteredOrganization>
        <RegisteredOwner>Acropolis</RegisteredOwner>
        <TimeZone>UTC</TimeZone>
     </component>
     <component xmlns="" name="Microsoft-Windows-TerminalServices-LocalSessionManager" publicKeyToken="31bf3856ad364e35" language="neutral" versionScope="nonSxS" processorArchitecture="amd64">
        <fDenyTSConnections>false</fDenyTSConnections>
     </component>
     <component xmlns="" name="Microsoft-Windows-TerminalServices-RDP-WinStationExtensions" publicKeyToken="31bf3856ad364e35" language="neutral" versionScope="nonSxS" processorArchitecture="amd64">
        <UserAuthentication>0</UserAuthentication>
     </component>
     <component xmlns:wcm="http://schemas.microsoft.com/WMIConfig/2002/State" xmlns:xsi="http://www.w3.org/2001/XMLSchema-instance" name="Networking-MPSSVC-Svc" processorArchitecture="amd64" publicKeyToken="31bf3856ad364e35" language="neutral" versionScope="nonSxS">
        <FirewallGroups>
           <FirewallGroup wcm:action="add" wcm:keyValue="RemoteDesktop">
              <Active>true</Active>
              <Profile>all</Profile>
              <Group>@FirewallAPI.dll,-28752</Group>
           </FirewallGroup>
        </FirewallGroups>
     </component>
  </settings>
  <settings pass="oobeSystem">
     <component xmlns:wcm="http://schemas.microsoft.com/WMIConfig/2002/State" xmlns:xsi="http://www.w3.org/2001/XMLSchema-instance" name="Microsoft-Windows-Shell-Setup" processorArchitecture="amd64" publicKeyToken="31bf3856ad364e35" language="neutral" versionScope="nonSxS">
        <UserAccounts>
           <AdministratorPassword>
              <Value>@@{WIN_VM_CRED.secret}@@</Value>
              <PlainText>true</PlainText>
           </AdministratorPassword>
        </UserAccounts>
        <AutoLogon>
           <Password>
              <Value>@@{WIN_VM_CRED.secret}@@</Value>
              <PlainText>true</PlainText>
           </Password>
           <Enabled>true</Enabled>
           <Username>Administrator</Username>
        </AutoLogon>
        <FirstLogonCommands>
           <SynchronousCommand wcm:action="add">
              <CommandLine>cmd.exe /c netsh firewall add portopening TCP 5985 "Port 5985"</CommandLine>
              <Description>Win RM port open</Description>
              <Order>1</Order>
              <RequiresUserInput>true</RequiresUserInput>
           </SynchronousCommand>
           <SynchronousCommand wcm:action="add">
              <CommandLine>powershell -Command "Enable-PSRemoting -SkipNetworkProfileCheck -Force"</CommandLine>
              <Description>Enable PS-Remoting</Description>
              <Order>2</Order>
              <RequiresUserInput>true</RequiresUserInput>
           </SynchronousCommand>
           <SynchronousCommand wcm:action="add">
              <CommandLine>powershell -Command "Set-ExecutionPolicy -ExecutionPolicy RemoteSigned"</CommandLine>
              <Description>Enable Remote-Signing</Description>
              <Order>3</Order>
              <RequiresUserInput>false</RequiresUserInput>
           </SynchronousCommand>
        </FirstLogonCommands>
        <OOBE>
           <HideEULAPage>true</HideEULAPage>
           <SkipMachineOOBE>true</SkipMachineOOBE>
        </OOBE>
     </component>
     <component xmlns:wcm="http://schemas.microsoft.com/WMIConfig/2002/State" xmlns:xsi="http://www.w3.org/2001/XMLSchema-instance" name="Microsoft-Windows-International-Core" processorArchitecture="amd64" publicKeyToken="31bf3856ad364e35" language="neutral" versionScope="nonSxS">
        <InputLocale>en-US</InputLocale>
        <SystemLocale>en-US</SystemLocale>
        <UILanguageFallback>en-us</UILanguageFallback>
        <UILanguage>en-US</UILanguage>
           <UserLocale>en-US</UserLocale>
     </component>
  </settings>
</unattend>
You can see the VMs being configured to autologon to the local Administrator account using the WIN_VM_CRED password. While this exercise will not join the VMs to an Active Directory domain, you could use either Sysprep or a Package Install task script to automate the joining of a domain.
Additionally, the firewall is configured to allow port 5985 which Calm uses to execute PowerShell scripts against the host.
Note
For those familiar with previous versions of Calm, the Karan service VM is no longer required to proxy PowerShell commands to the service VMs. Instead, Calm has introduced native support for running PowerShell scripts on remote hosts.
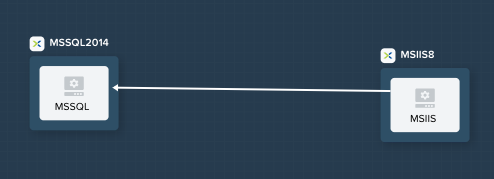
Similar to the Task Manager application in the Calm: Linux Workloads lab, you want to ensure the database is available prior to the IIS web server setup.
In the Blueprint Editor, select the MSIIS service and create a dependency on the MSSQL service.
Defining Package Install
For each of the following 7 scripts (3 for MSSSQL and 4 for MSIIS), the Type, Script Type, and Credential fields will be the same:
Type - Execute
Script Type - PowerShell
Endpoint (optional) - Leave default
Credential - WIN_VM_CRED
Note
If you were working with domain joined VMs, you would require a separate domain credential to execute PowerShell scripts following the VM being joined to the domain.
Select the MSSQL service and open the Package tab in the Configuration Panel.
Name the package and click Configure install to begin adding installation tasks.
You will add multiple scripts to complete each installation. Working with multiple scripts allows for easier maintenance and application of code across multiple services or blueprints using the Calm Task Library. The Task Library allows you to create modularized scripts to achieve certain common functions such as joining a domain or configuring common OS settings.
Under MSSQL > Package Install, click + Task and fill out the following fields:
Task Name - InitializeDisk1
Script -
Get-Disk -Number 1 | Initialize-Disk -ErrorAction SilentlyContinue
New-Partition -DiskNumber 1 -UseMaximumSize -AssignDriveLetter -ErrorAction SilentlyContinue | Format-Volume -Confirm:$false

# Enable CredSSP
Enable-WSManCredSSP -Role Server -Force
The above script simply performs an initialization and format of the extra 100GB VDisk added during VM configuration of the service.
Click Publish To Library > Publish to save this task script to the Task Library for future use.
Repeat clicking + Task to add the remaining two scripts:
Task Name - InstallMSSQL
Script -
$DriveLetter = $(Get-Partition -DiskNumber 1 -PartitionNumber 2 | select DriveLetter -ExpandProperty DriveLetter)
$edition = "Standard"
$HOSTNAME=$(hostname)
$PackageName = "MsSqlServer2014Standard"
$Prerequisites = "Net-Framework-Core"
$silentArgs = "/IACCEPTSQLSERVERLICENSETERMS /Q /ACTION=install /FEATURES=SQLENGINE,SSMS,ADV_SSMS,CONN,IS,BC,SDK,BOL /SECURITYMODE=sql /SAPWD=`"@@{SQL_CRED.secret}@@`" /ASSYSADMINACCOUNTS=`"@@{SQL_CRED.username}@@`" /SQLSYSADMINACCOUNTS=`"@@{SQL_CRED.username}@@`" /INSTANCEID=MSSQLSERVER /INSTANCENAME=MSSQLSERVER /UPDATEENABLED=False /INDICATEPROGRESS /TCPENABLED=1 /INSTALLSQLDATADIR=`"${DriveLetter}:\Microsoft SQL Server`""
$setupDriveLetter = "D:"
$setupPath = "$setupDriveLetter\setup.exe"
$validExitCodes = @(0)

if ($Prerequisites){
Install-WindowsFeature -IncludeAllSubFeature -ErrorAction Stop $Prerequisites
}

Write-Output "Installing $PackageName...."

$install = Start-Process -FilePath $setupPath -ArgumentList $silentArgs -Wait -NoNewWindow -PassThru
$install.WaitForExit()

$exitCode = $install.ExitCode
$install.Dispose()

Write-Output "Command [`"$setupPath`" $silentArgs] exited with `'$exitCode`'."
if ($validExitCodes -notcontains $exitCode) {
Write-Output "Running [`"$setupPath`" $silentArgs] was not successful. Exit code was '$exitCode'. See log for possible error messages."
exit 1
}
Reviewing the above script you can see it is performing an automated installation of SQL Server, using the SQL_CRED credential details and using the extra 100GB VDisk for the SQL data files.
According to Nutanix best practices for production database deployments, what else would need to be added to the VM/installation?
Task Name - FirewallRules
Script -
New-NetFirewallRule -DisplayName "SQL Server" -Direction Inbound -Protocol TCP -LocalPort 1433 -Action allow
New-NetFirewallRule -DisplayName "SQL Admin Connection" -Direction Inbound -Protocol TCP -LocalPort 1434 -Action allow
New-NetFirewallRule -DisplayName "SQL Database Management" -Direction Inbound -Protocol UDP -LocalPort 1434 -Action allow
New-NetFirewallRule -DisplayName "SQL Service Broker" -Direction Inbound -Protocol TCP -LocalPort 4022 -Action allow
New-NetFirewallRule -DisplayName "SQL Debugger/RPC" -Direction Inbound -Protocol TCP -LocalPort 135 -Action allow
New-NetFirewallRule -DisplayName "SQL Browser" -Direction Inbound -Protocol TCP -LocalPort 2382 -Action allow
Reviewing the above script you can see it is allowing inbound access through the Windows Firewall for key SQL services.
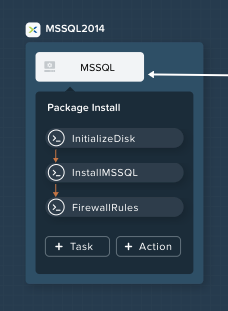
Once complete, your MSSQL service should look like this:
Select the MSIIS service and open the Package tab in the Configuration Panel.
Name the package and click Configure install to begin adding installation tasks.
Under MSIIS > Package Install, click + Task.
Provide the Task Name - InitializeDisk1
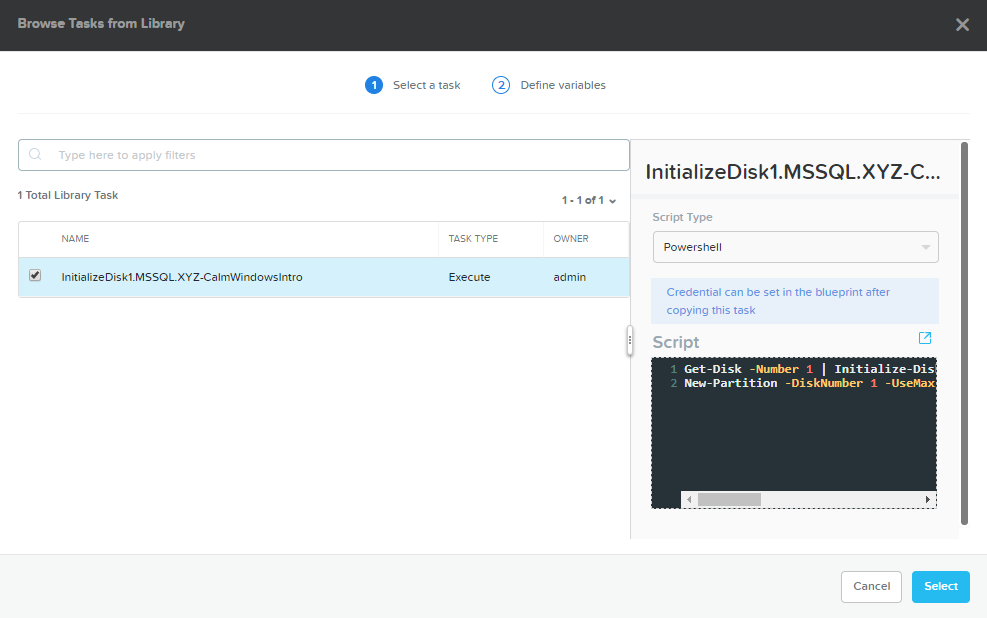
Rather than manually specifying the same script for this task, click Browse Library.
Select the InitializeDisk1 task you had previously published and click Select > Copy.
Note
The Task Library also gives you the ability to provide variable definitions if there are Calm macros present in the published task.
Specify the Name and Credential, then repeat clicking + Task to add the remaining three scripts:
Task Name - InstallWebPI
Script -
# Install WPI
New-Item c:/msi -Type Directory
Invoke-WebRequest 'http://download.microsoft.com/download/C/F/F/CFF3A0B8-99D4-41A2-AE1A-496C08BEB904/WebPlatformInstaller_amd64_en-US.msi' -OutFile c:/msi/WebPlatformInstaller_amd64_en-US.msi
Start-Process 'c:/msi/WebPlatformInstaller_amd64_en-US.msi' '/qn' -PassThru | Wait-Process

Invoke-WebRequest 'https://download.microsoft.com/download/4/B/1/4B1E9B0E-A4F3-4715-B417-31C82302A70A/ENU/x86/SQLSysClrTypes.msi' -OutFile c:/msi/SQLSysClrTypes.msi-x86.msi
Start-Process 'c:/msi/SQLSysClrTypes.msi-x86.msi' '/qn' -PassThru | Wait-Process
Invoke-WebRequest 'https://download.microsoft.com/download/4/B/1/4B1E9B0E-A4F3-4715-B417-31C82302A70A/ENU/x64/SQLSysClrTypes.msi' -OutFile c:/msi/SQLSysClrTypes.msi-x64.msi
Start-Process 'c:/msi/SQLSysClrTypes.msi-x64.msi' '/qn' -PassThru | Wait-Process
The above script installs the Microsoft Web Platform Installer (WebPI), which is used to download, install, and update components of the Microsoft Web Platform, including Internet Information Services (IIS), IIS Media Platform technologies, SQL Server Express, .NET Framework, and Visual Web Developer.
Task Name - InstallNetFeatures
Script -
# Enable Repair via Windows Update
$servicing = "HKLM:\SOFTWARE\Microsoft\Windows\CurrentVersion\policies\Servicing"
New-Item -Path $servicing -Force
Set-ItemProperty -Path $servicing -Name RepairContentServerSource -Value 2

# Install Features
Install-WindowsFeature -Name NET-Framework-Core
Install-WindowsFeature -Name NET-WCF-Services45 -IncludeAllSubFeature
The above script installs .NET Framework 4.5 on the VM.
Task Name - InstallBugNetApp
Script -
# Create the installation configuration file
$configFile = "AppPath[@]Default Web Site/bugnet
DbServer[@]@@{MSSQL.address}@@
DbName[@]@@{DbName}@@
DbUsername[@]@@{DbUsername}@@
Database Password[@]@@{DbPassword}@@
DbAdminUsername[@]sa
DbAdminPassword[@]@@{SQL_CRED.secret}@@"

echo $configFile >> BugNET0.app

# Install the application via Web PI
WebpiCmd-x64.exe /Install /UseRemoteDatabase /Application:BugNET@BugNET0.app /AcceptEula
The above script uses the Application Profile variables you defined at the beginning of the exercise to populate the configuration file of the Bug Tracker app. It then leverages WebPI to install the application from the Microsoft Web App Gallery. With minimal changes, you could leverage many popular applications from the Gallery, including apps for CMS, eCommerce, Wiki, ticketing, and more.
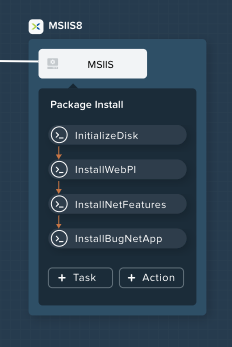
Once complete, your MSIIS service should look like this:
Click Save.
Make sure that there is NO Orange exclamation mark at the top of the Calm screen. If so, make sure you have them all resolved before launching the blueprint!!!

Launching the Blueprint
From the upper toolbar in the Blueprint Editor, click Launch.
Specify a unique Application Name (e.g. Initials-BugNET) and your User_initials Runtime variable value for VM naming.
Click Create.
The Audit tab can be used to monitor the deployment of the application. The application should take approximately 20 minutes to deploy.
Once the Create action completes, and the application is in a Running state, open the BugNET link in a new tab.
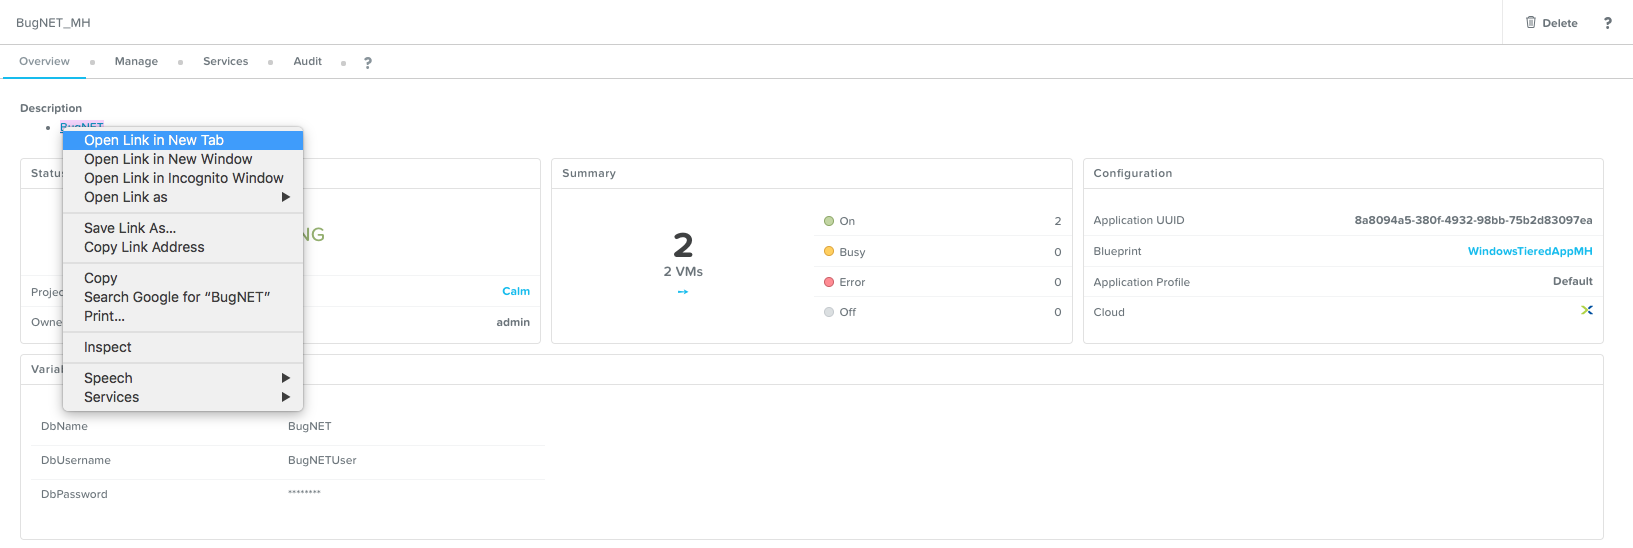
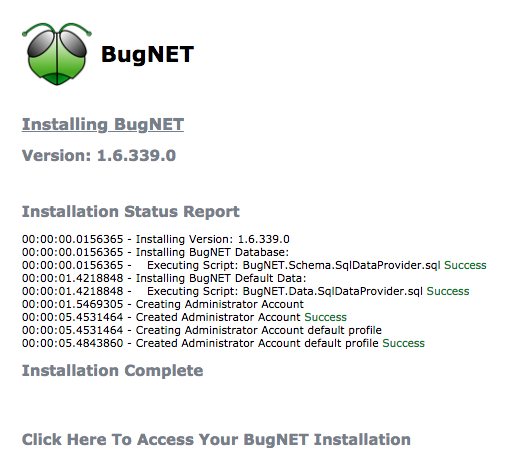
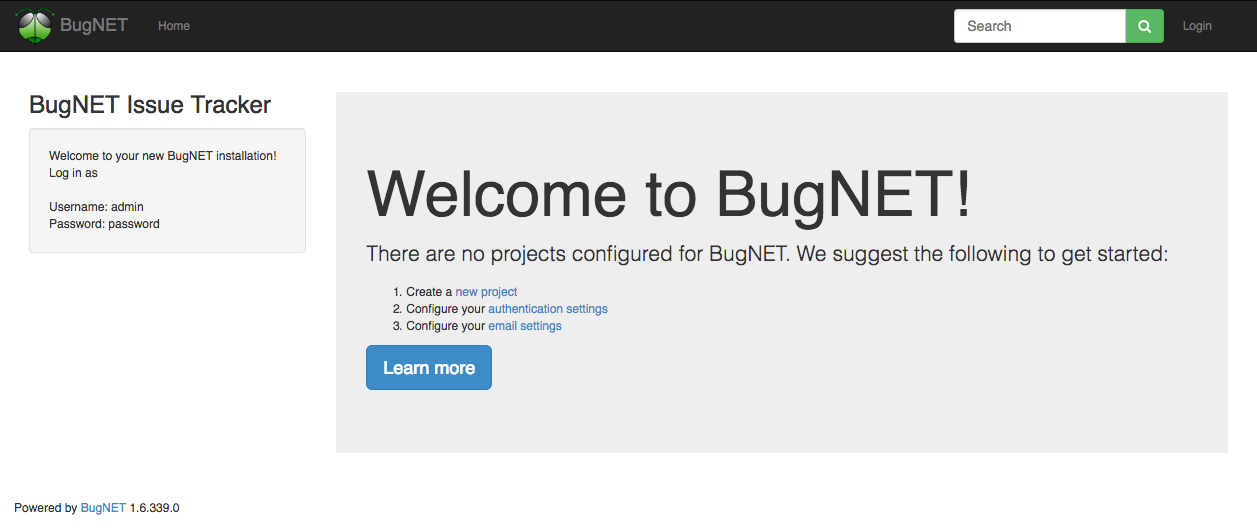
You’ll be presented with an Installation Status Report page. Wait for it to report Installation Complete, and then click the link at the bottom to access the application.
Congratulations! You now have a fully functional bug tracking application automatically provisioned leveraging Microsoft SQL Server and IIS.
(Optional) Scale Out IIS Tier
Leveraging the same approach from the Calm: Linux Workloads lab of having multiple web server replicas, can you add a CentOS based HAProxy service to this blueprint to allow for load balancing across multiple IIS servers?
Takeaways
Calm provides the same application deployment and lifecycle management benefits for Windows workloads as it does for Linux workloads.
Calm can natively execute remote PowerShell scripts on Windows endpoints without the need for a Windows-based proxy.