Clone Postgres DB
Overview
Note
Estimated time to complete: 30 MINUTES
This lab will show you how to clone, and refresh a Database.
Cloning Your PostgreSQL Source
Now that you have created a source database, you can easily clone it using Era Time Machine. Database clones are helpful for development and testing purposes, allowing non-production environments to utilize product data without impacting production operations. Era clones utilize Nutanix-native copy-on-write cloning technology, allowing for zero-byte database clones. This space efficiency can significantly lower storage costs for environments supporting large numbers of database clones.
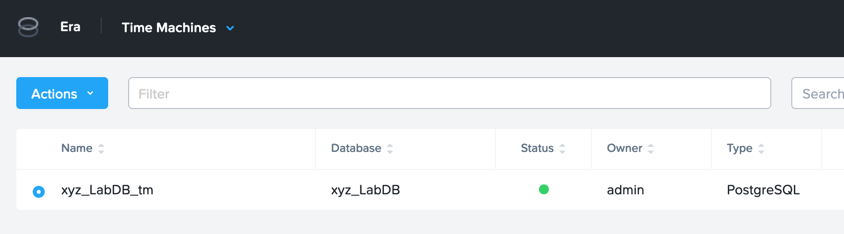
In Era, select Time Machines, select the Time Machine instance for your source database (Initials_LabDB_tm).
Click Actions > Snapshot and enter First as the Snapshot Name.

Click Create.
Select Operations from the dropdown menu to monitor the provisioning. This process should take approximately 5 minutes.
After the snapshot job completes, select the Time Machine instance for your source database (Initials_LabDB_tm) in Era > Time Machines and click Actions > Clone Database.
On the Time tab, select Snapshot > First.
Note
Without creating manual snapshots, Era also offers the ability to clone a database based on Point in Time increments including Continuous (Every Second), Daily, Weekly, Monthly, or Quarterly. Availability is controlled by the SLA of the source.
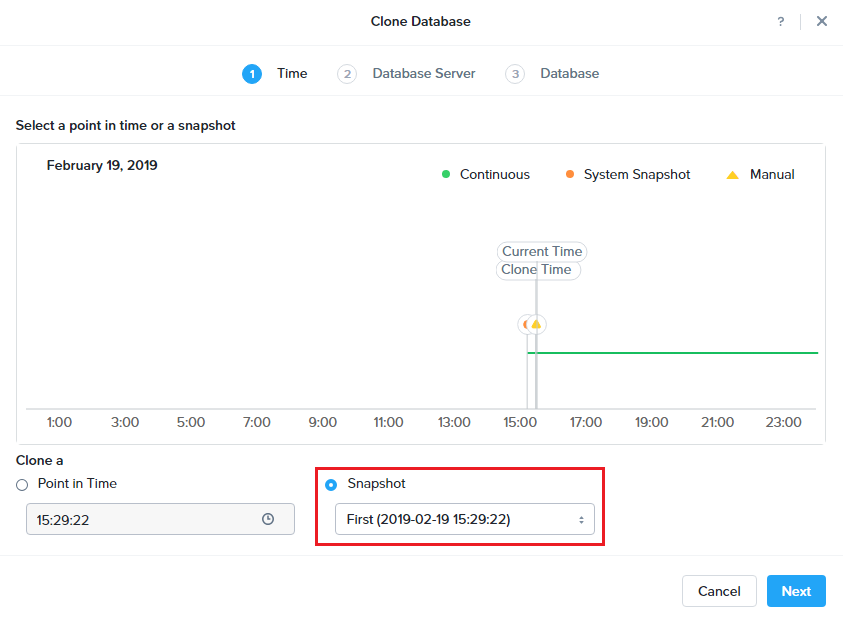
Click Next.
On the Database Server tab, fill out the following fields:
Database Server - Create New Server
Database Server Name - Initials-PostgresSQL_Clone
Compute Profile - Initials-Lab
Network Profile - Primary-PGSQL-NETWORK
SSH Public Key -
ssh-rsa AAAAB3NzaC1yc2EAAAADAQABAAABAQCoQRdEfm8ZJNGlYLQ2iw08eVk/Wyj0zl3M5KyqKmBTpUaS1uxj0K05HMHaUNP+AeJ63Qa2hI1RJHBJOnV7Dx28/yN7ymQpvO1jWejv/AT/yasC9ayiIT1rCrpHvEDXH9ee0NZ3Dtv91R+8kDEQaUfJLYa5X97+jPMVFC7fWK5PqZRzx+N0bh1izSf8PW0snk3t13DYovHFtlTpzVaYRec/XfgHF9j0032vQDK3svfQqCVzT02NXeEyksLbRfGJwl3UsA1ujQdPgalil0RyyWzCMIabVofz+Czq4zFDFjX+ZPQKZr94/h/6RMBRyWFY5CsUVvw8f+Rq6kW+VTYMvvkv
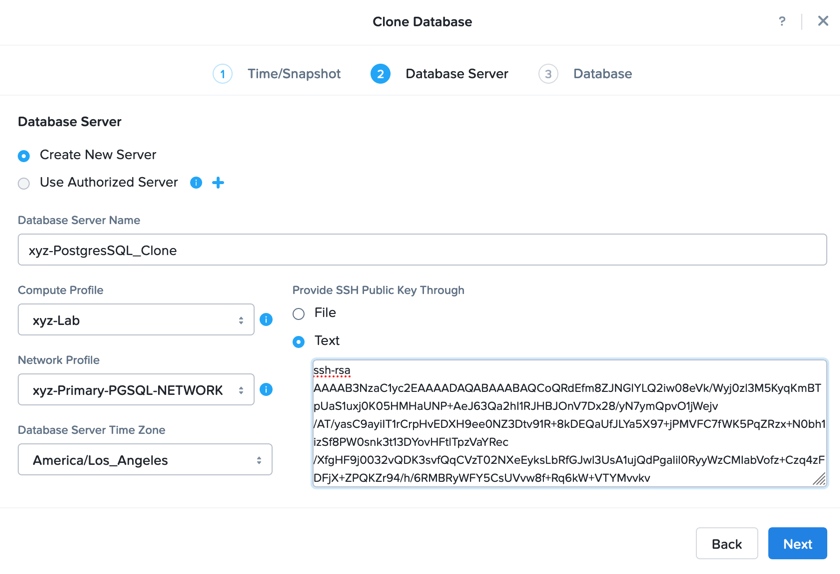
Click Next.
On the Database Server tab, fill out the following fields:
Name - Initials_LabDB_Clone
Description - (Optional) Description
Password - nutanix/4u
Database Parameter Profile - DEFAULT_POSTGRES_PARAMS
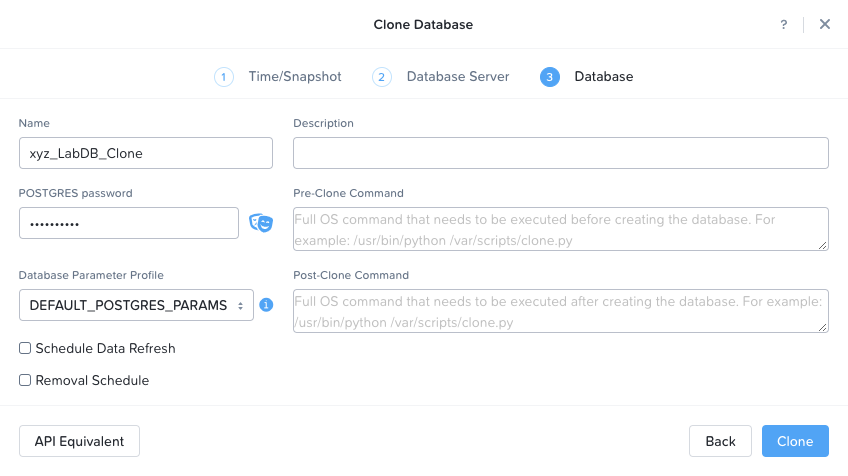
Click Clone.
Select Operations from the dropdown menu to monitor the provisioning. This process should take approximately 5-10 minutes.
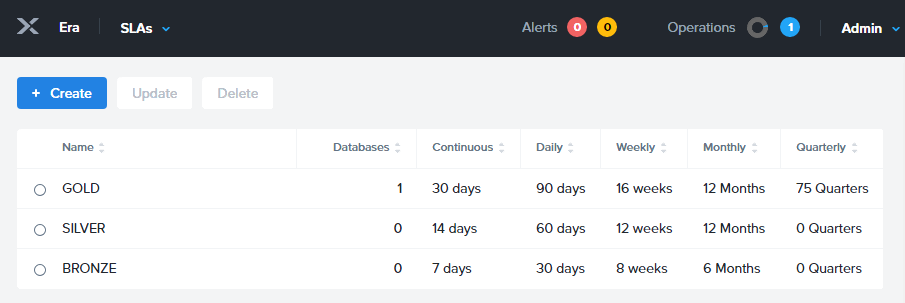
While waiting for the clone to complete, explore Era > SLAs to understand the differences between standard SLAs offered by Era, or create your own custom SLA.
Following the completion of the clone operation, you can connect to the clone instance as described in the previous section, `Connecting to the Database`_.
The newly provisioned clone is now ready to be used.
Refreshing A Cloned Database
The ability to easily refresh a cloned database using new data from the source database improves development, test, and other use cases by ensuring they have access to new and relevant data. In this section you will add a new table for storing data to your source database, and refresh the existing clone.
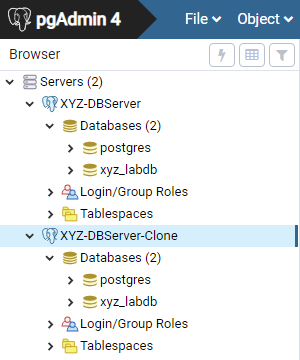
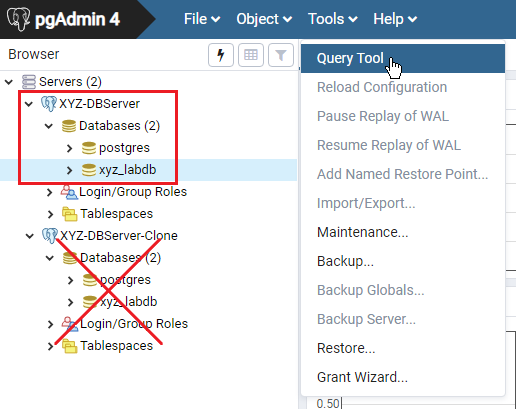
In pgAdmin, select your source database (NOT the cloned database), and from the menu bar click Tools > Query Tool (Maximizing the PGAdmin may be helpful to see the Tools Menu).
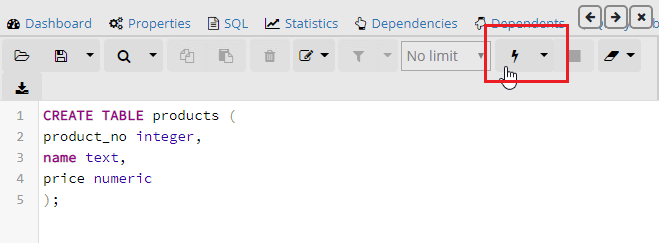
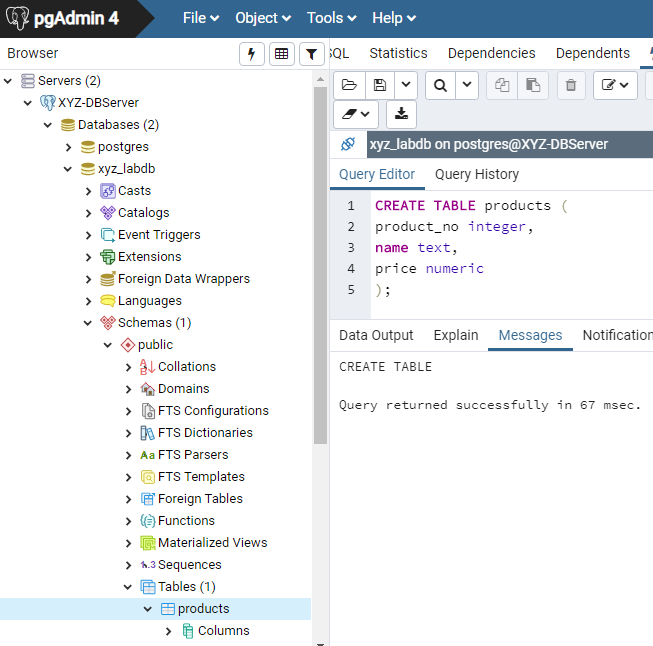
From the Query Tool, type the following SQL command into the editor:
CREATE TABLE products (
product_no integer,
name text,
price numeric
);
Click Execute/Refresh.
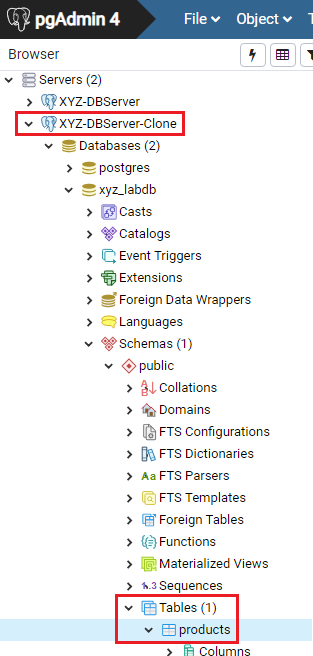
Verify the creation of the table under Schemas > Public > Tables > products.
Note
You may need to refresh Tables for the newly created table to appear.
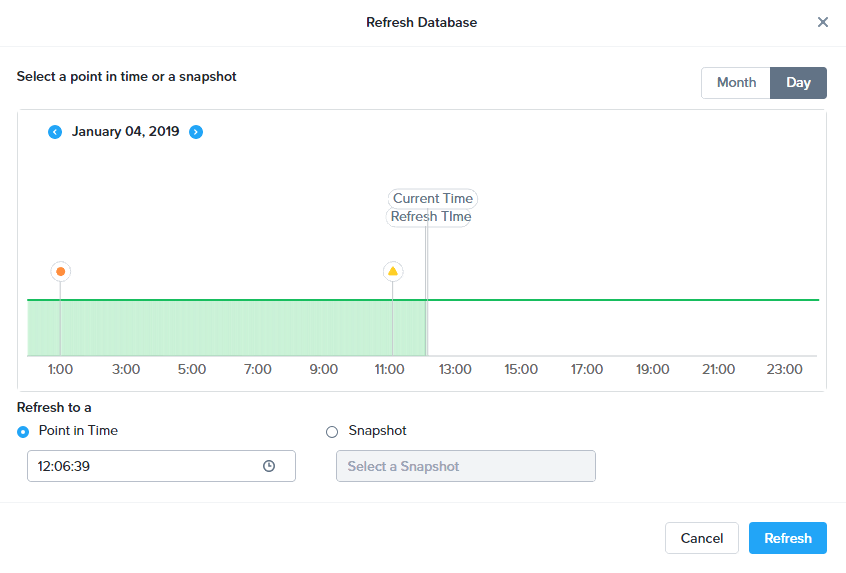
Previously you created a manual snapshot on which to base your cloned database, for the refresh you will leverage the Point in Time capability of Era.
The default schedule for Log Catch Up, configured when provisioning the source database, is every 30 minutes. Based on this schedule, you should expect to be able to refresh the database based on updates older than 30 minutes with no further action required.
In this case, you just created the products table in your source database, so a manual execution of Log Catch Up would be required to copy transactional logs to Era from your source database.
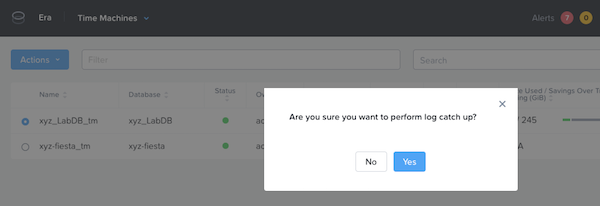
In Era, select Time Machines, select the Time Machine instance for your source database and click Actions > Log Catch Up > Yes.
Select Operations from the dropdown menu to monitor the provisioning. This process should take approximately 5-10 minutes.
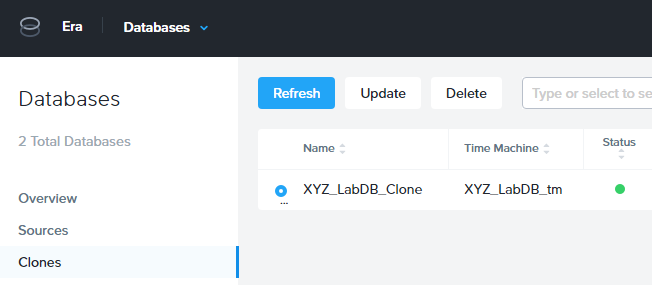
Once the Log Catchup job completes, select Databases > Clones, select the clone of your source database and click Refresh.
Refreshing to the latest available Point in Time is selected by default. Click Refresh.
Select Operations from the dropdown menu to monitor the provisioning. This process should take approximately 5-10 minutes.
Once the Refresh Clone job is complete, refresh the Tables view of your clone database in pgAdmin and confirm the products table is now present.
In just a couple of clicks and minutes you were able to update your cloned database using the latest available production data. This same approach could be leveraged to recover absent data from a database by provisioning a clone based on a previous snapshot or point in time.
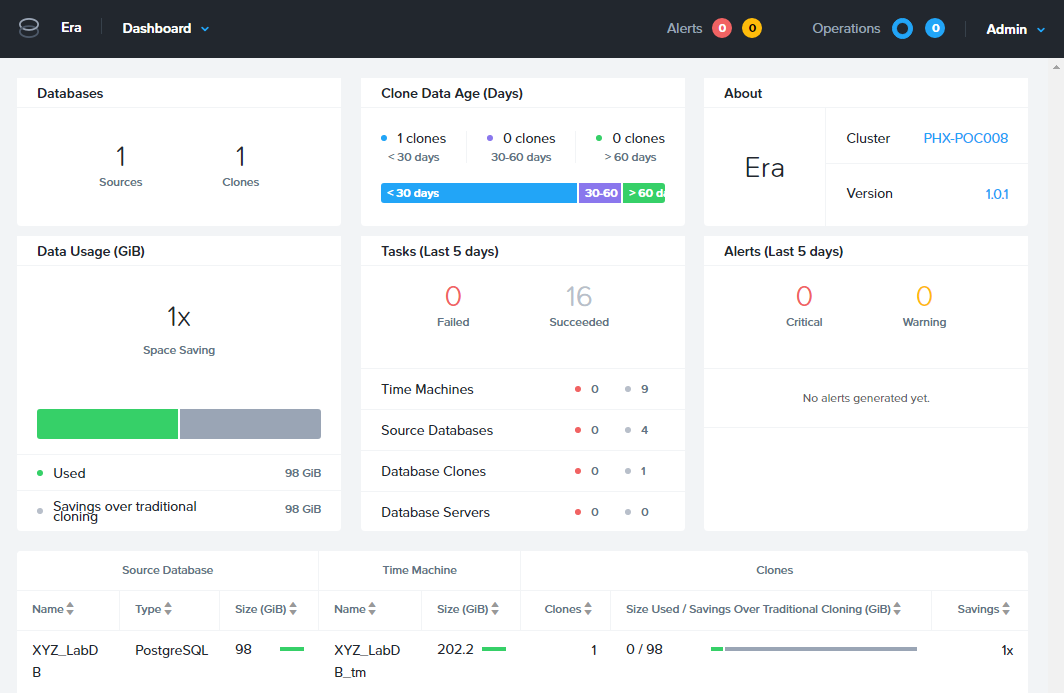
Return to the Dashboard and review the critical information Era provides to administrators, including storage savings, clone aging, tasks, and alerts.
Takeaways
Era supports One Click operations for registering, provisioning, cloning and refreshing supported databases.
Era enables the same type of simplicity and operating efficiency that you would expect from a public cloud while allowing DBAs to maintain control.
Era automates complex database operations – slashing both DBA time and the cost of managing databases with traditional technologies and saving immensely on enterprise OpEx.
Era enables database admins to standardize their database deployments across database engines and automatically incorporate database best practices.
Era enable DBAs to clone their environments to the latest application-consistent transaction.