Delivering Non-Persistent Desktops
Unlike persistent desktops, non-persistent desktops do not persist changes across VM reboots. Implementations of non-persistent desktops can vary based on the provisioning technology used, but in general, after a user session ends, the VM reverts back to a pristine state. Non-persistent desktops can simplify management operations as changes to the master image can be quickly rolled out (and rolled back) in a consistent fashion to large numbers of VMs. Non-persistent desktops can also eliminate the negative software and performance creep that can occur over time on traditional desktops or persistent virtual desktops.
Due to the stateless nature of non-persistent desktops, this approach may not be viable for every use case. For use cases such as kiosks, which require no customization, non-persistent desktops are an ideal fit. For use cases where persisting end user customizations such as application settings are important, profile management solutions would need to be evaluated and employed. Similarly, the need to persist end user data would require additional network based storage. The need to maintain many master images due to varying requirements and application stacks across an organization can also present a challenge for non-persistent desktops at scale. In these cases, application virtualization, application layering, and/or server based application technologies may be applied to consolidate master image sprawl.
In this exercise you will use the same gold image to deploy a pool of non-persistent virtual desktops with Citrix on AHV.
Creating the Machine Catalog
In Citrix Studio, right-click Machine Catalogs > Create Machine Catalog.
Click Next.
Review the available Operating System types. Select Single-Session OS and click Next.
Select Machines that are power managed and Citrix Machine Creation Services (MCS). Under Resources select the pool of resources that includes the Secondary network, configured in the previous exercise.
Click Next.
Select I want users to connect to a new (random) desktop each time they log on and click Next.

Select the Default Nutanix storage container and click Next.
Select your Initials Post VDA Install snapshot and click Next.
Note
Note the XDSNAP* snapshot listed from the Preparation VM created by the persistent Machine Catalog previously. These snapshots will continue to exist as long as there are provisioned virtual desktops utilizing them.
Fill out the following fields and click Next:
How many virtual machines do you want to create - 2
Total memory (MB) on each machine - 4096
Virtual CPUs - 2
Cores per vCPU - 2
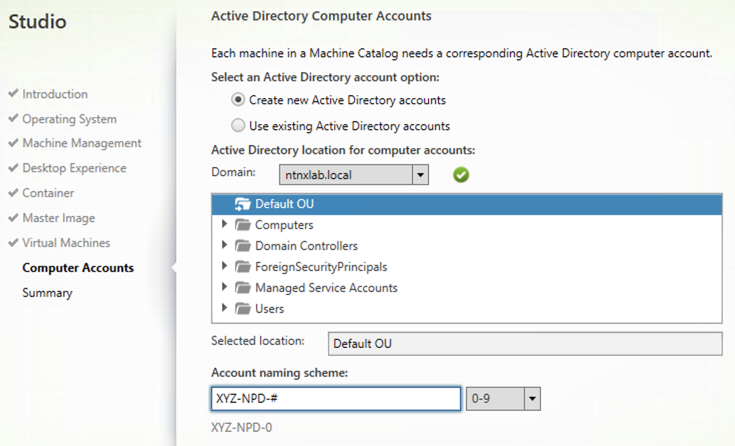
Fill out the following fields and click Next:
Select Create new Active Directory accounts
Select Default OU OU
Account naming scheme - Initials-NPD-#
Specify a friendly, descriptive Machine Catalog name that includes your Initials (e.g. XYZ Windows 10 Non-Persistent 4vCPU 4GB) and click Finish.
MCS will now create a clone from the snapshot of Initials-GoldImage VM and follow a similar preparation process as the in the previous exercise.
Upon completion, view the details of the Machine Catalog in Citrix Studio.
Note the clones exist in Prism but are not powered on. Select one of the VMs and observe both the OS vDisk and ID disk attached to the VM on the Virtual Disks tab below the VMs table in Prism Element. Similar to the persistent Machine Catalog, each VM appears to have its own unique read/write copy of the gold image. With VMs in a Machine Catalog spanning several Nutanix nodes, data locality for VM reads is provided inherently by the Unified Cache.
This MCS implementation is unique to AHV. For non-persistent Machine Catalogs, other hypervisors link to the base golden image for reads and apply writes to a separate disk, referred to as a differencing disk. In these scenarios, Nutanix Shadow Clones are used to provide data locality for VM reads. Shadow Clones is a feature that automatically provides distributed caching for multi-reader vDisks.
Note
To learn about MCS provisioning in greater detail, see the following articles:
To learn more about how Nutanix implements Shadow Clones, see the Shadow Clones section of the Nutanix Bible.
Creating the Delivery Group
Right-click Delivery Groups > Create Delivery Group.
Click Next.
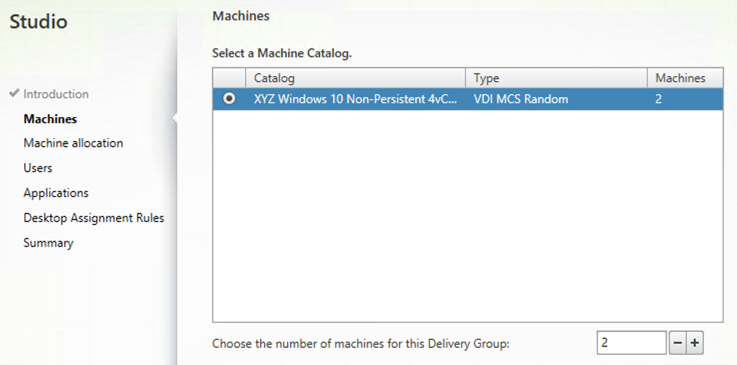
On the Machines page, select your Non-Persistent Machine Catalog and specify the maximum number of VMs available for the Delivery Group.
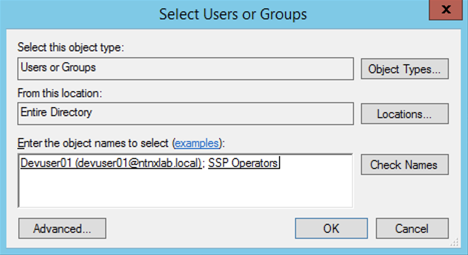
On the Users page, select Restrict use of this Delivery Group to the following users and click Add.
Specify SSP Operators and devuser01 in the Object names field and click OK.
On the Applications page, click Next.
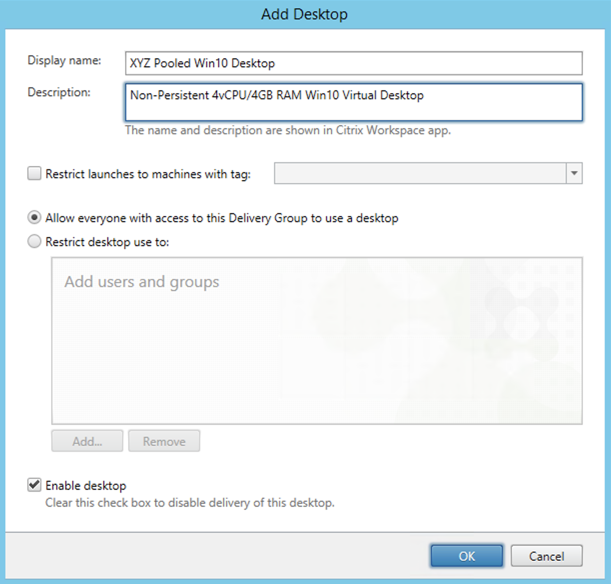
On the Desktops page, click Add and fill out the following fields:
Display name - Initials Pooled Win10 Desktop
Description - Non-Persistent 4vCPU/4GB RAM Win10 Virtual Desktop
Select Allow everyone with access to this Delivery Group
Select Enable desktop assignment rule
Note
Exposition about restricting desktop access to only certain users versus apps
Click OK > Next.
Specify a friendly name (e.g. Initials Win10 Non-Persistent Delivery Group) for the Delivery Group and click Finish.
Following creation of the pool, observe in Prism that 1 of the Initials-NP-# VMs been has powered on.
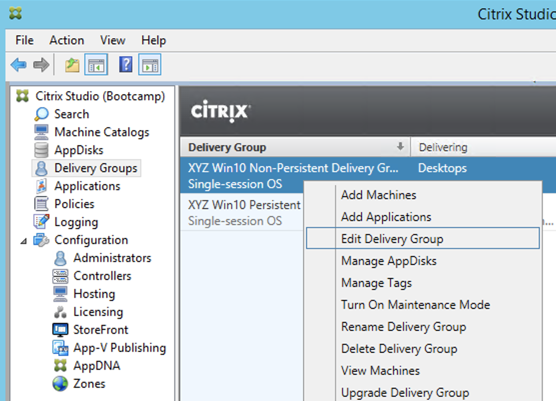
In Citrix Studio, right-click your Delivery Group and click Edit Delivery Group.
Select Power Management from the sidebar.
Click and drag the number of machines powered on during peak hours from 1 to 2. The peak hours period can optionally be modified by clicking and dragging to either the left or the right.
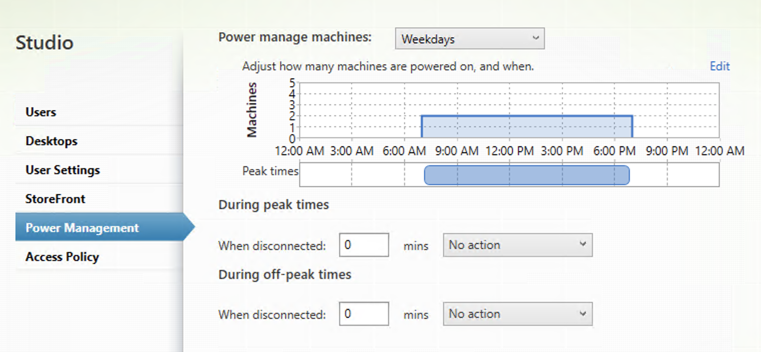
Note
For more granular control of registered, powered on VMs you can click the Edit link and provide the number or percentage of VMs you want available for every hour of the day. You can also configure the disconnected VM policy to free up disconnected VMs after a configurable time out period, returning the desktop to the pool for another user.
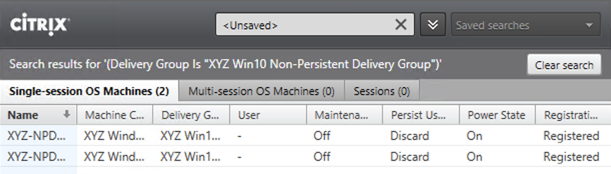
After increasing the number of powered on virtual machines, validate the W10NP-## VMs are powered on in Prism and appear as Registered in Citrix Studio.
Connecting to the Desktop
From your InitialsToolsVM, open http://ddc.ntnxlab.local/Citrix/NTNXLABWeb in a browser to access the Citrix StoreFront server.
Specify the following credentials and click Log On:
Username - NTNXLAB\devuser01
Password - nutanix/4u
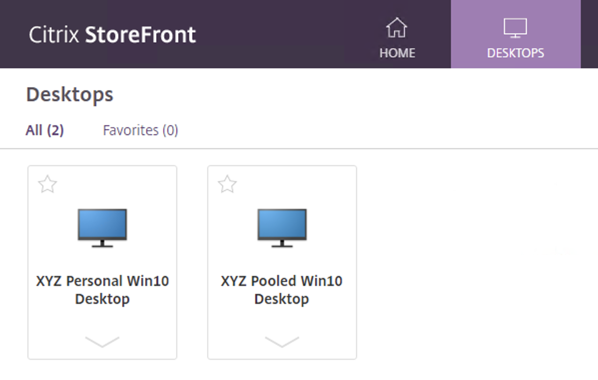
Select the Desktops tab and observe both desktop images are available. Click the Pooled desktop to launch the session.
After the virtual desktop has completed logging in, experiment by changing application settings, installing an application, restarting the VM, and logging in again. Try logging in as operator01, any differences?
Note
Your user is not part of the Local Administrators group, so you may be unable to install certain applications. If you encounter an error trying to install an application, hold the Shift key, right-click the installer, and select Run as different user. Use your NTNXLAB\Administrator credentials to complete the installation.
Takeaways
With MCS, a single gold image can be used for both persistent and non-persistent Machine Catalogs.
Non-persistent virtual desktops provide a consistent experience as the user is getting a “fresh” VM upon every login. This approach can provide significant operation savings over traditional software patching, but will likely require other tools to provide needed customization on top of the non-persistent desktop. Use cases such as kiosks or educational labs can be a great fit for “vanilla” non-persistent desktops.
Despite being based off of a single, shared, gold image, all the VMs in the Machine Catalog continue to benefit from data locality (reduced latency for reads and reduced network congestion). For non-AHV hypervisors, the same benefit is realized through Shadow Clones.