Delivering Persistent Desktops
Similar to a traditional desktops, persistent virtual desktops persist changes to the VM across reboots. Persistent desktops offer the greatest flexibility to the user, including the ability to install their own applications and customize OS and application settings without dependence on a remote profile. However, once the VM has been provisioned it will require patching/updating through traditional means such as SCCM, WSUS, or other 3rd party patch management tools, limiting the operational benefit of implementing VDI.
Rather than creating full byte-copy clones of a master image, Citrix can efficiently provision persistent desktops from a shared master image with Machine Creation Services (MCS). MCS is a VM creation/orchestration framework installed as part of the Desktop Delivery Controller role and managed through Citrix Studio.
In this lab you will deploy and test a pool of persistent virtual desktops with Citrix on AHV.
Configuring AHV Resources
For the purposes of this exercise, a XenDesktop Delivery Controller (DDC) has been installed as a shared resource on your assigned cluster. The DDC acts as the connection broker for XenDesktop and is deployed on a Windows Server. Additionally this VM includes services for Citrix web front end (StoreFront), and Citrix Licensing - both are components that would typically run on dedicated infrastructure in a production environment.
A single XenDesktop site can contain multiple Delivery Controllers and StoreFronts for the purposes of redundancy and scaling out to support increasingly large environments.
Connect to your Initials-WinToolsVM VM via the VM console or RDP (RDP recommended):
User Name - NTNXLAB\Administrator
Password - nutanix/4u
From the Start menu, open Citrix Studio.
Citrix Studio is a MMC snap-in used for managing a XenDesktop site, including Delivery Controller, StoreFront, and Licensing. It is installed by default on the DDC, but can be run as a client on any machine on the network.
Specify ddc.ntnxlab.local as your XenDesktop Controller and click Connect.

Select Citrix Studio > Configuration > Hosting and click on the NutanixAcropolis connection. In the Details pane note it has been configured to connect to the Prism Element virtual IP of your assigned cluster.

Note
By default, XenDesktop has support for provisioning virtual machines to a number of platforms, including: VMware vSphere, Microsoft Hyper-V, Citrix XenServer, Microsoft Azure, and AWS. The Citrix Provisioning SDK provides the ability to integrate additional platforms with the Delivery Controller’s provisioning and power management functions, creating a native Citrix management experience on top of Nutanix AHV.
To enable this integration, the Nutanix AHV Plugin for Citrix has been pre-installed on the DDC. In a production environment, the plugin must be installed on each DDC. The plugin is available for download on the Nutanix Portal.
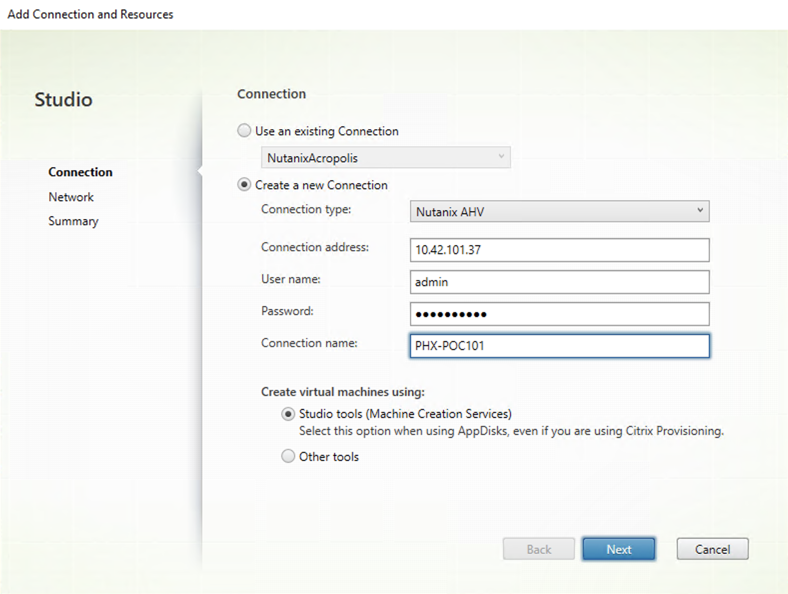
Select NutanixResources and note that only the Primary network has been made available for desktop provisioning. Click Hosting on the leftside menu, then under the Actions menu, click Add Connection and Resources.
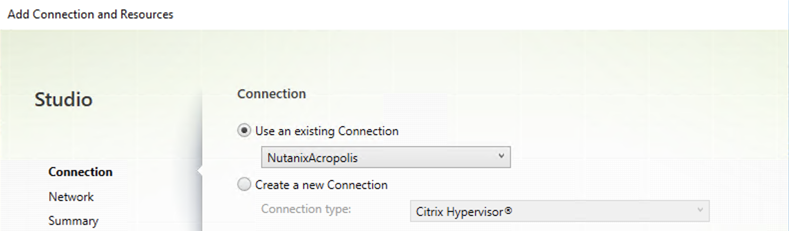
Select Use an existing Connection: NutanixAcropolis and click Next to add resources to the connection.
Fill out the following fields and click Next > Finish:
Name for these resources - Initials-Resources
Select Secondary Network

Creating the Machine Catalog
Machine Catalogs are collections of either physical or virtual machines. When using MCS or PVS to provision a Machine Catalog from a gold image, all machines provisioned from that image will share the same VM configuration (vCPUs, Memory, Network) and be part of the same domain. A single gold image can be used for multiple Machine Catalogs to provide different size VMs, VMs across multiple domains, etc.
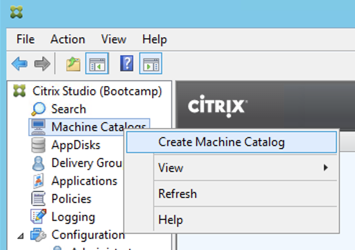
In Citrix Studio, right-click Machine Catalogs > Create Machine Catalog.
Click Next.
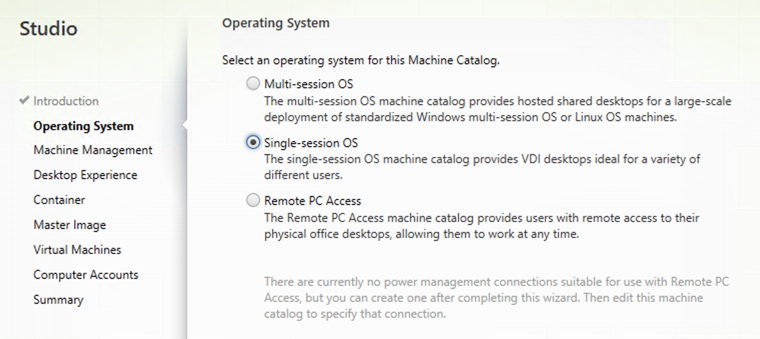
Review the available Operating System types. Select Single-Session OS and click Next.
Select Machines that are power managed and Citrix Machine Creation Services (MCS). Under Resources select the pool of resources that includes your user VLAN, configured in the previous exercise.
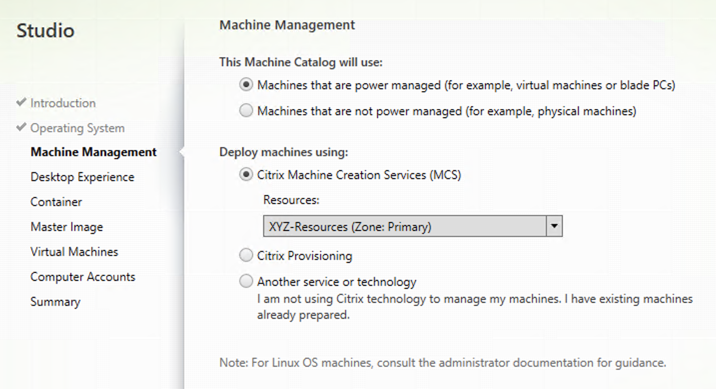
Click Next.
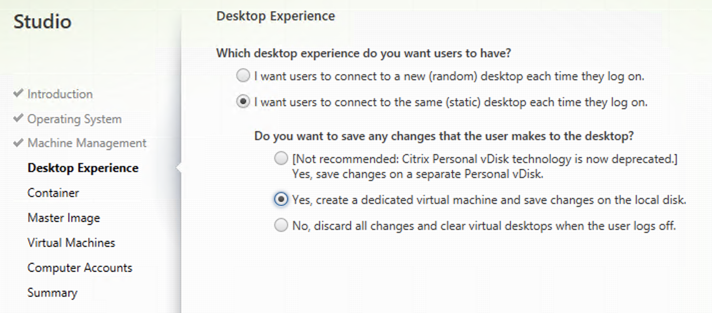
Select Static and Yes, create a dedicated virtual machine. Click Next.
Select the Default Nutanix storage container and click Next.
Note
Compression (Inline or Post-process) is recommended for all storage containers running virtual desktops. Deduplication is recommended only for storage containers running full byte-copy cloned VMs.
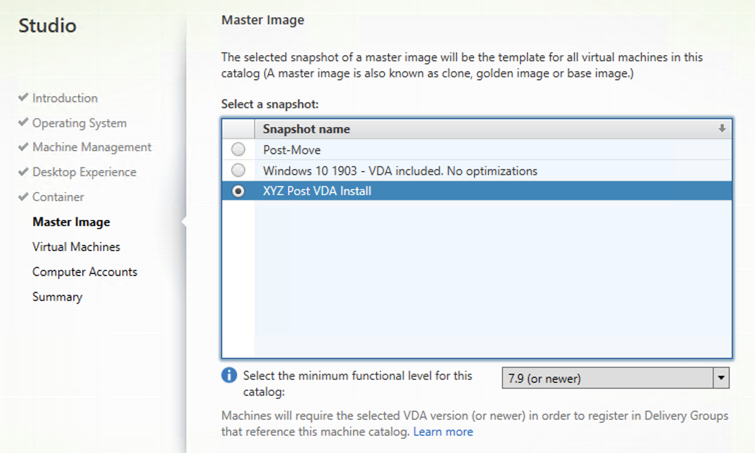
Select your Initials Post VDA Install snapshot and click Next.
Fill out the following fields and click Next:
How many virtual machines do you want to create - 2
Total memory (MB) on each machine - 4096
Virtual CPUs - 2
Cores per vCPU - 2
Fill out the following fields and click Next:
Select Create new Active Directory accounts
Select Default OU OU
Account naming scheme - Initials-PD-#
As part of Machine Catalog creation, the Delivery Controller will create all of the machine accounts in AD. This is necessary as the cloned VMs themselves do not go through a traditional Sysprep and domain join. Instead, the Citrix Machine Identity Service (installed as part of the VDA), manages the VM’s “uniqueness,” providing a more rapid means of provisioning large pools of desktop resources.
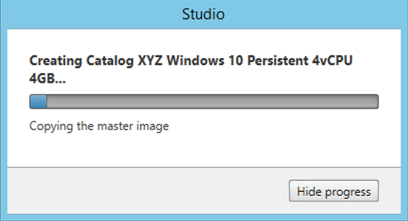
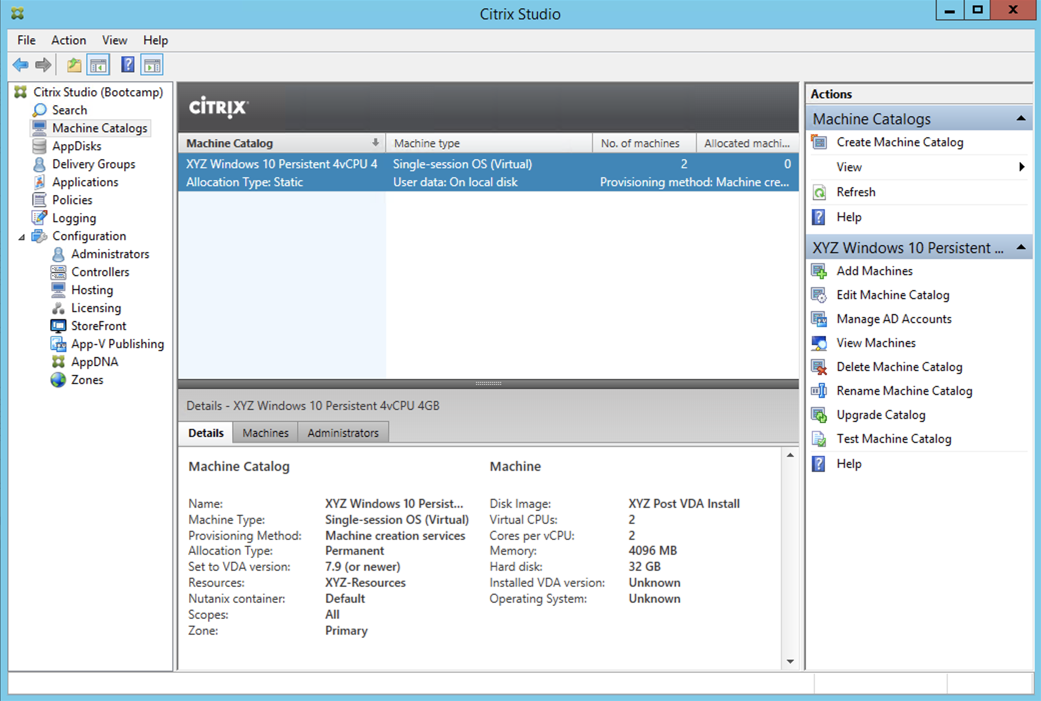
Specify a friendly, descriptive Machine Catalog name that includes your Initials (e.g. XYZ Windows 10 Persistent 4vCPU 4GB) and click Finish.
MCS will now create a clone from the snapshot of Initials-GoldImage. When using MCS, the Delivery Controller copies the gold image to each configured datastore in the Host Connection. In a traditional SAN scenario (or using MCS with local storage) this can be a time consuming event, as the Machine Catalog may be spread over several volumes to achieve the desired performance. In a Nutanix cluster you would typically have a single datastore (Storage Container) servicing all desktops, simplifying the configuration and improving the time to provision a Machine Catalog.
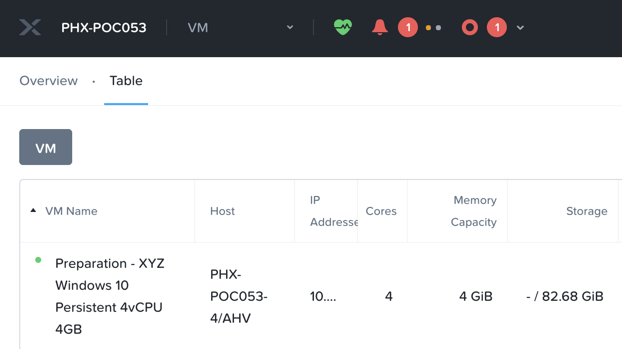
Observe the Preparation clone booting in Prism briefly before shutting down and being removed automatically. Attached to this VM is a separate disk that walks through multiple steps to ensure the VM is ready to be used for the Machine Catalog.
The preparation stage will enable DHCP, perform a Windows licensing “rearm” to ensure it is reported to the Microsoft KMS server as a unique VM, and similarly perform an Office licensing “rearm”. Studio will automatically create a snapshot of the VM in this state once it has completed preparation and shut down.
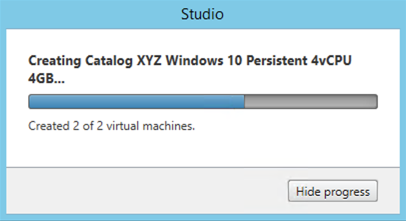
MCS will now create the VMs for our Machine Catalog. This involves the creation of the VMs and the cloned base vDisk, as well as the creation of a small (16MB maximum) vDisks called the Identity (ID) disks. The ID disk contains information unique to each VM that provides its hostname and Active Directory Machine Account Password. This information is ingested automatically by the Citrix Machine Identity Service and allows the VM to appear as unique and allowing it to join the domain.
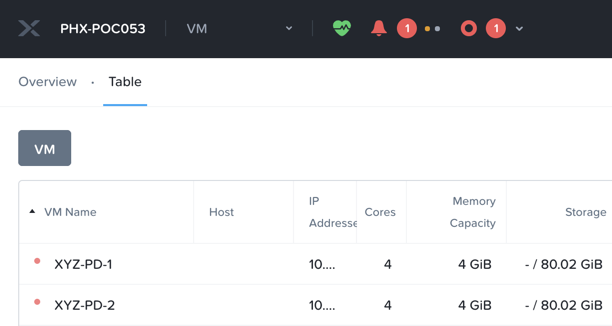
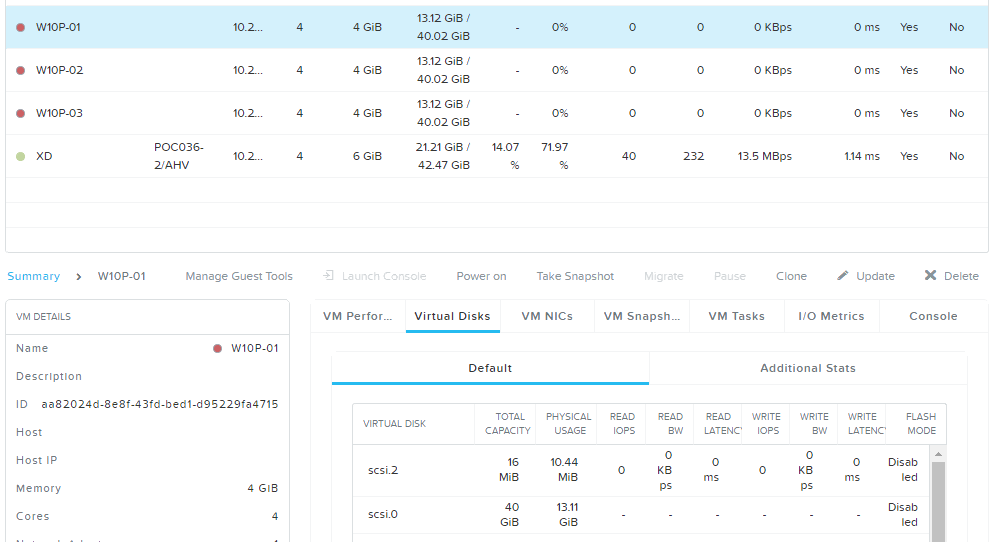
Observe the clones exist in Prism but are not powered on. Select one of the VMs and observe both the OS vDisk and ID disk attached to the VM on the Virtual Disks tab below the VMs table in Prism Element. Each VM appears to have its own unique read/write copy of the gold image. With VMs in a Machine Catalog spanning several Nutanix nodes, data locality for VM reads is provided inherently by the Unified Cache.
Note
To learn more about how the Nutanix Unified Cache operates, see the I/O Path and Cache section of the Nutanix Bible.
Upon completion, view the details of the Machine Catalog in Citrix Studio.
Creating the Delivery Group
Delivery Groups are collections of machines from one or more Machine Catalogs. The purpose of a Delivery Group is to specify what users or groups can access the machines. For persistent desktops a permanent relationship is created between the machine and the user account. This assignment can occur either manually during creation of the Delivery Group or be assigned automatically during a user’s first logon.
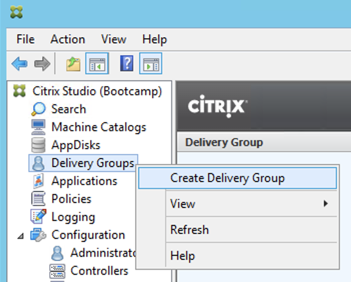
In Citrix Studio, right-click Delivery Groups > Create Delivery Group.
Click Next.
Select your Persistent Machine Catalog and specify the maximum number of VMs available for the Delivery Group.

Under Delivery Type, select Desktops and click Next.
Note
While Citrix is well known for delivering applications running on shared, server operating systems, desktop operating systems can also be used to deliver seamless applications without delivering the full desktop experience. This approach is typically used when there are licensing issues preventing an application from being delivered via a server OS, or to create better performance isolation for an application by running it in a VM where only a single user can access that resource at one time.
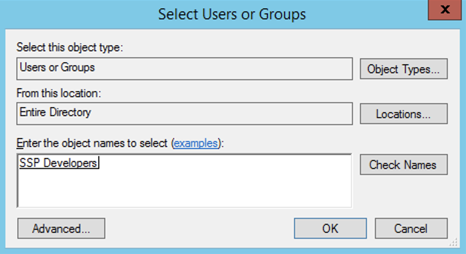
Select Restrict use of this Delivery Group to the following users and click Add.
Specify SSP Developers in the Object names field and click OK.
Click Next.
Click Add and fill out the following fields:
Display name - Initials Personal Win10 Desktop
Description - Persistent 4vCPU/4GB RAM Windows 10 Virtual Desktop
Select Allow everyone with access to this Delivery Group
Maximum desktops per user - 1
Select Enable desktop assignment rule
Click OK > Next.
Specify a friendly name (e.g. Initials Win10 Persistent Delivery Group) for the Delivery Group and click Finish.
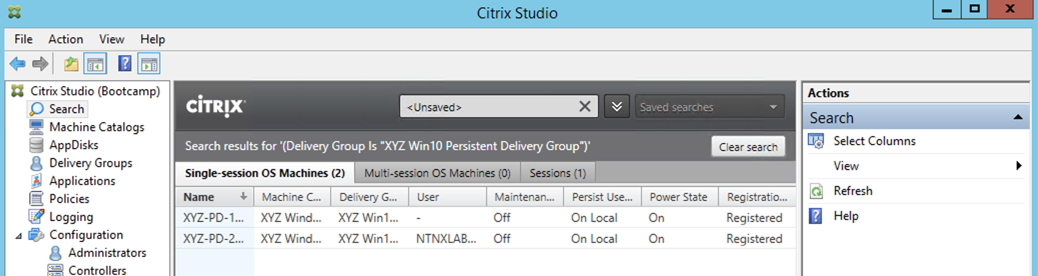
Following creation of the pool, observe in Prism that 1 of the Initials-PD-# VMs been has powered on.
In Citrix Studio, right-click your Delivery Group and click View Machines. Alternatively you can double-click on the name of the Delivery Group.
Observe the powered on desktop soon appears as Registered with the Delivery Controller, indicating the desktop is ready for user connection.
Connecting to the Desktop
From your InitialsToolsVM, open http://ddc.ntnxlab.local/Citrix/NTNXLABWeb in a browser to access the Citrix StoreFront server.
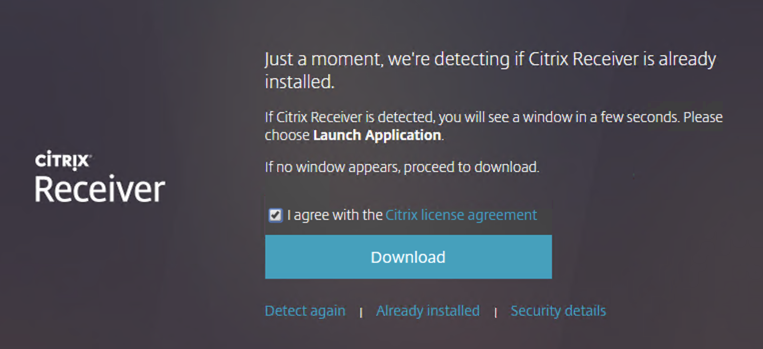
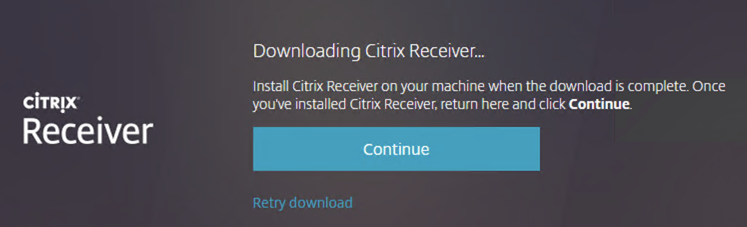
When prompted, click Detect Receiver, accept the license and click Download to download the Citrix Workspace App installer.
Note
The Citrix Workspace application used as a client to access Citrix desktops and applications is formerly known as Citrix Receiver - or depending on how far back you go, known as Dazzle, PNAgent, and others!
Launch and complete the CitrixWorkspaceApp.exe installer. Do NOT enable Single Sign-On when prompted.
After you’ve finished the client installation, return to your browser and click Continue.
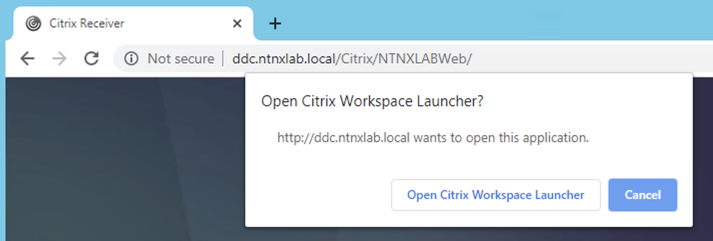
If prompted by Chrome, click Open Citrix Workspace Launcher.
Specify the following credentials and click Log On:
Username - NTNXLAB\devuser01
Password - nutanix/4u
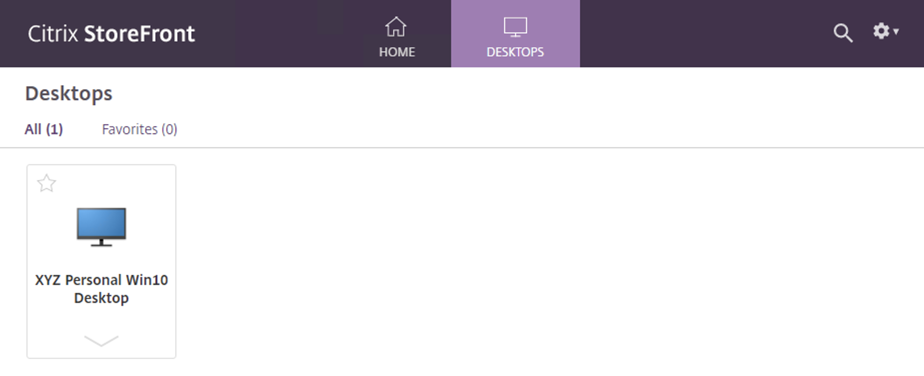
Select the Desktops tab and click your Personal Win10 Desktop to launch the session.
Note
Depending on your browser you may have to click on the downloaded .ica file if Receiver does not open automatically. You may also be able to instruct the browser to always open .ica files.
After the virtual desktop has completed logging in, experiment by changing application settings, installing applications, restarting the VM, and logging in again.
Note
Your user is not part of the Local Administrators group, so you may be unable to install certain applications. If you encounter an error trying to install an application, hold the Shift key, right-click the installer, and select Run as different user. Use your NTNXLAB\Administrator credentials to complete the installation.

In Citrix Studio, observe the changes to VM details. As a user logs in they are statically assigned a desktop and another desktop will power on and register with the Delivery Controller, waiting for the next user.
Takeaways
Citrix is capable of delivering a high-fidelity desktop experience via HTML5. Similarly, the HTML 5 Nutanix Prism interface provides a single UI for managing and monitoring your infrastructure from anywhere.
The ability to support a large environment from a single storage container simplifies configuration and improves deployment speed.
Despite being based off of a single, shared, gold image, all the VMs in the Machine Catalog continue to benefit from data locality (reduced latency for reads and reduced network congestion). For non-AHV hypervisors, the same benefit is realized through Shadow Clones.
Intelligent cloning avoids significant storage overhead for deploying persistent virtual desktops. If mixing persistent and non-persistent desktops within the same cluster, best practice would be to leverage a storage container with deduplication enabled for persistent desktops and a separate storage container with deduplication disabled for non-persistent desktops. Having the flexibility to pair workloads with appropriate storage efficiency technologies can improve density and reduce waste.
Citrix MCS allows for end to end provisioning and entitlement management in a single console.
Persistent virtual desktops provide a traditional desktop-like experience where a user can have full control over their desktop experience. This approach may be necessary for a small subset of users but typically isn’t desirable at scale due to the continued dependence on legacy software patching tools.