Nutanix Calm and Karbon: CI/CD
The estimated time to complete this lab is ?? minutes.
Overview
Countless studies have shown that reducing the amount of time for developers to receive feedback on code changes improves software quality. Automating the build, test, and deployment of software with tools such as Jenkins is one of the best ways to accelerate software development. If you’re unfamiliar with Jenkins you can learn more on their website here.
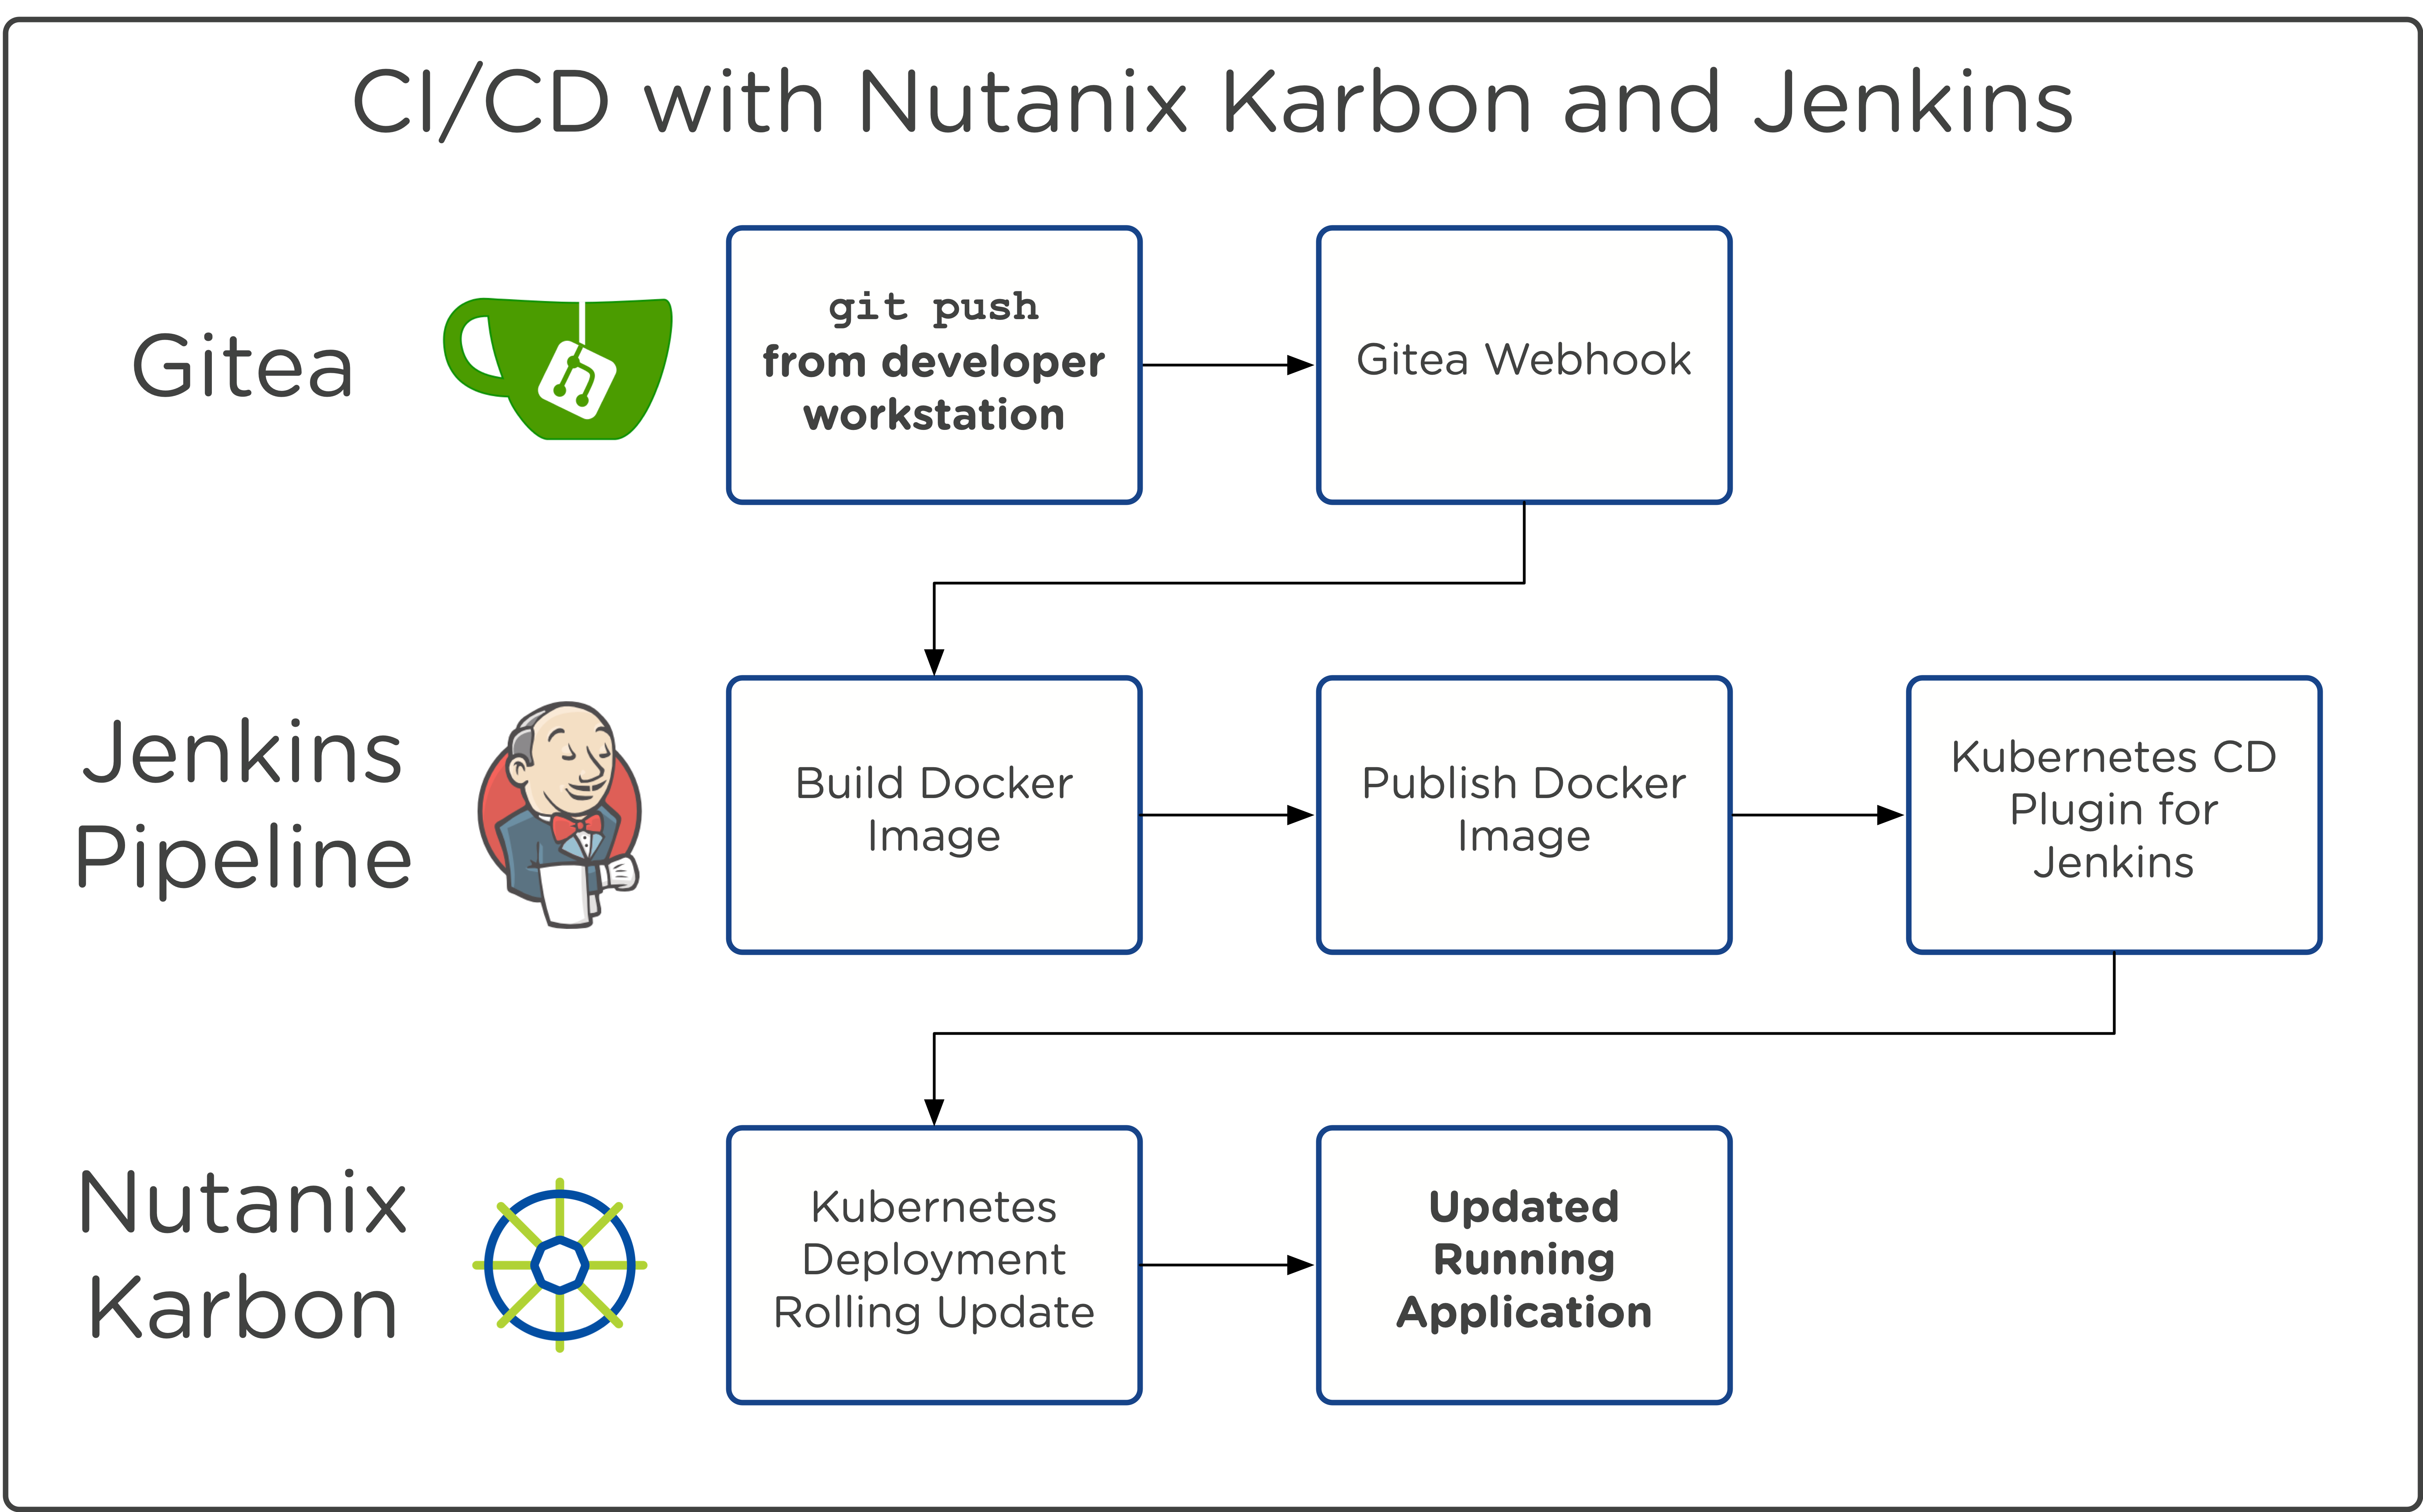
In this lab, we’ll utilize Nutanix Calm to build the infrastructure required to create a Continuous Integration / Continuous Delivery (CI/CD) Pipeline, which includes deploying Jenkins, a Gitea git server, a developer workstation, and configuring that workstation to manage a Karbon Kubernetes cluster. Once the infrastructure is deployed via Nutanix Calm, we’ll go through configuring Jenkins and Gitea to create a fully function CI/CD pipeline. The end result will be a developer running a “git push”, which triggers Jenkins to build a docker container based on the new code, publishes that container to DockerHub, and then deploys that container onto the Nutanix Karbon Kubernetes cluster.
Pre-requisites
This lab requires:
a running Nutanix Karbon Kubernetes cluster. When the Calm blueprint is launched in the next step, a runtime variable will prompt you for the Karbon Kubernetes cluster name. If this bootcamp environment was staged, then use the default value of karbon_bootcamp_cluster. Otherwise, please specify the name of an existing Karbon Kubernetes cluster.
a DockerHub account. If you do not already have one, go ahead and sign up for an account (it’s free).
All other required components are deployed via a Calm blueprint.
Creating our CI/CD Infrastructure with Nutanix Calm
Building a CI/CD pipeline generally involves connecting a large number of disparate tools. To streamline this lab, we’ll be deploying many of these tools via a Nutanix Calm blueprint. We’ll first launch the blueprint, and then in the ~20 minutes it takes to deploy, we’ll cover the blueprint architecture to familiarze ourselves with the tools involved.
In Prism Central, select > Services > Calm.
Select
 Blueprints in the left hand toolbar to view and manage Calm blueprints.
Note
Mousing over an icon will display its title.
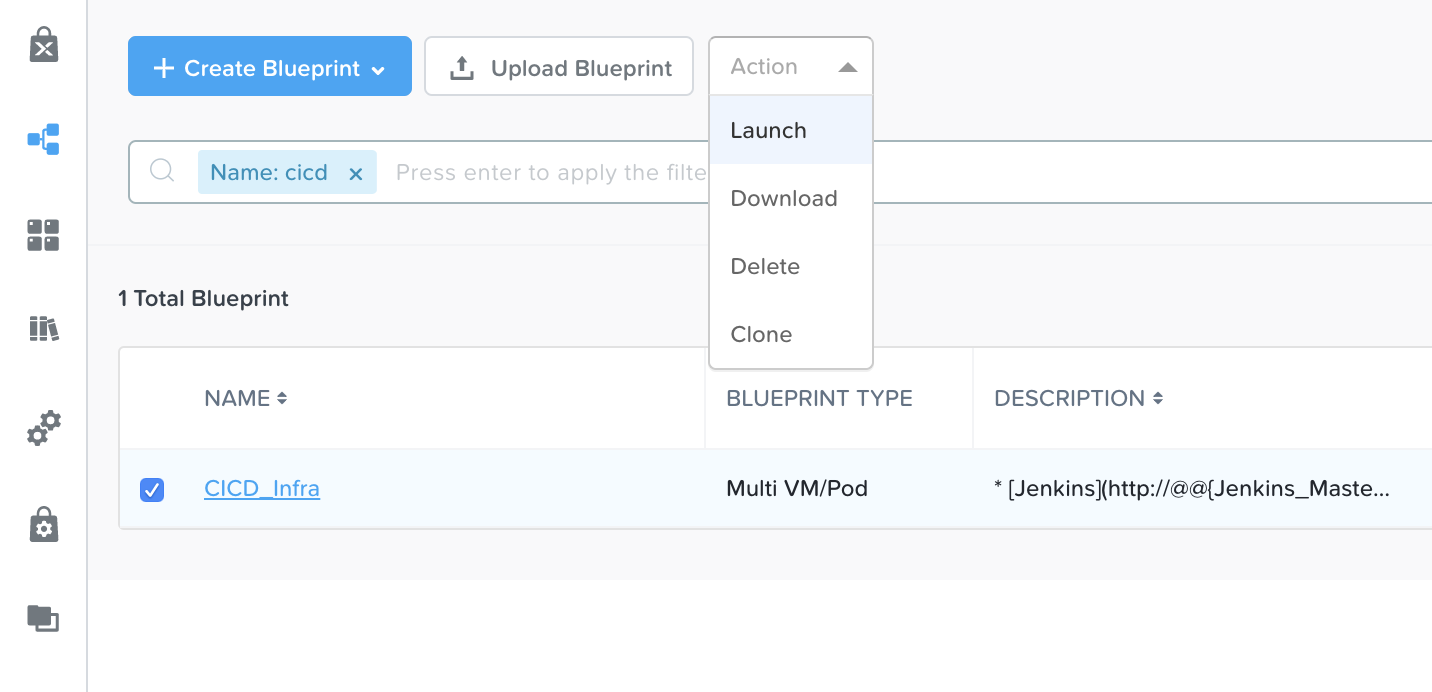
Find the blueprint titled CICD_Infra, select its checkbox, and from the Action dropdown, click Launch.
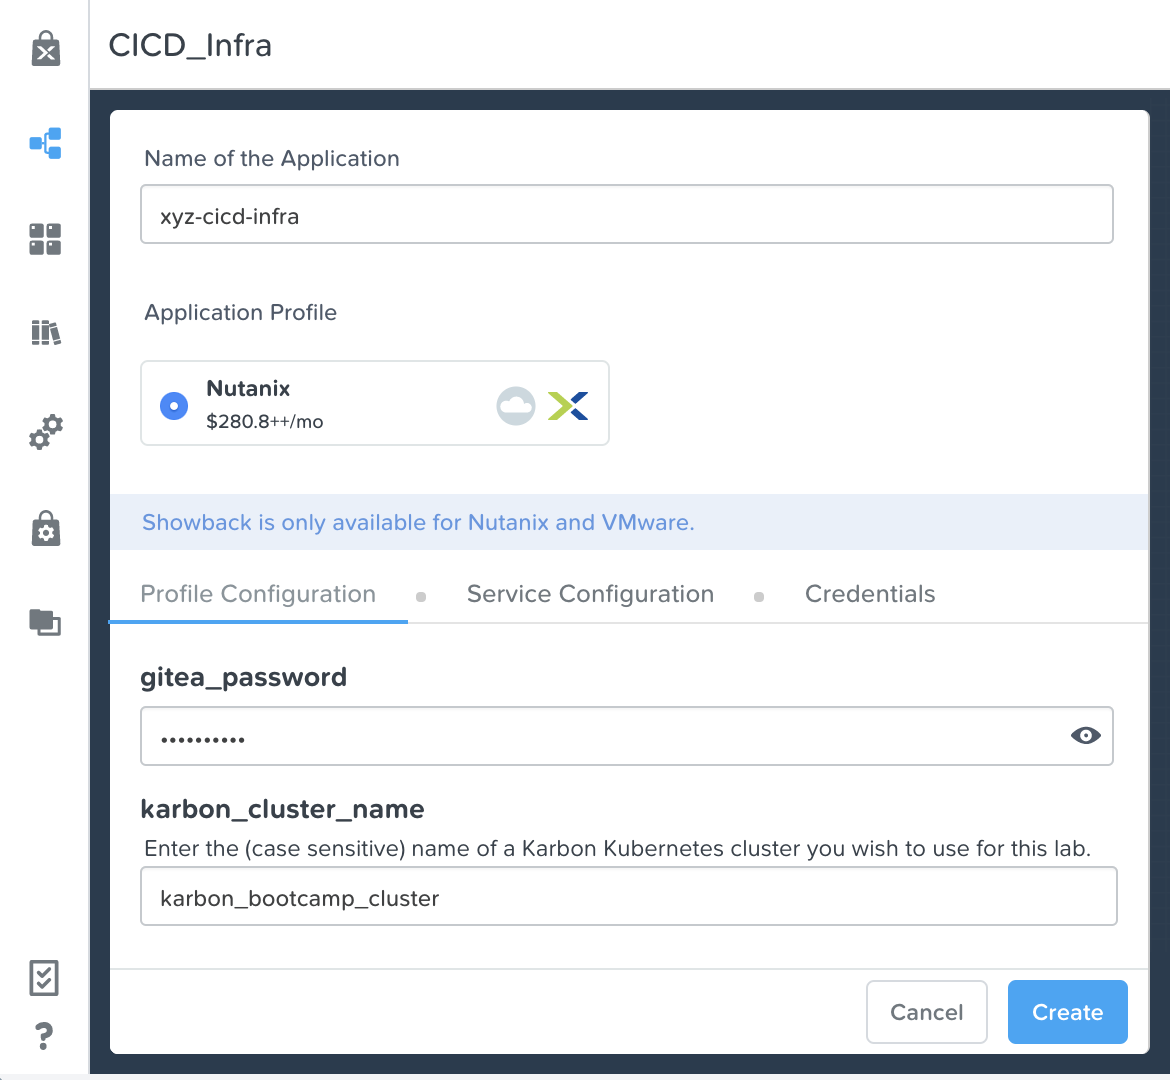
On the launch page, fill in the following fields.
Name of the Application - initials-cicd-infra
gitea_password - Any password desired, which will be set as the Gitea admin user password
karbon_cluster_name - The name of the Karbon cluster to use for this lab (it must already be depoyed). If the cluster was staged, leave the default of karbon_bootcamp_cluster.
Click the blue Create button, and ensure you’re redirected to the application page.
Now that we’re waiting for our CI/CD Infrastructure to deploy, let’s review the architecture of the blueprint. If desired, open the blueprint in Calm and view the Services and their underlying scripts as they’re covered. Alternatively, here’s an image of the blueprint canvas.
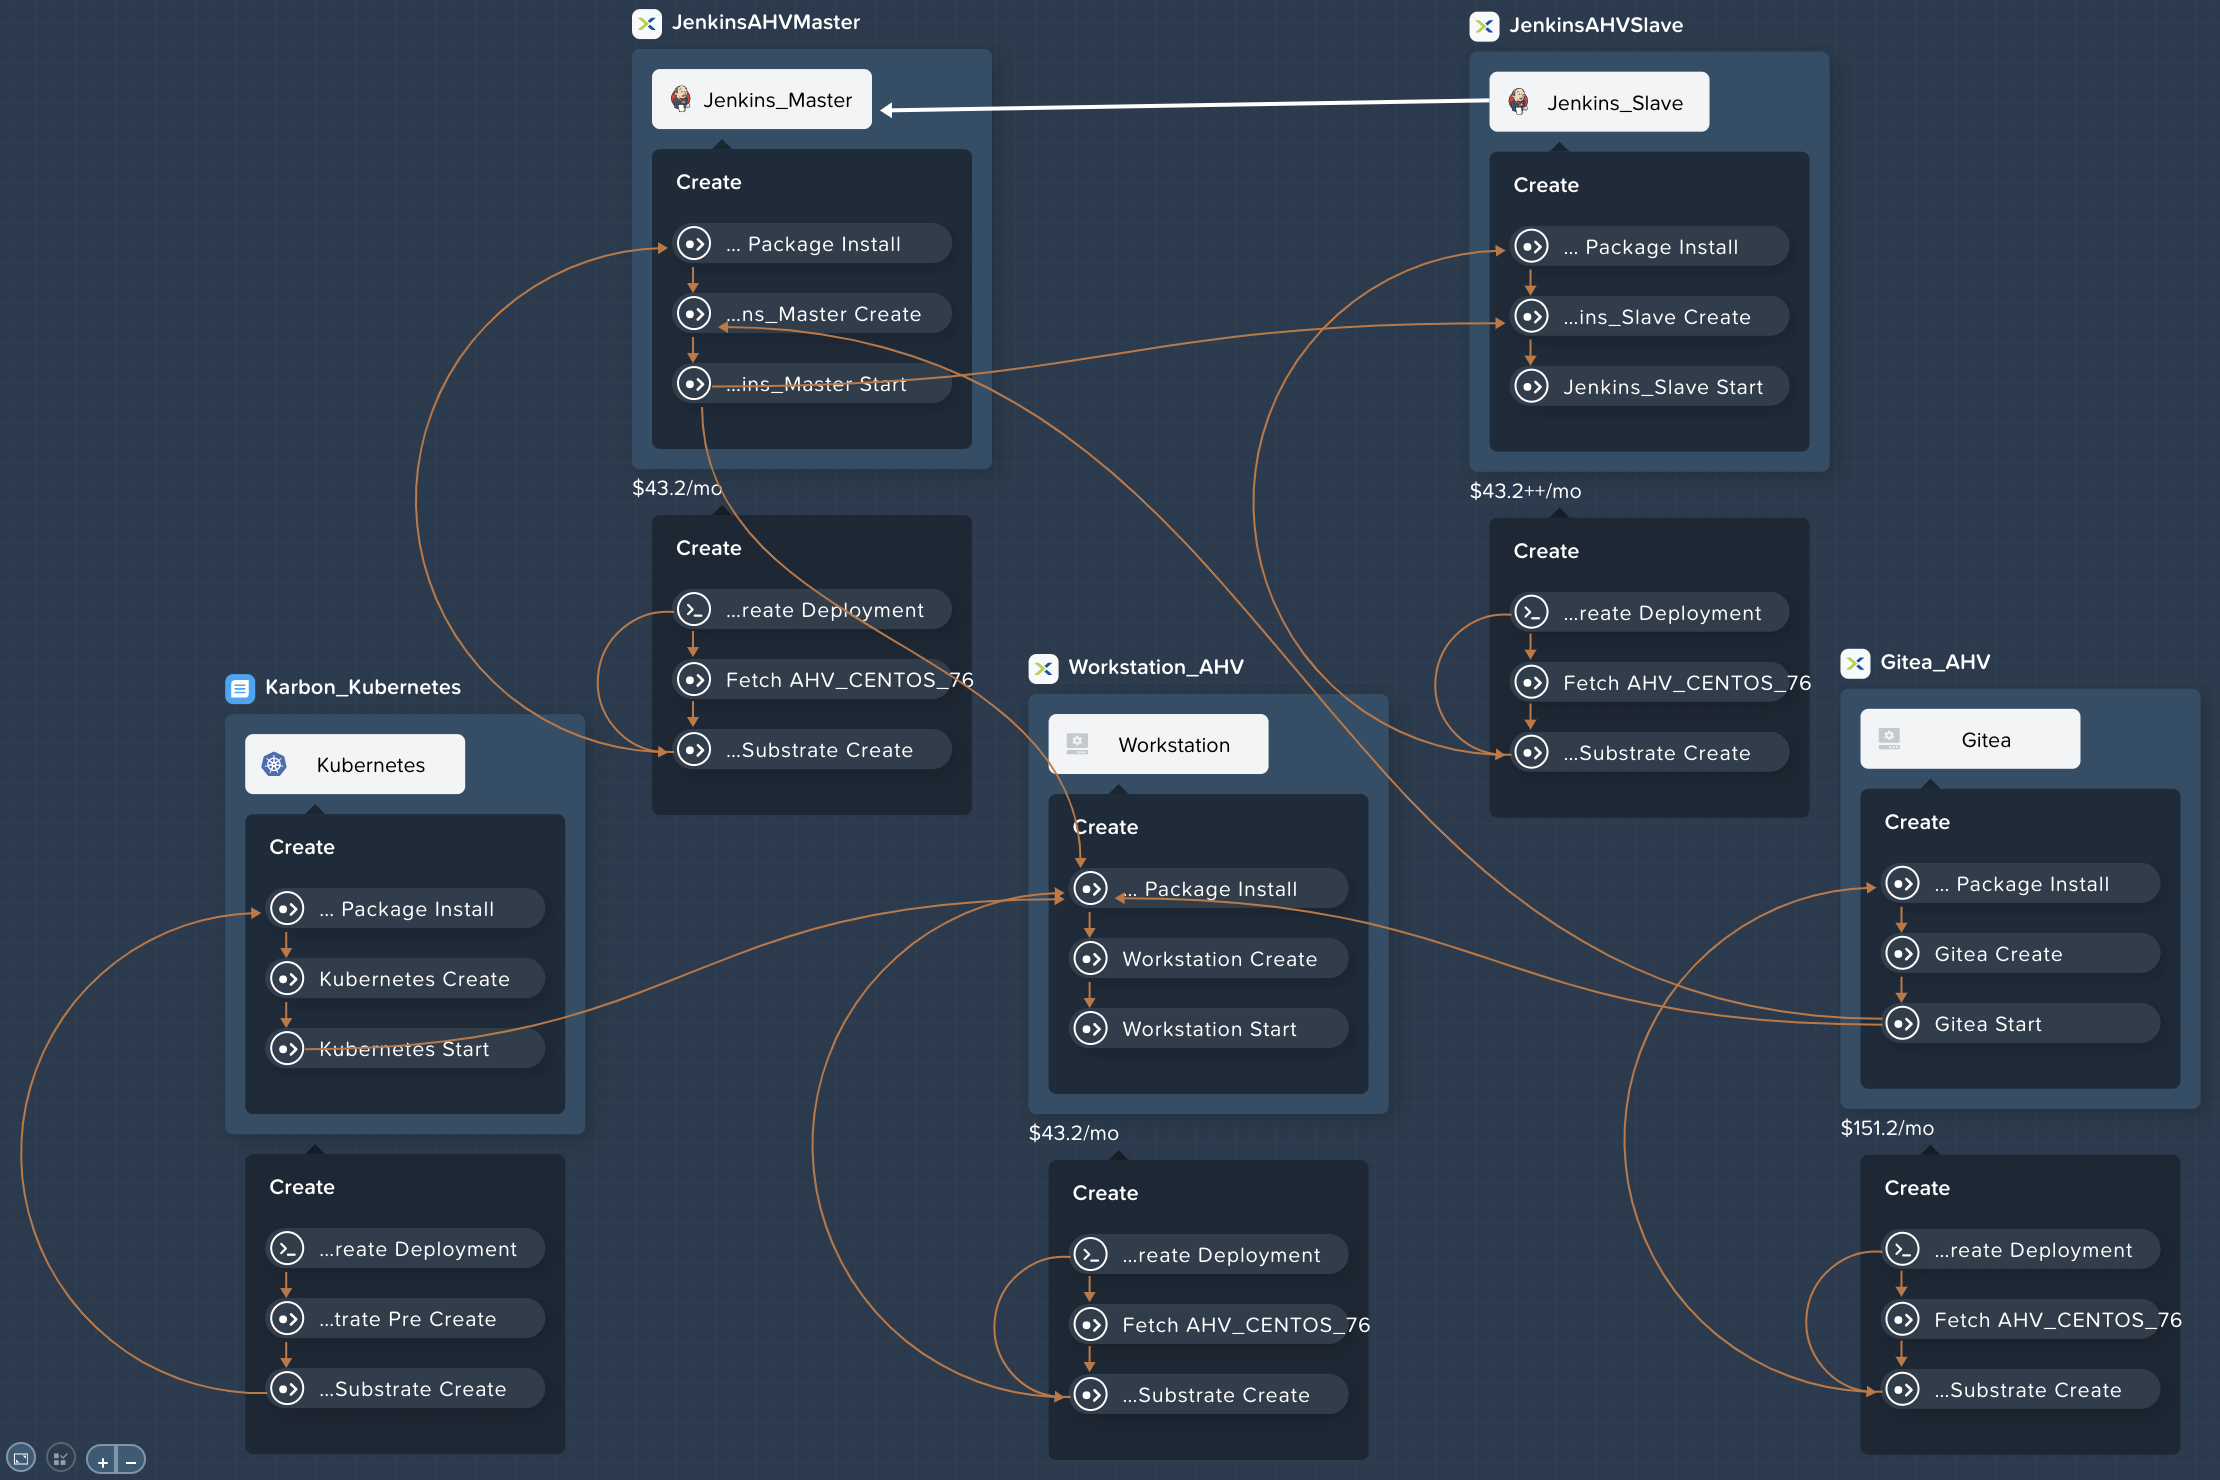
In approximate order (approximate as Calm deploys Services in parallel, unless there is a dependency), the blueprint deploys the following Services:
Kubernetes (Existing machine) - this Service utilizes VM Pre-create eScript tasks to make API calls into Prism Central, to find a Karbon Kubernetes cluster matching the karbon_cluster_name variable defined at launch. It also sets the content of the cluster’s kubeconfig as a variable, which will be later applied to the Workstation VM.
Gitea (AHV) - this Service installs Gitea, which is a community managed lightweight code hosting solution. It first installs MySQL, as Gitea requires a backend DB to operate. It then creates self signed certificates, installs the Gitea service, and configures the repo which stores our application code.
Jenkins_Master (AHV) - this Service installs Jenkins, a popular Continuous Integration server. It also trusts Certificate Authority (CA) generated during the Package Install of the Gitea Service.
Jenkins_Slave (AHV) - this Service installs a Jenkins Slave, which is used for builds in our Jenkins pipeline. Meaning this is the node that is responsible for building a docker container based on the new application code, publishing tha container to DockerHub, and then deploying the new container to the Kubernetes cluster.
Workstation (AHV) - this Service represents a “developer workstation,” and is where we’ll be making changes to our application code later in this lab. It first installs necessary software (like git and kubectl), and then configures the kubeconfig based on the variable set in the Kubernetes Service. Finally, it clones the git repo configured in the Gitea Service.
Once your Jenkins_Master and Jenkins_Slave Services have been fully deployed, move on to the next section.
Accessing Jenkins
Now that our CI/CD Infrastructure has been deployed, we’re ready to start configuration of the various components that make up our Pipeline. First up, is Jenkins.
On the Overview tab of your Application, right click on the Jenkins link, and open the page in a new tab.
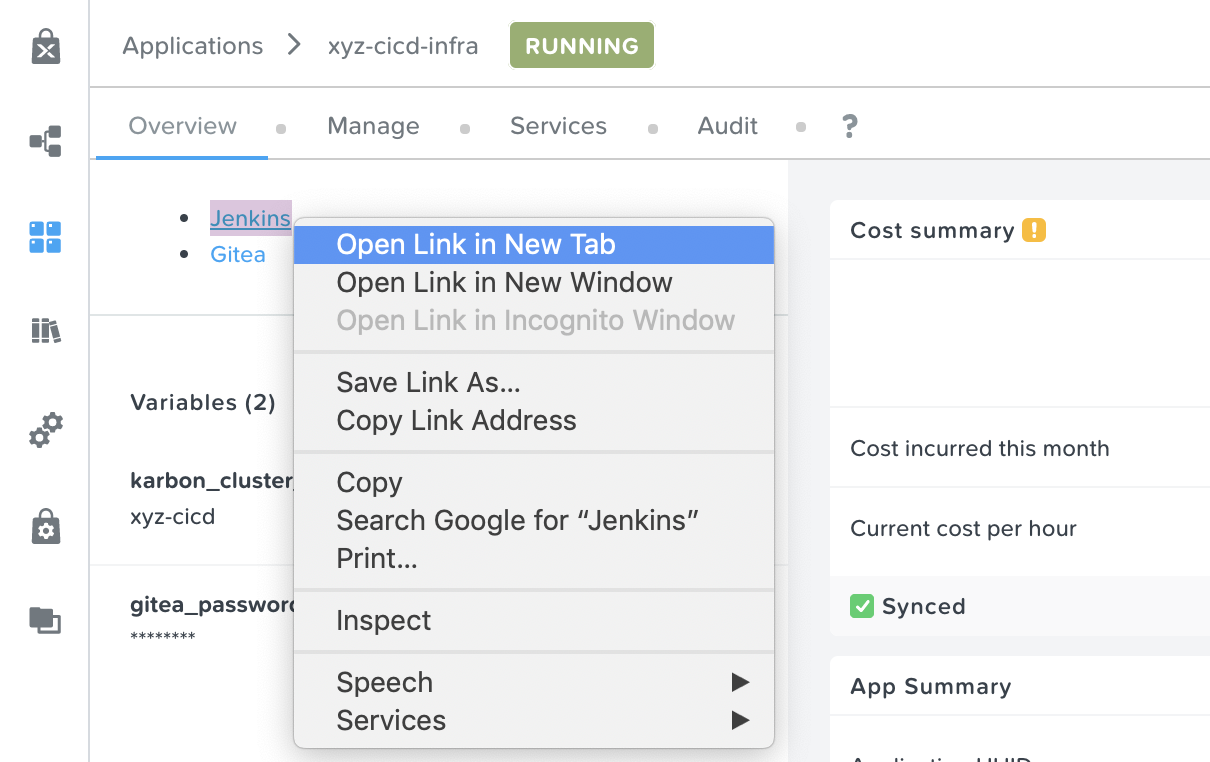
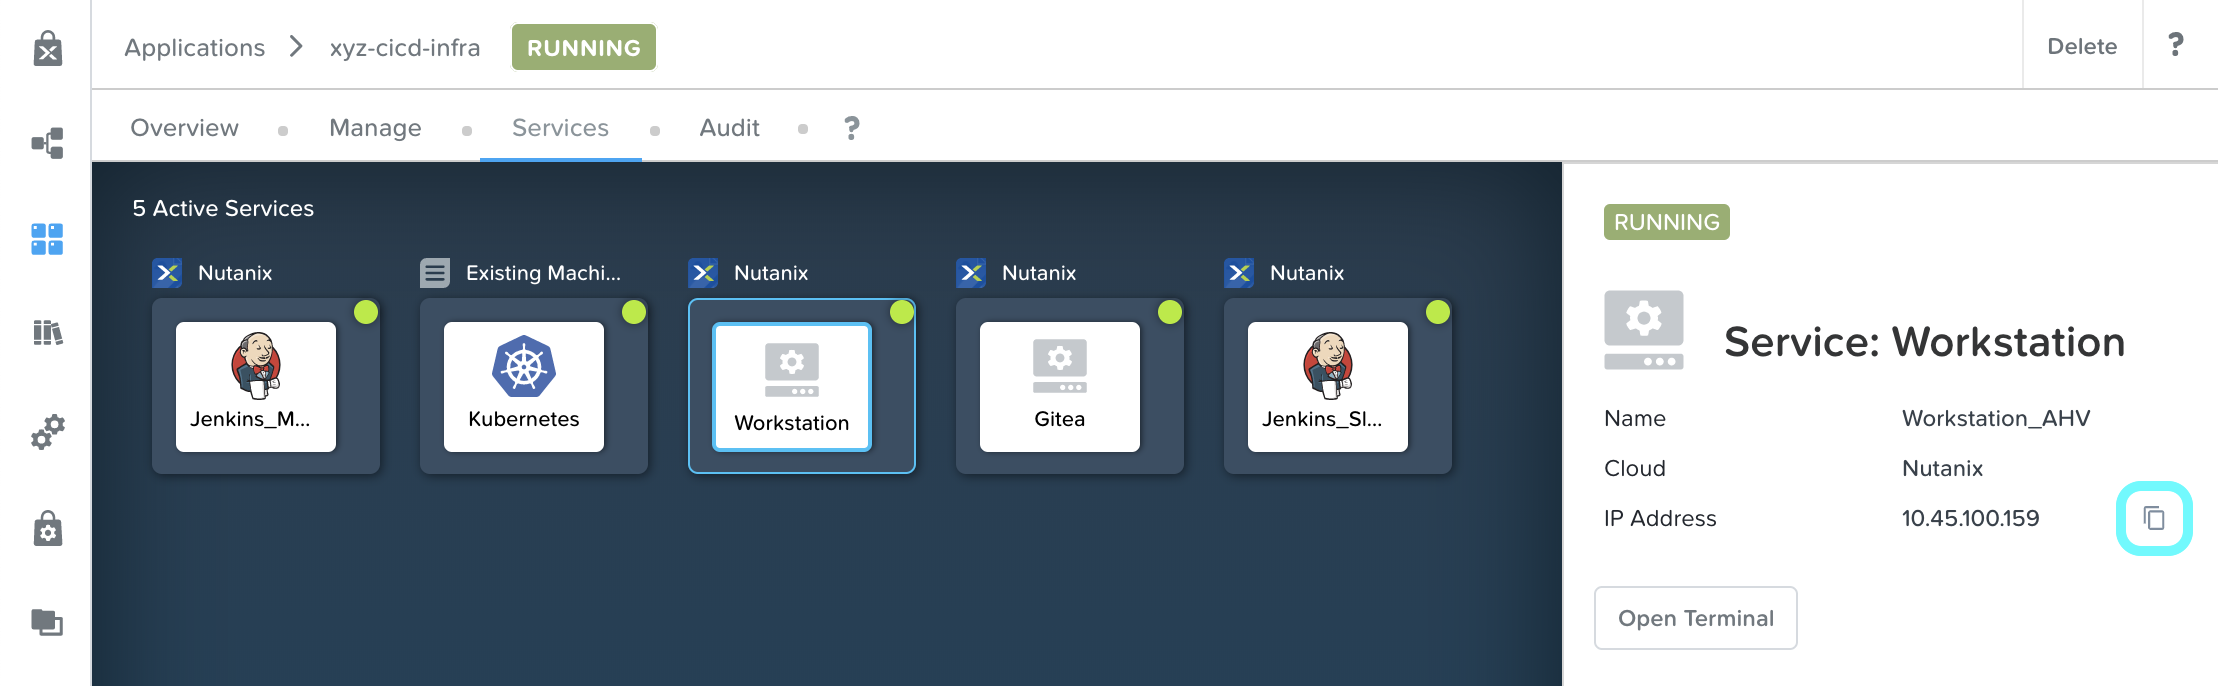
While still within the Calm Application page, navigate to the Services tab, select the Jenkins_Master Service, and in the right column, click Open Terminal.

In the Web SSH Terminal that just opened, run the following command to print out Jenkins’ temporary administrator password.
sudo cat /var/lib/jenkins/secrets/initialAdminPassword
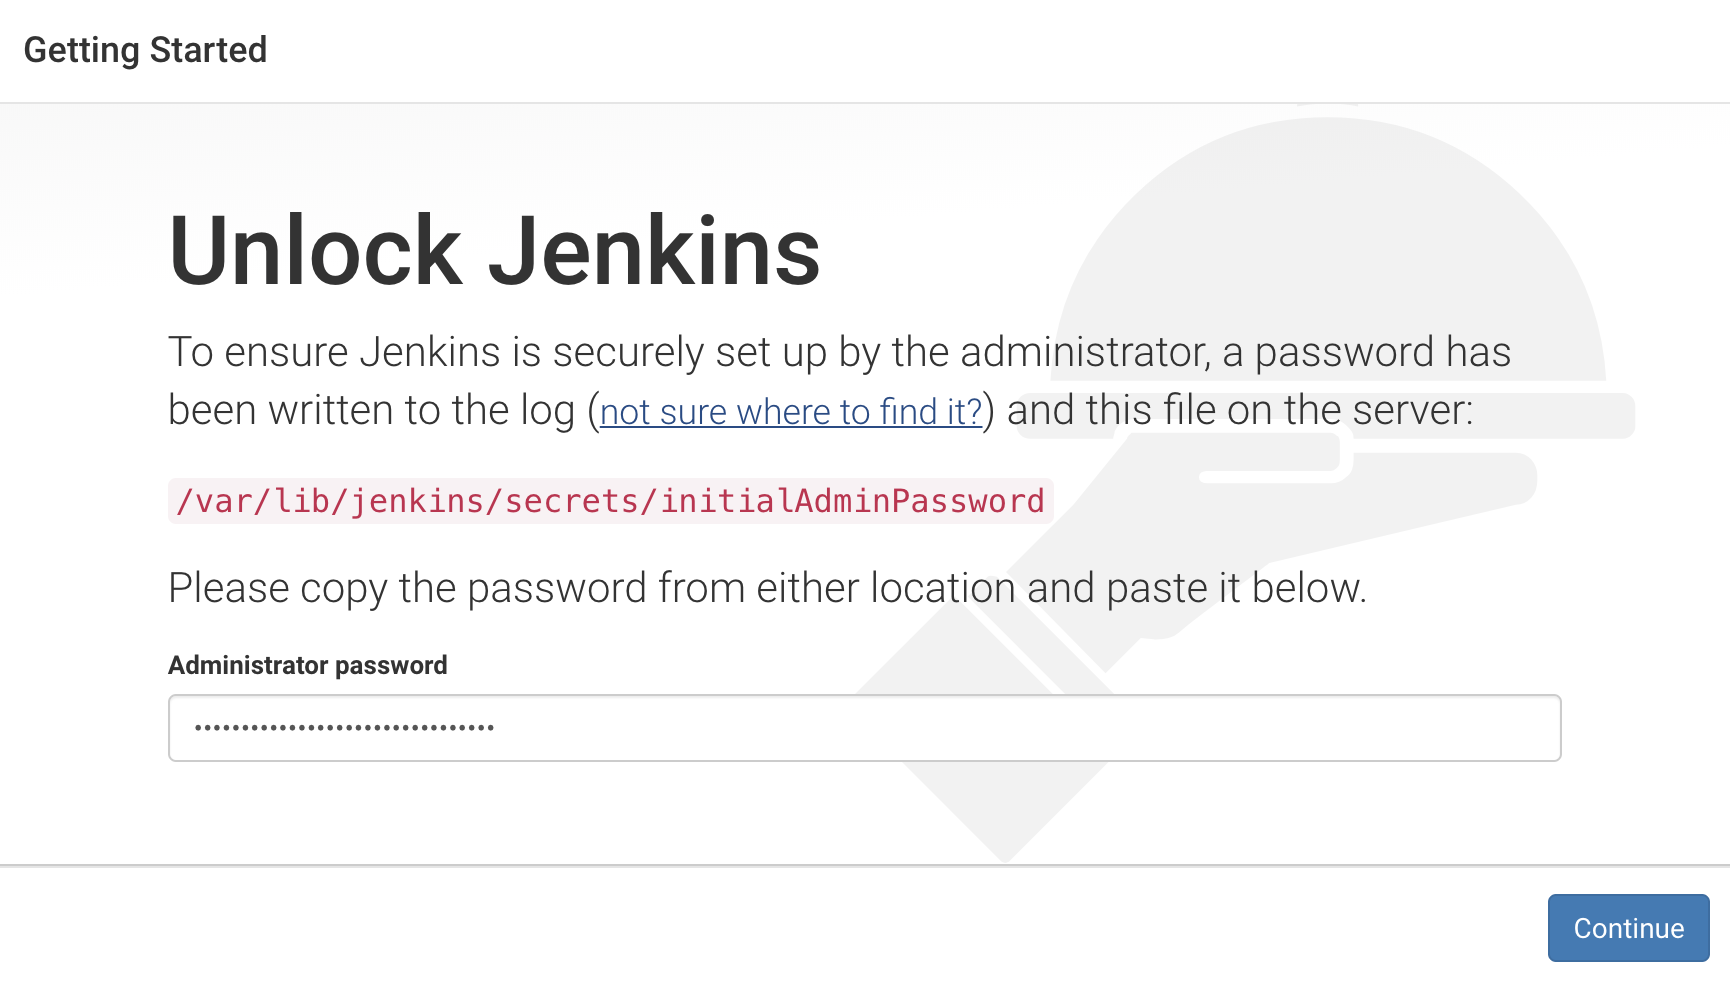
Double click the result from the previous step’s command to copy it to your clipboard.

Change to the Sign in [Jenkins] tab that was previously opened. In the Administrator password field, paste in the contents of the previous step, and click Continue.
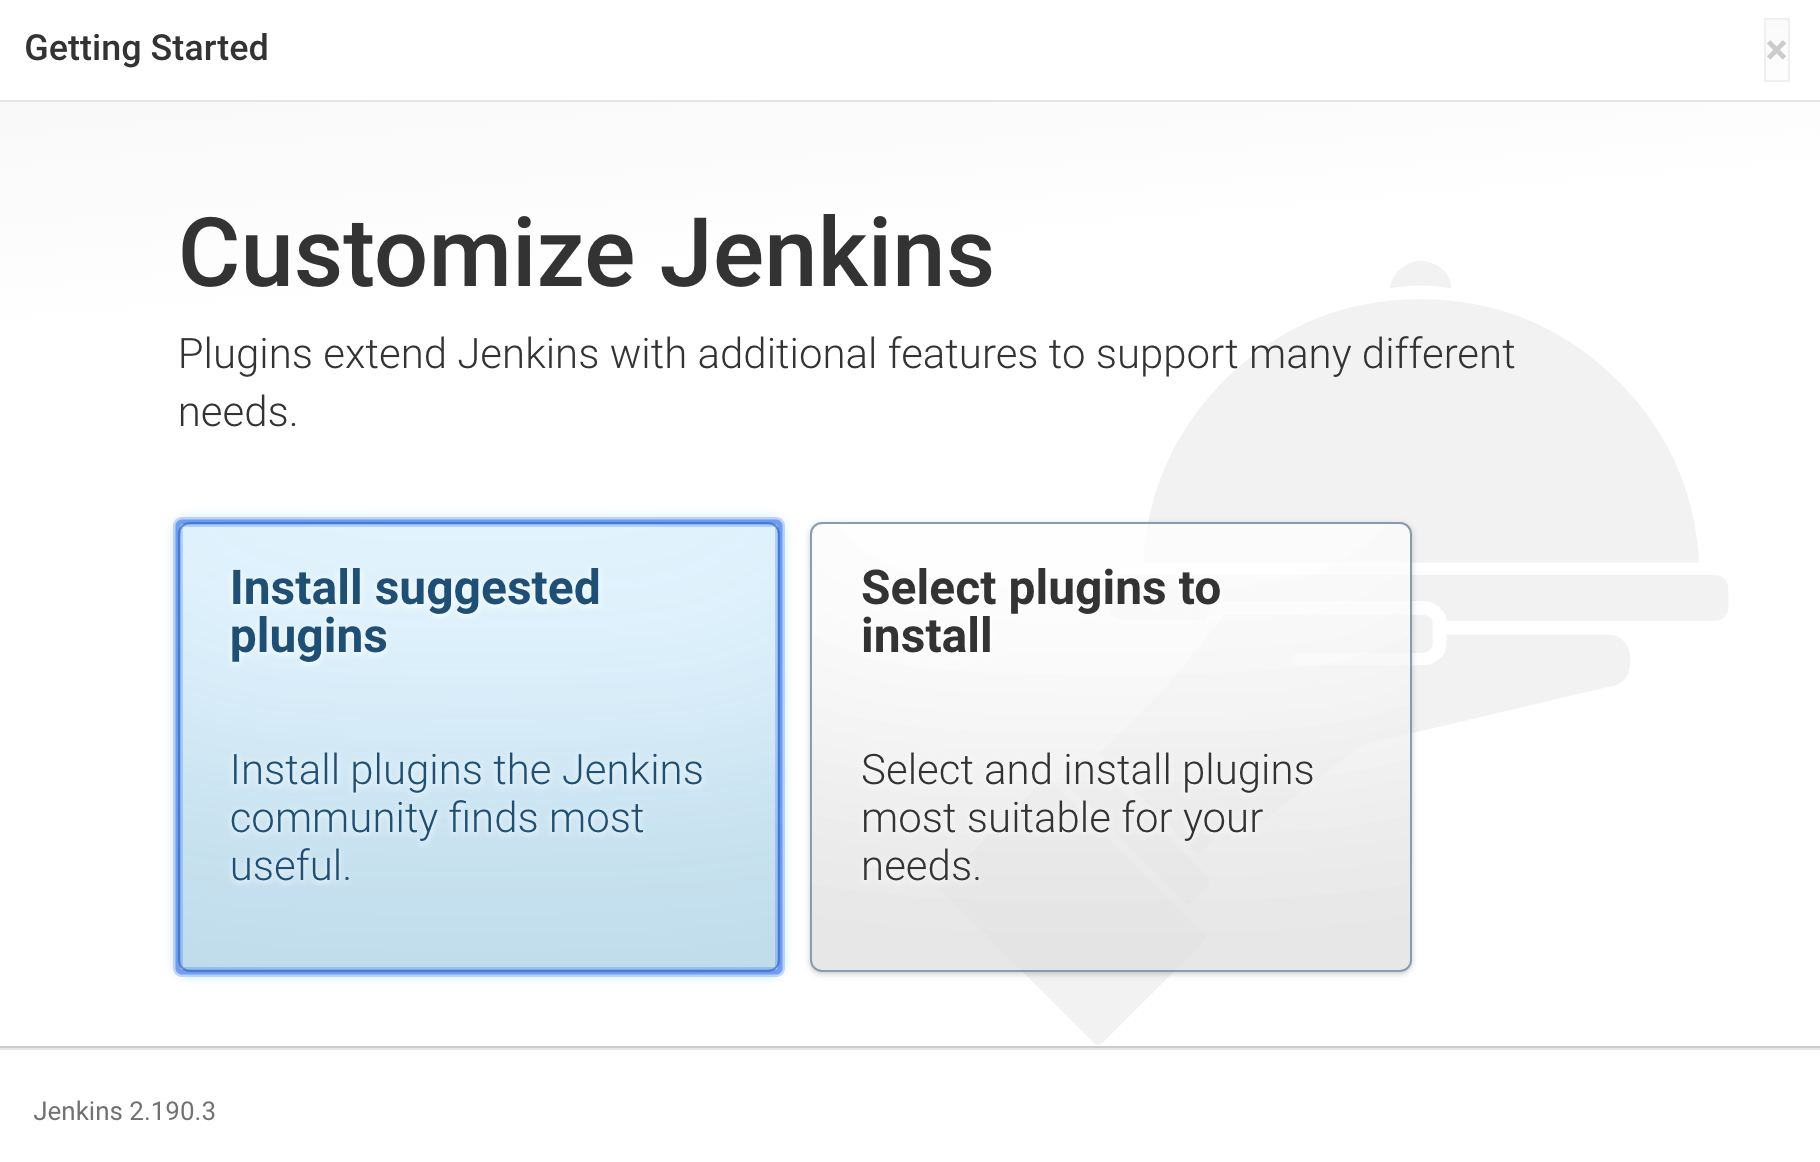
On the next page, click the large Install suggested plugins button.
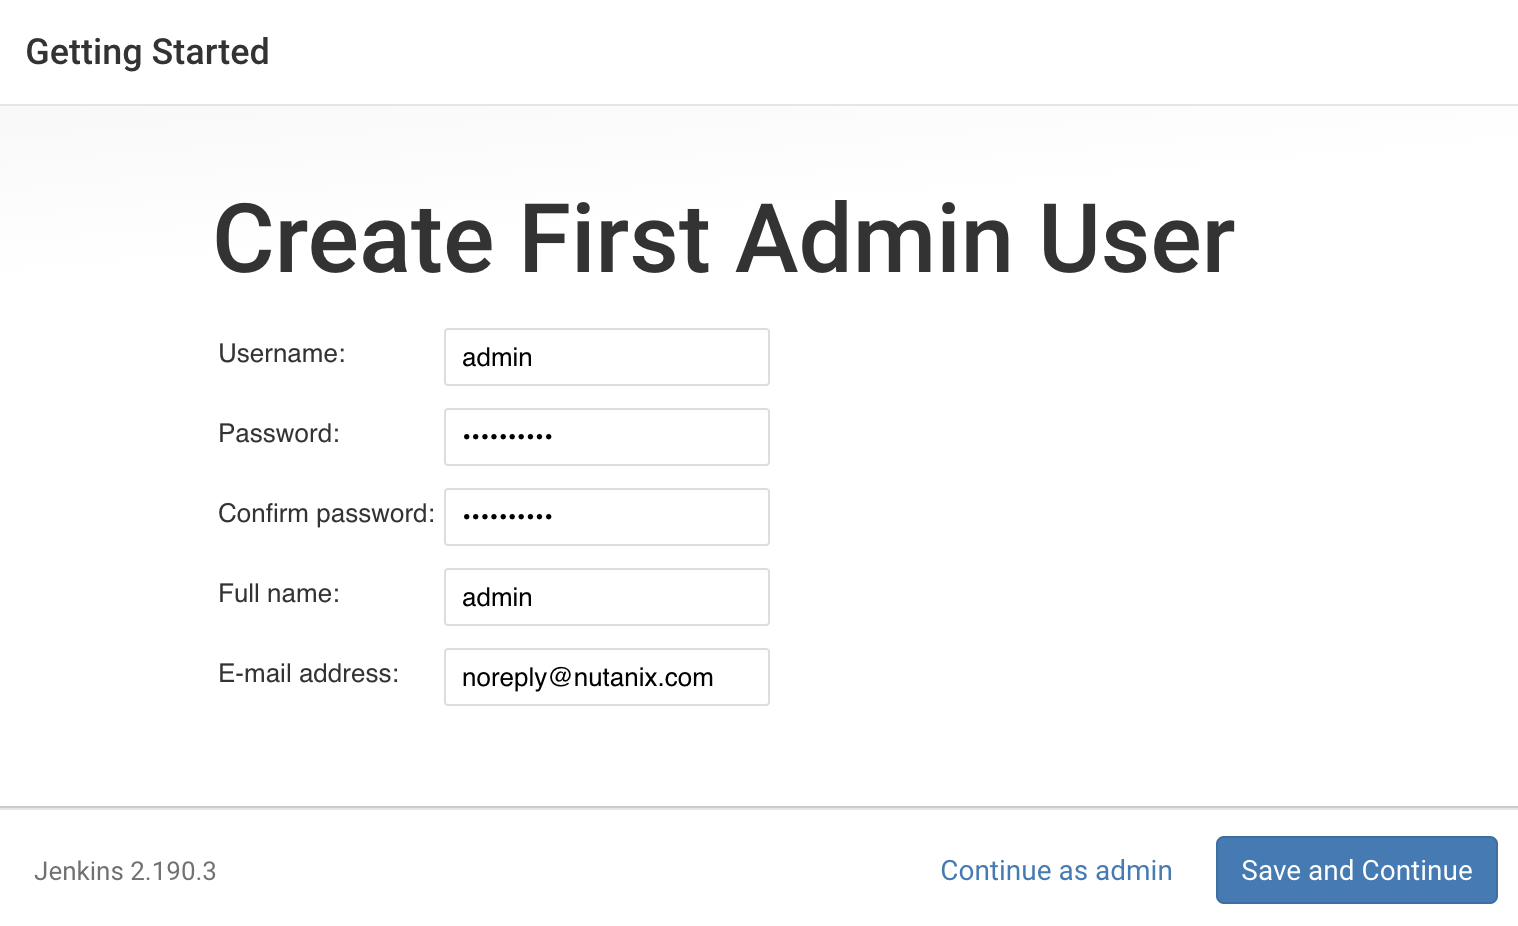
Wait for the suggested plugins to install, after which you’ll be re-directed to create the first admin user. Fill in the following fields, and click Save and Continue.
Username - admin
Password - any password of your choice
Confirm password - matching password
Full name - admin
Email address - noreply@nutanix.com
On the Instance Configuration page that appears, leave the Jenkins URL as default, and click Save and Finish.
Jenkins setup is now complete, but first our Jenkins instance needs to be restarted. Click Restart, and then move on to the next section.

Accessing the Developer Workstation
Throughout this entire lab, we’ll be running a large number of commands from our developer workstation, as it has already been configured with all the necessary software packages, the correct kubeconfig file, and is pointed at our git repository that’s stored in Gitea.
To access the developer workstation, you have two options: 1, use the web SSH client as we did for the Jenkins Service, or 2, use your laptop’s terminal or PuTTY to SSH into the workstation. Either option is perfectly valid, however we recommend you stick with whatever you’re most comfortable with. Since we already covered how to use the web SSH client in the previous step, we’ll cover SSH’ing in from your laptop here.
Back in our Calm application page, navigate to the Services tab, and select the Workstation Service. In the right column that appears, copy the IP address of the service by clicking the button just to the right of the IP.
In your laptop’s terminal, run the following commands to SSH into your workstation (be sure to subsitute in your workstation IP).
echo '-----BEGIN RSA PRIVATE KEY-----
MIIEowIBAAKCAQEAii7qFDhVadLx5lULAG/ooCUTA/ATSmXbArs+GdHxbUWd/bNG
ZCXnaQ2L1mSVVGDxfTbSaTJ3En3tVlMtD2RjZPdhqWESCaoj2kXLYSiNDS9qz3SK
6h822je/f9O9CzCTrw2XGhnDVwmNraUvO5wmQObCDthTXc72PcBOd6oa4ENsnuY9
HtiETg29TZXgCYPFXipLBHSZYkBmGgccAeY9dq5ywiywBJLuoSovXkkRJk3cd7Gy
hCRIwYzqfdgSmiAMYgJLrz/UuLxatPqXts2D8v1xqR9EPNZNzgd4QHK4of1lqsNR
uz2SxkwqLcXSw0mGcAL8mIwVpzhPzwmENC5OrwIBJQKCAQB++q2WCkCmbtByyrAp
6ktiukjTL6MGGGhjX/PgYA5IvINX1SvtU0NZnb7FAntiSz7GFrODQyFPQ0jL3bq0
MrwzRDA6x+cPzMb/7RvBEIGdadfFjbAVaMqfAsul5SpBokKFLxU6lDb2CMdhS67c
1K2Hv0qKLpHL0vAdEZQ2nFAMWETvVMzl0o1dQmyGzA0GTY8VYdCRsUbwNgvFMvBj
8T/svzjpASDifa7IXlGaLrXfCH584zt7y+qjJ05O1G0NFslQ9n2wi7F93N8rHxgl
JDE4OhfyaDyLL1UdBlBpjYPSUbX7D5NExLggWEVFEwx4JRaK6+aDdFDKbSBIidHf
h45NAoGBANjANRKLBtcxmW4foK5ILTuFkOaowqj+2AIgT1ezCVpErHDFg0bkuvDk
QVdsAJRX5//luSO30dI0OWWGjgmIUXD7iej0sjAPJjRAv8ai+MYyaLfkdqv1Oj5c
oDC3KjmSdXTuWSYNvarsW+Uf2v7zlZlWesTnpV6gkZH3tX86iuiZAoGBAKM0mKX0
EjFkJH65Ym7gIED2CUyuFqq4WsCUD2RakpYZyIBKZGr8MRni3I4z6Hqm+rxVW6Dj
uFGQe5GhgPvO23UG1Y6nm0VkYgZq81TraZc/oMzignSC95w7OsLaLn6qp32Fje1M
Ez2Yn0T3dDcu1twY8OoDuvWx5LFMJ3NoRJaHAoGBAJ4rZP+xj17DVElxBo0EPK7k
7TKygDYhwDjnJSRSN0HfFg0agmQqXucjGuzEbyAkeN1Um9vLU+xrTHqEyIN/Jqxk
hztKxzfTtBhK7M84p7M5iq+0jfMau8ykdOVHZAB/odHeXLrnbrr/gVQsAKw1NdDC
kPCNXP/c9JrzB+c4juEVAoGBAJGPxmp/vTL4c5OebIxnCAKWP6VBUnyWliFhdYME
rECvNkjoZ2ZWjKhijVw8Il+OAjlFNgwJXzP9Z0qJIAMuHa2QeUfhmFKlo4ku9LOF
2rdUbNJpKD5m+IRsLX1az4W6zLwPVRHp56WjzFJEfGiRjzMBfOxkMSBSjbLjDm3Z
iUf7AoGBALjvtjapDwlEa5/CFvzOVGFq4L/OJTBEBGx/SA4HUc3TFTtlY2hvTDPZ
dQr/JBzLBUjCOBVuUuH3uW7hGhW+DnlzrfbfJATaRR8Ht6VU651T+Gbrr8EqNpCP
gmznERCNf9Kaxl/hlyV5dZBe/2LIK+/jLGNu9EJLoraaCBFshJKF
-----END RSA PRIVATE KEY-----' | tee ~/calmkey
chmod 600 ~/calmkey
ssh -i ~/calmkey centos@<workstation-ip>
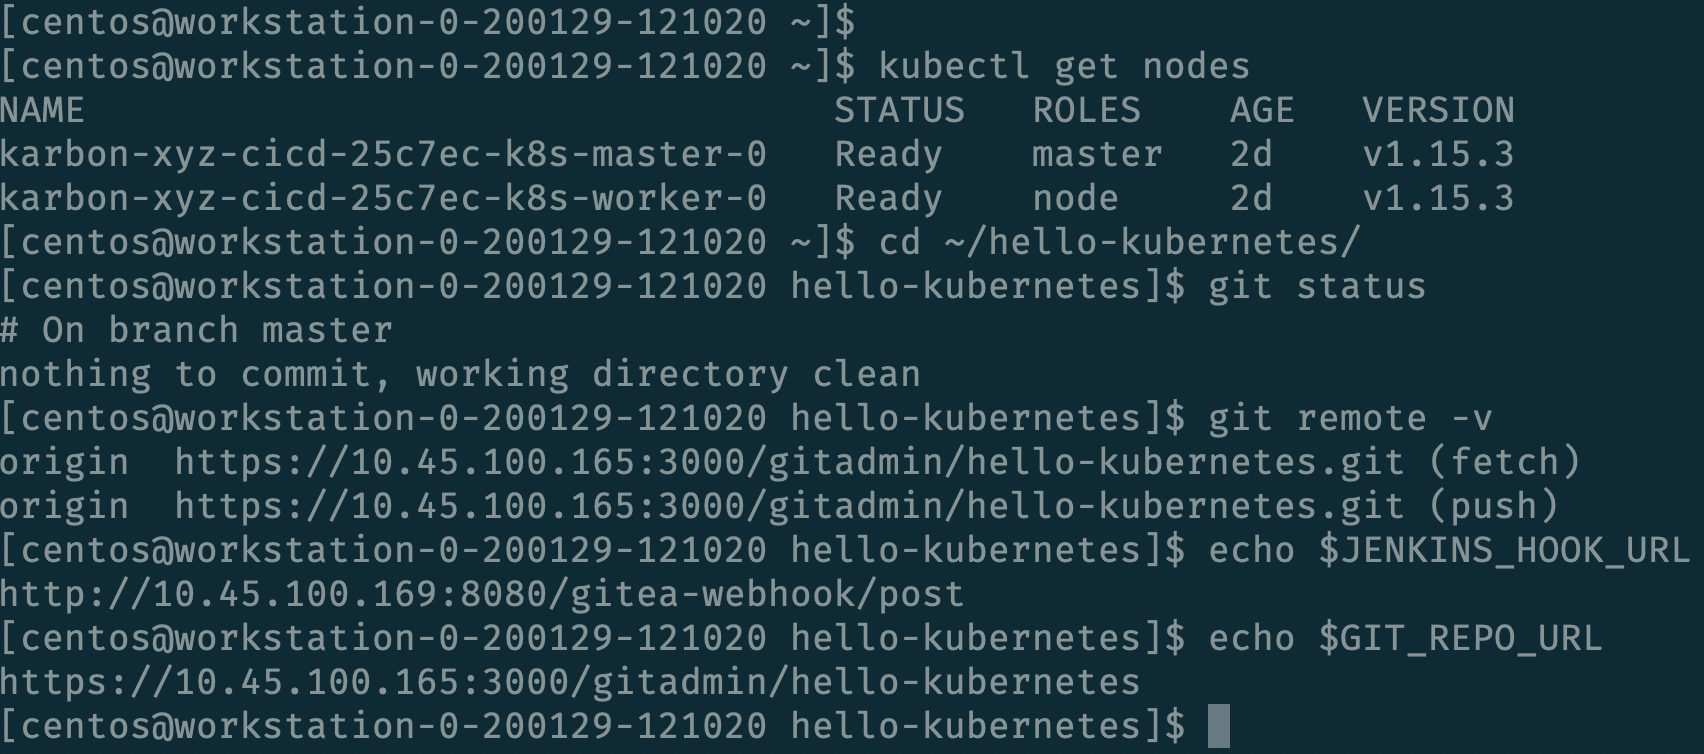
Validate that our kubeconfig and git repo are set up properly by running the following commands. Your output should be similar to the image below, but with different node names and IPs.
kubectl get nodes
cd ~/hello-kubernetes/
git status
git remote -v
echo $JENKINS_HOOK_URL
echo $GIT_REPO_URL
Gitea Webhook Setup
Our next configuration step is to create a webhook in Gitea, which tells Gitea to inform some server (in our case Jenkins) each time there is a new commit. Many popular git servers have this functionality, including GitHub, GitLab, and Gitea.
We’ll access our Gitea Service in the same manner as Jenkins, by navigating to the Overview tab of our Calm application, right clicking on the Gitea link, and opening it in a new tab.
It is expected to receive a warning from your browser about the site’s security certificate not being trusted by your computer. This is due to the use of self signed SSL certificates during setup (which is not recommended for production workloads). Select the Proceed Anyway option (exact wording may depend on your browser).
On the Gitea homepage, click the Sign In button in the upper right.
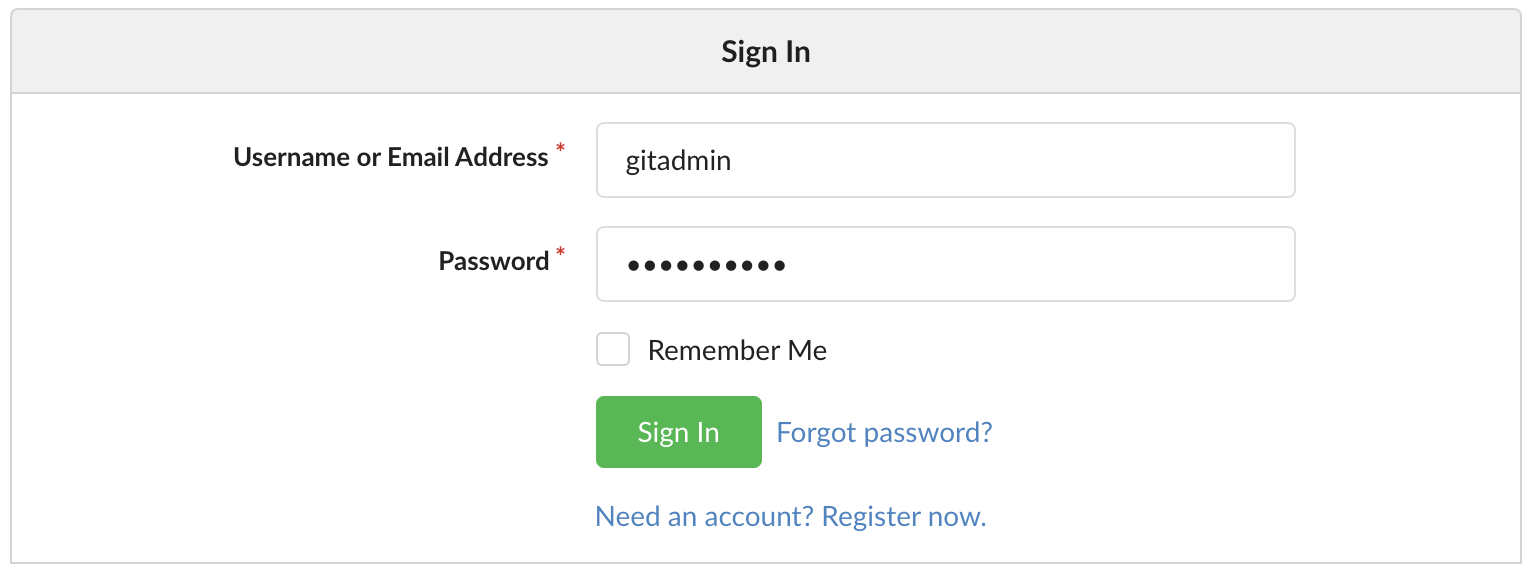
Sign in with the following credentials.
Username - gitadmin
Password - your password specified when launching the Calm blueprint
On the page that appears, click the gitadmin/hello-kubernetes repository link, then Settings along the right-hand side, and finally the Webhooks tab.
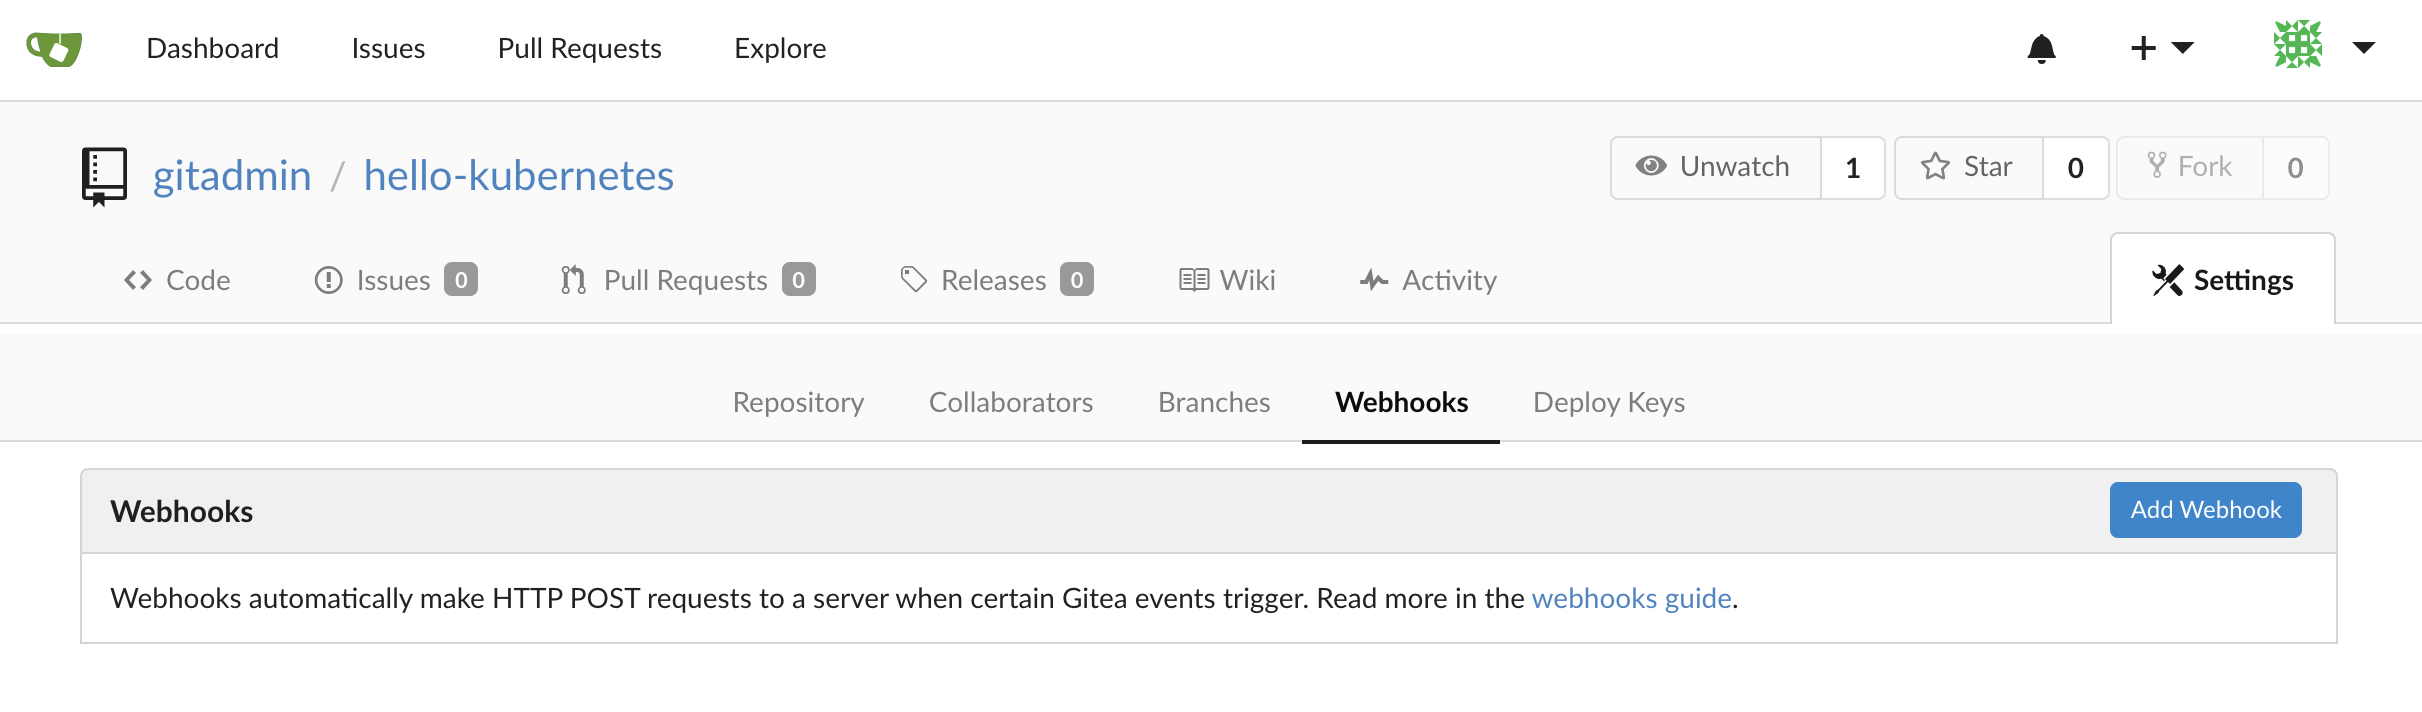
Click the blue Add Webhook button, in the list that appears click Gitea, and then fill in the following fields.
Target URL - The output of the echo $JENKINS_HOOK_URL command from the previous “Developer Workstation” section, should be of the format http://<jenkins-ip>:8080/gitea-webhook/post
HTTP Method - Leave the default of POST
POST Content Type - Leave the default of application/json
Secret - Leave it blank (Jenkins does not require a secret by default)
Trigger On - Leave the default of Push Events (any time a user runs “git push” Gitea will send the webhook)
Branch filter - Leave the default of * (this means the webhook will be triggered for any branch)
Active - Leave the Active checkbox enabled.
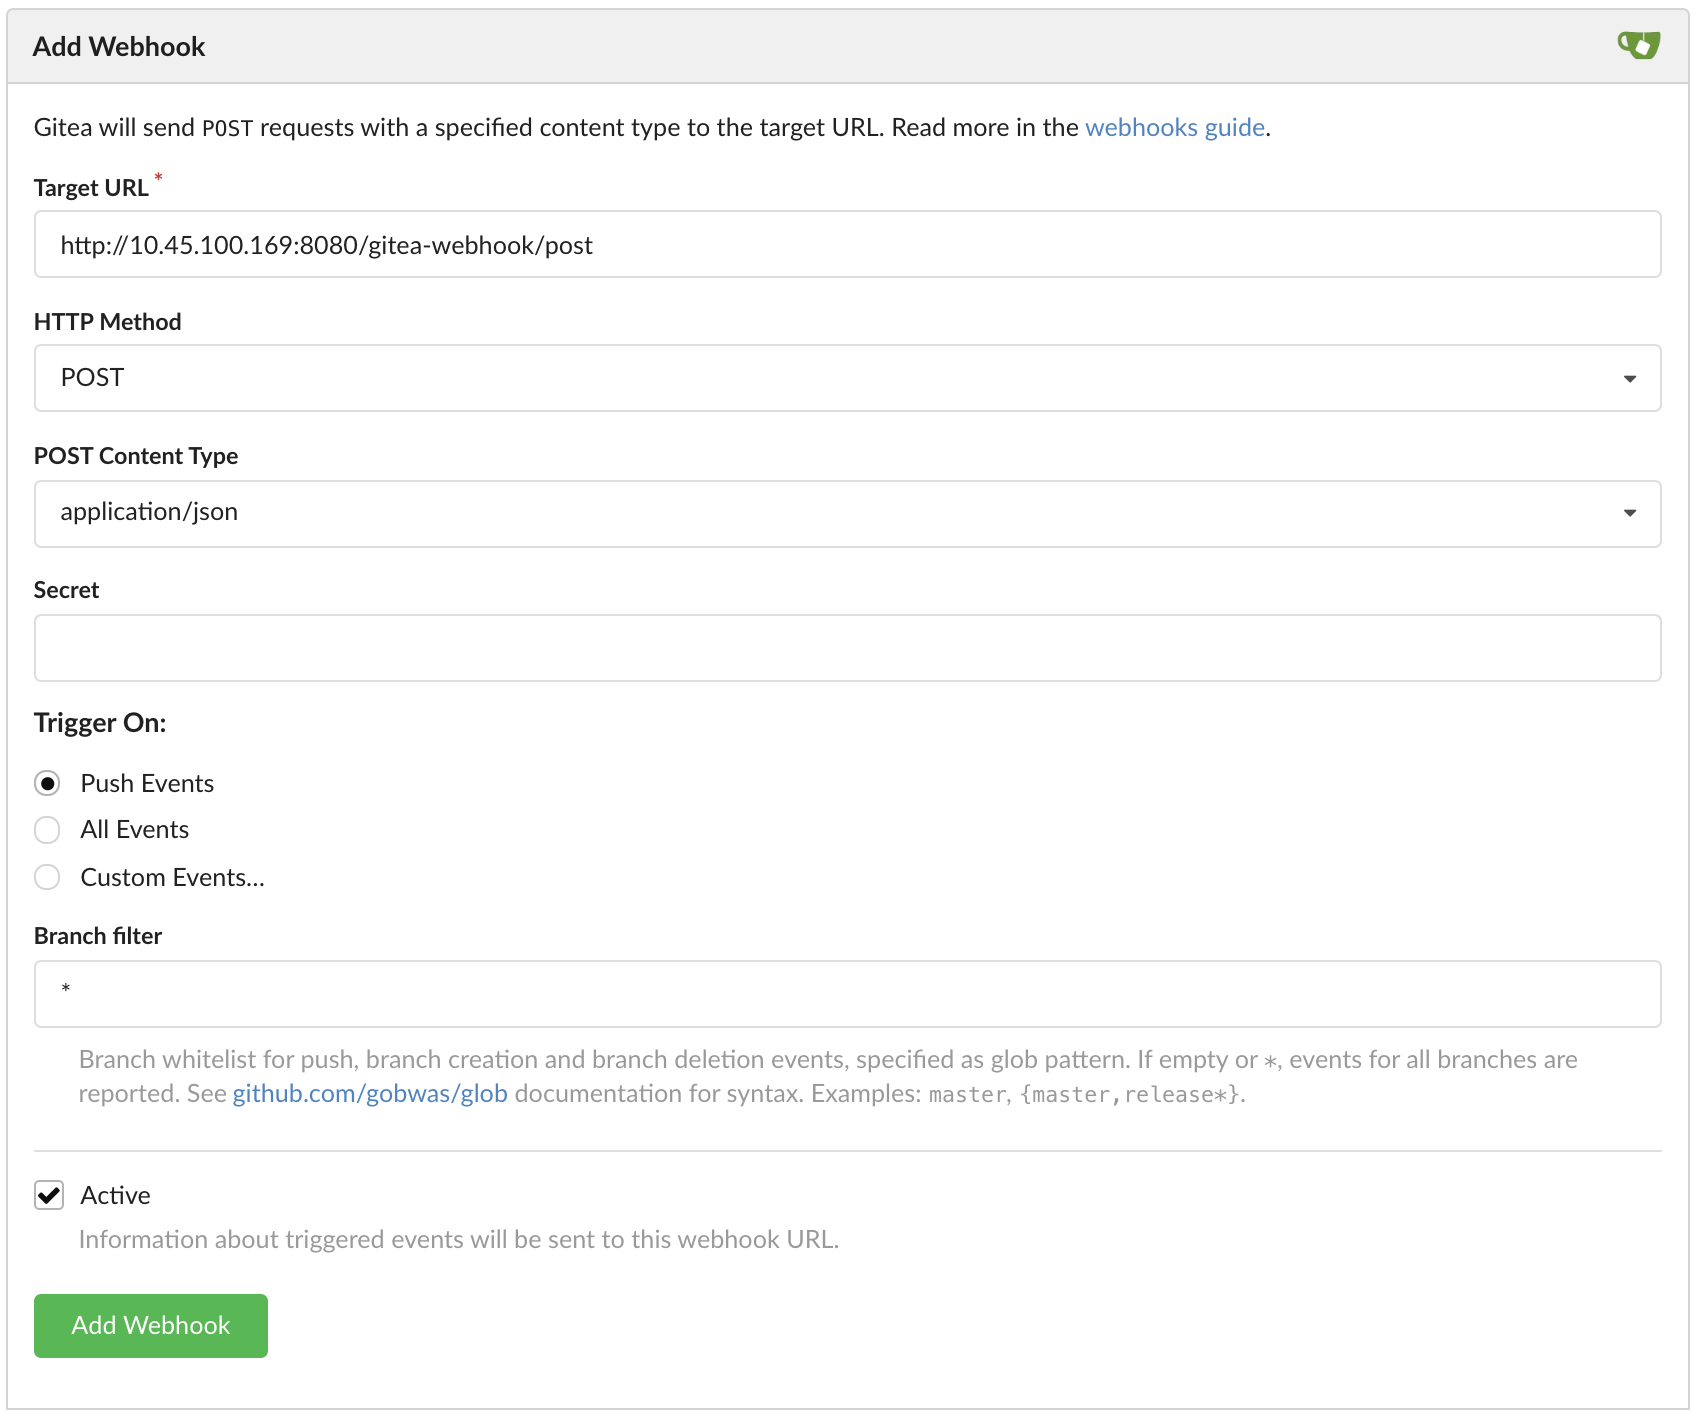
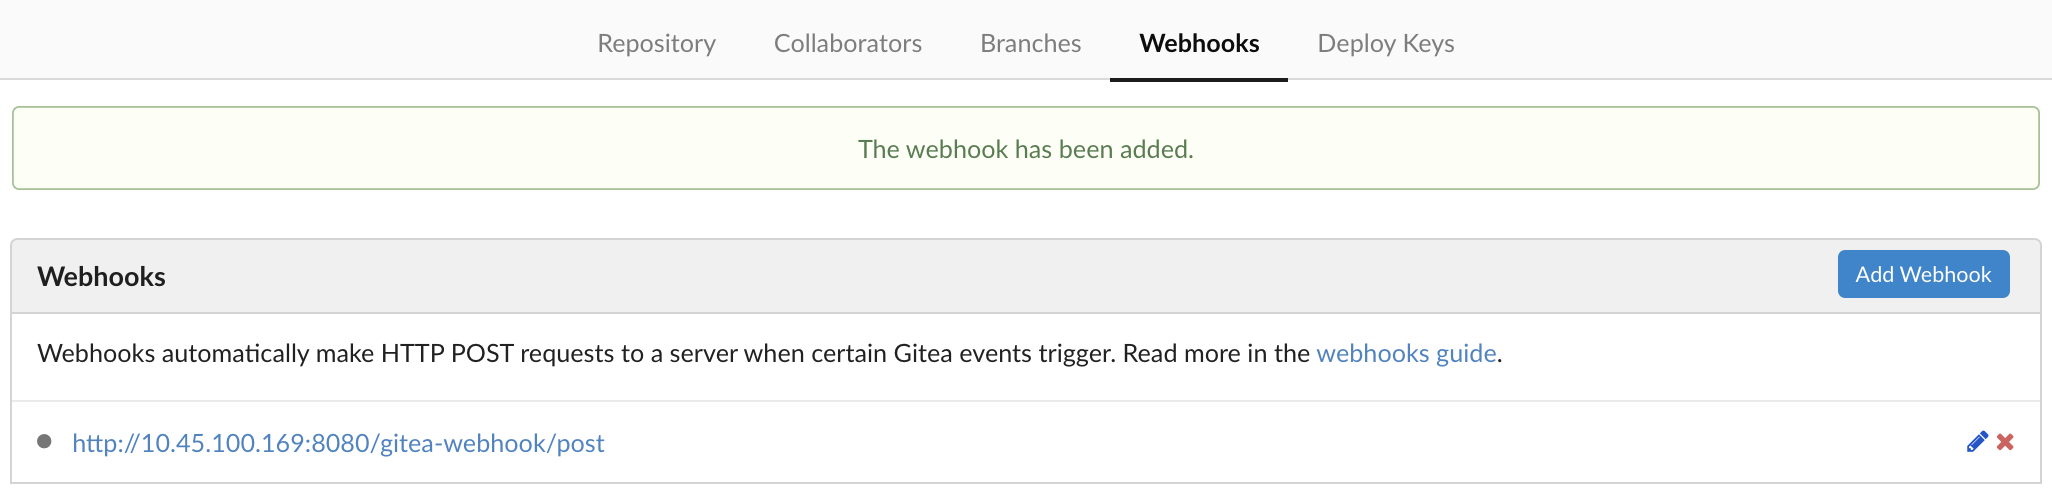
Click the green Add Webhook button. You should receive a notification that the webhook has been added.
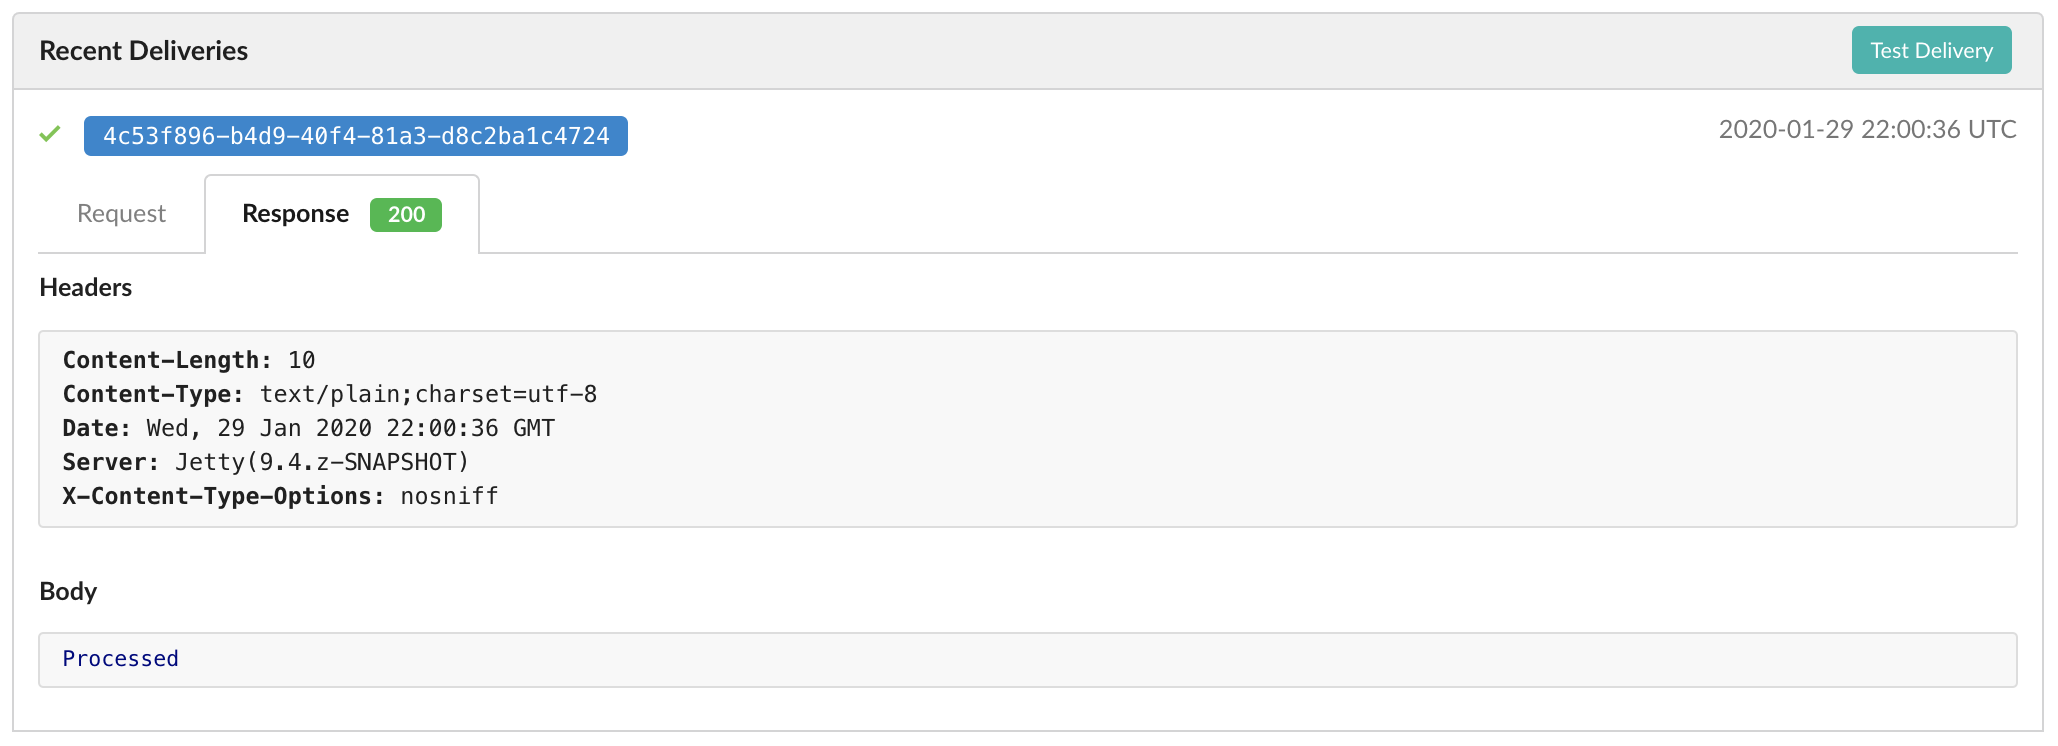
To validate the webhook is operating as expected, click the pencil to the right of the webhook. Scroll all the way to the bottom of the page, and click the teal Test Delivery button. After a moment, the page should refresh, and there should be a successful test event created. If the Response has a green 200 code, then everything is configured properly.
DockerHub Setup
After a GitHub commit triggers a Jenkins build, and Jenkins successfully builds our new docker image, it needs some place to store the image. In this lab, we’ll be using DockerHub, however there are many free container registries available.
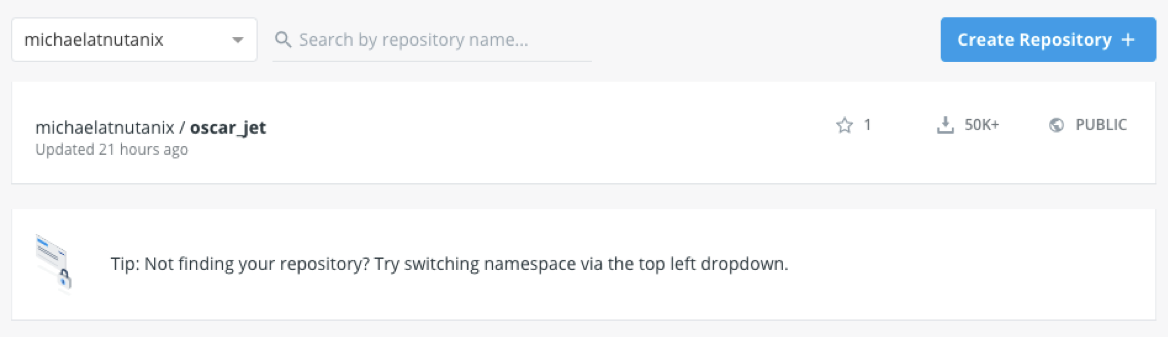
First, login to DockerHub (or create a free account) and click the Create Repository button.
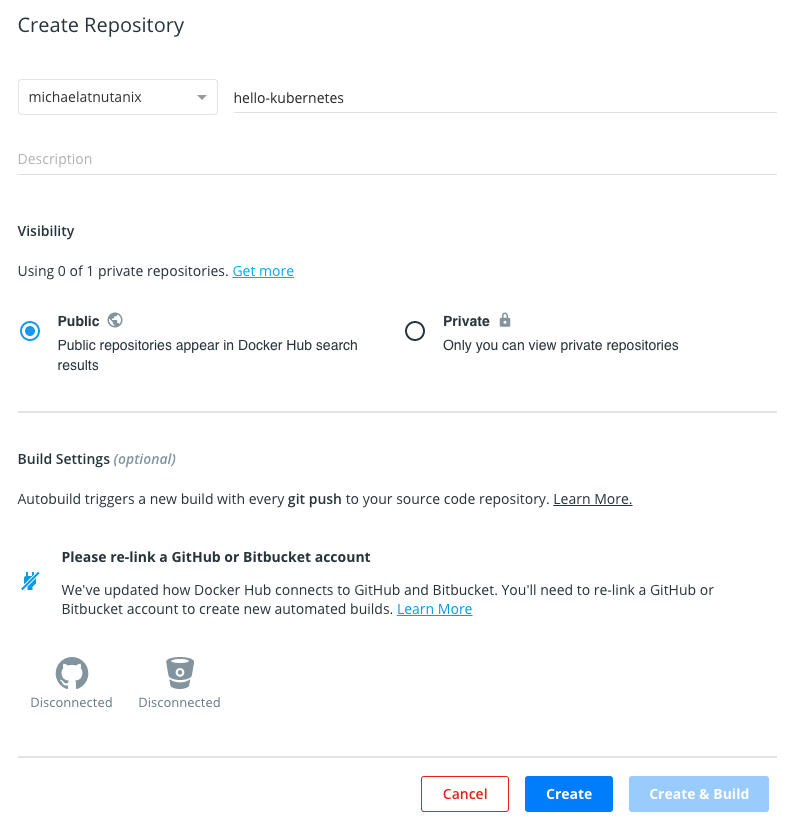
Name the repository hello-kubernetes, give it a description of your choice, leave all other fields as default (be sure to leave the repo as Public), and click Create.
Jenkins Credentials Creation
The first step of our Jenkins Setup is to add our various credentials to Jenkins’ credential store, which gives Jenkins the ability to authenticate to other pieces of our pipeline. We’ll first add our DockerHub credentials, which allows Jenkins to push images. TODO: Validate this statement. In many environments, you would also need to add git credentials for Jenkins to be able to read the repository, however in this particular environment, our Gitea server has our git repository marked as public, so no authentication is necessary to read the repo. Lastly, we’ll add our Karbon kubeconfig file to allow Jenkins to deploy our application directly onto our Kubernetes cluster.
Log in to your Jenkins server with the credentials you created earlier (you may need to refresh your browser page due to the Jenkins reboot in a previous section).
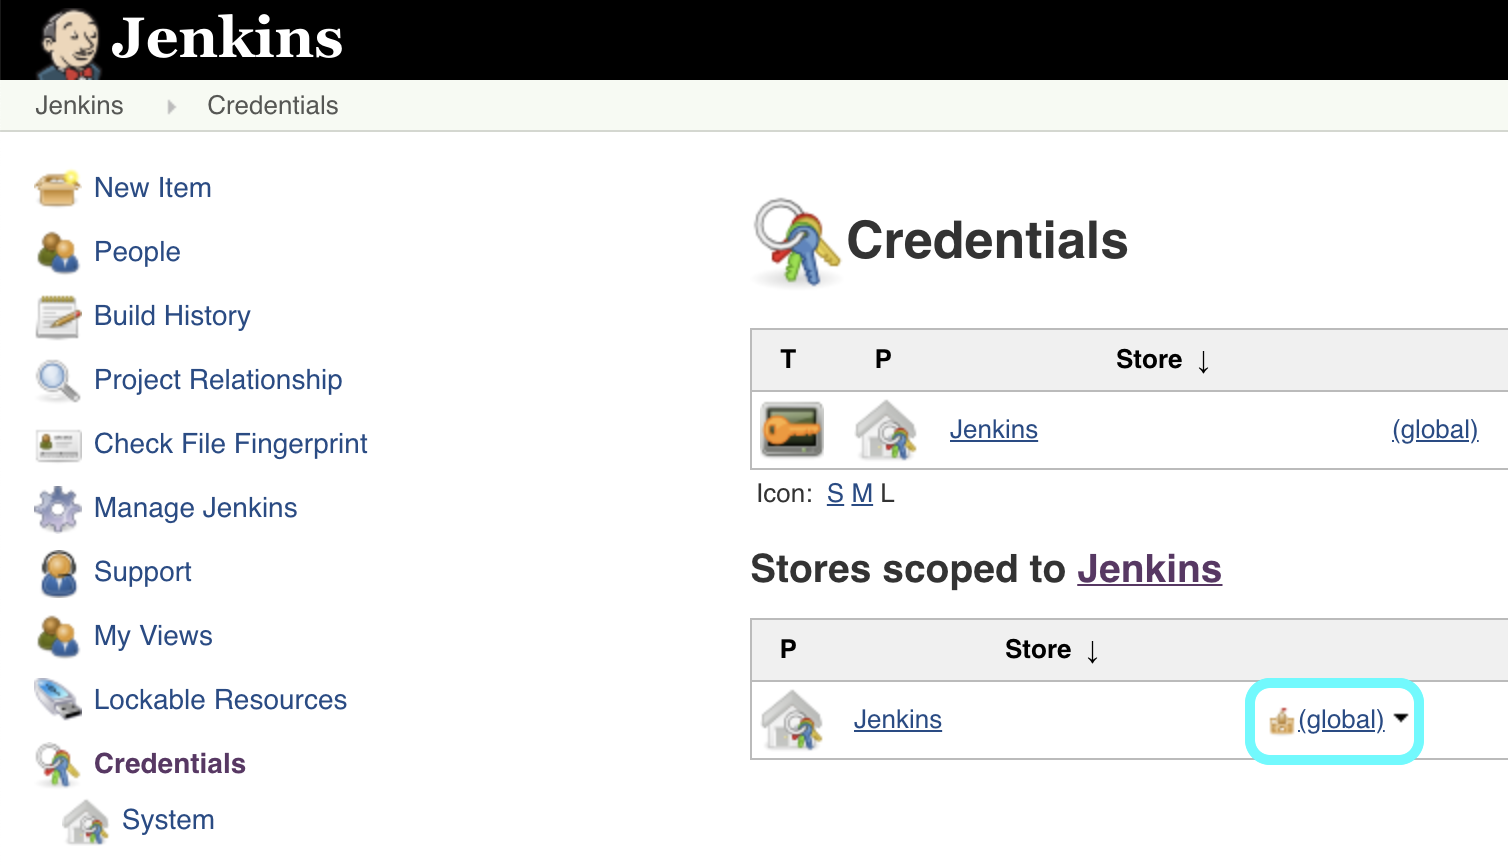
In the Jenkins UI, select Credentials along the left, and then in the Stores scoped to Jenkins section, select the global domain.
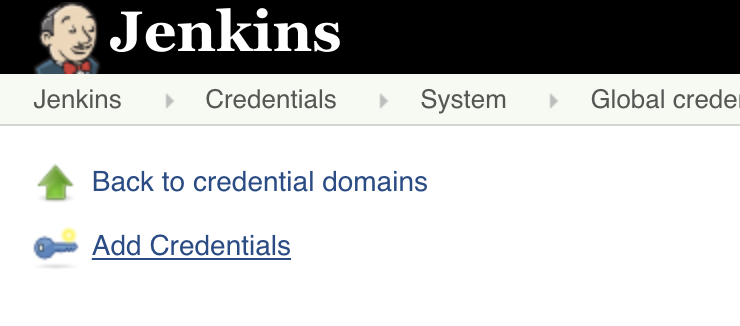
Click Add Credentials along the left column.
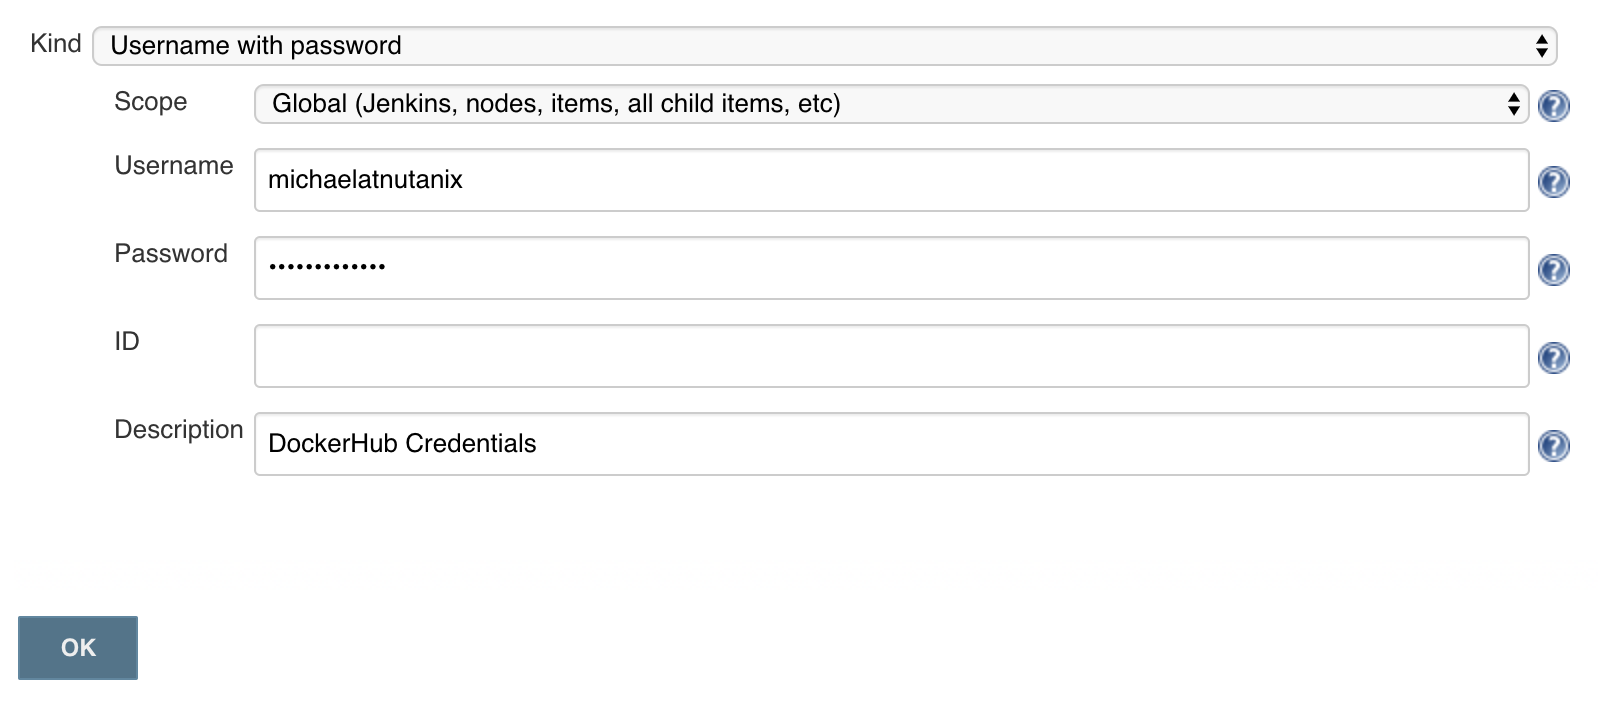
Fill in the following fields to add your DockerHube credentials, and click OK.
Kind - leave as default (Username with password)
Scope - leave as default (Global)
Username - your DockerHub username (not your email)
Password - your DockerHub password
ID - leave blank
Description - DockerHub Credentials
Lastly, we’ll need to add our kubeconfig file as a credential to allow Jenkins to deploy our updated application onto our Kubernetes cluster. In our Workstation CLI, run the following commands to create a Kubernetes Service Account jenkins, and then create a Role Binding which maps our Service Account the the built-in admin role (each individual command starts with a “$”, they should be run one at a time, and do not include the “$” in the command).
$ cd ~/
$ kubectl create serviceaccount jenkins
$ cat << EOF > jenkins-rb.yaml
apiVersion: rbac.authorization.k8s.io/v1
kind: RoleBinding
metadata:
  namespace: default
  name: jenkins-rolebinding
roleRef:
  apiGroup: rbac.authorization.k8s.io
  kind: ClusterRole
  name: admin
subjects:
- kind: ServiceAccount
  name: jenkins
  namespace: default
EOF
$ kubectl create -f jenkins-rb.yaml
Note
We’re limiting our jenkins Service Account to a single Kubernetes namespace (default).
We’ll now replace the token in our existing kubeconfig with the token of our newly generated Service Account, which we can do in one line with the following command.
sed "s/ token:.*/ token: `kubectl get secrets $(kubectl get serviceaccounts jenkins -o jsonpath={.secrets[].name}) -o jsonpath={.data.token} | base64 --decode`/g" ~/.kube/config
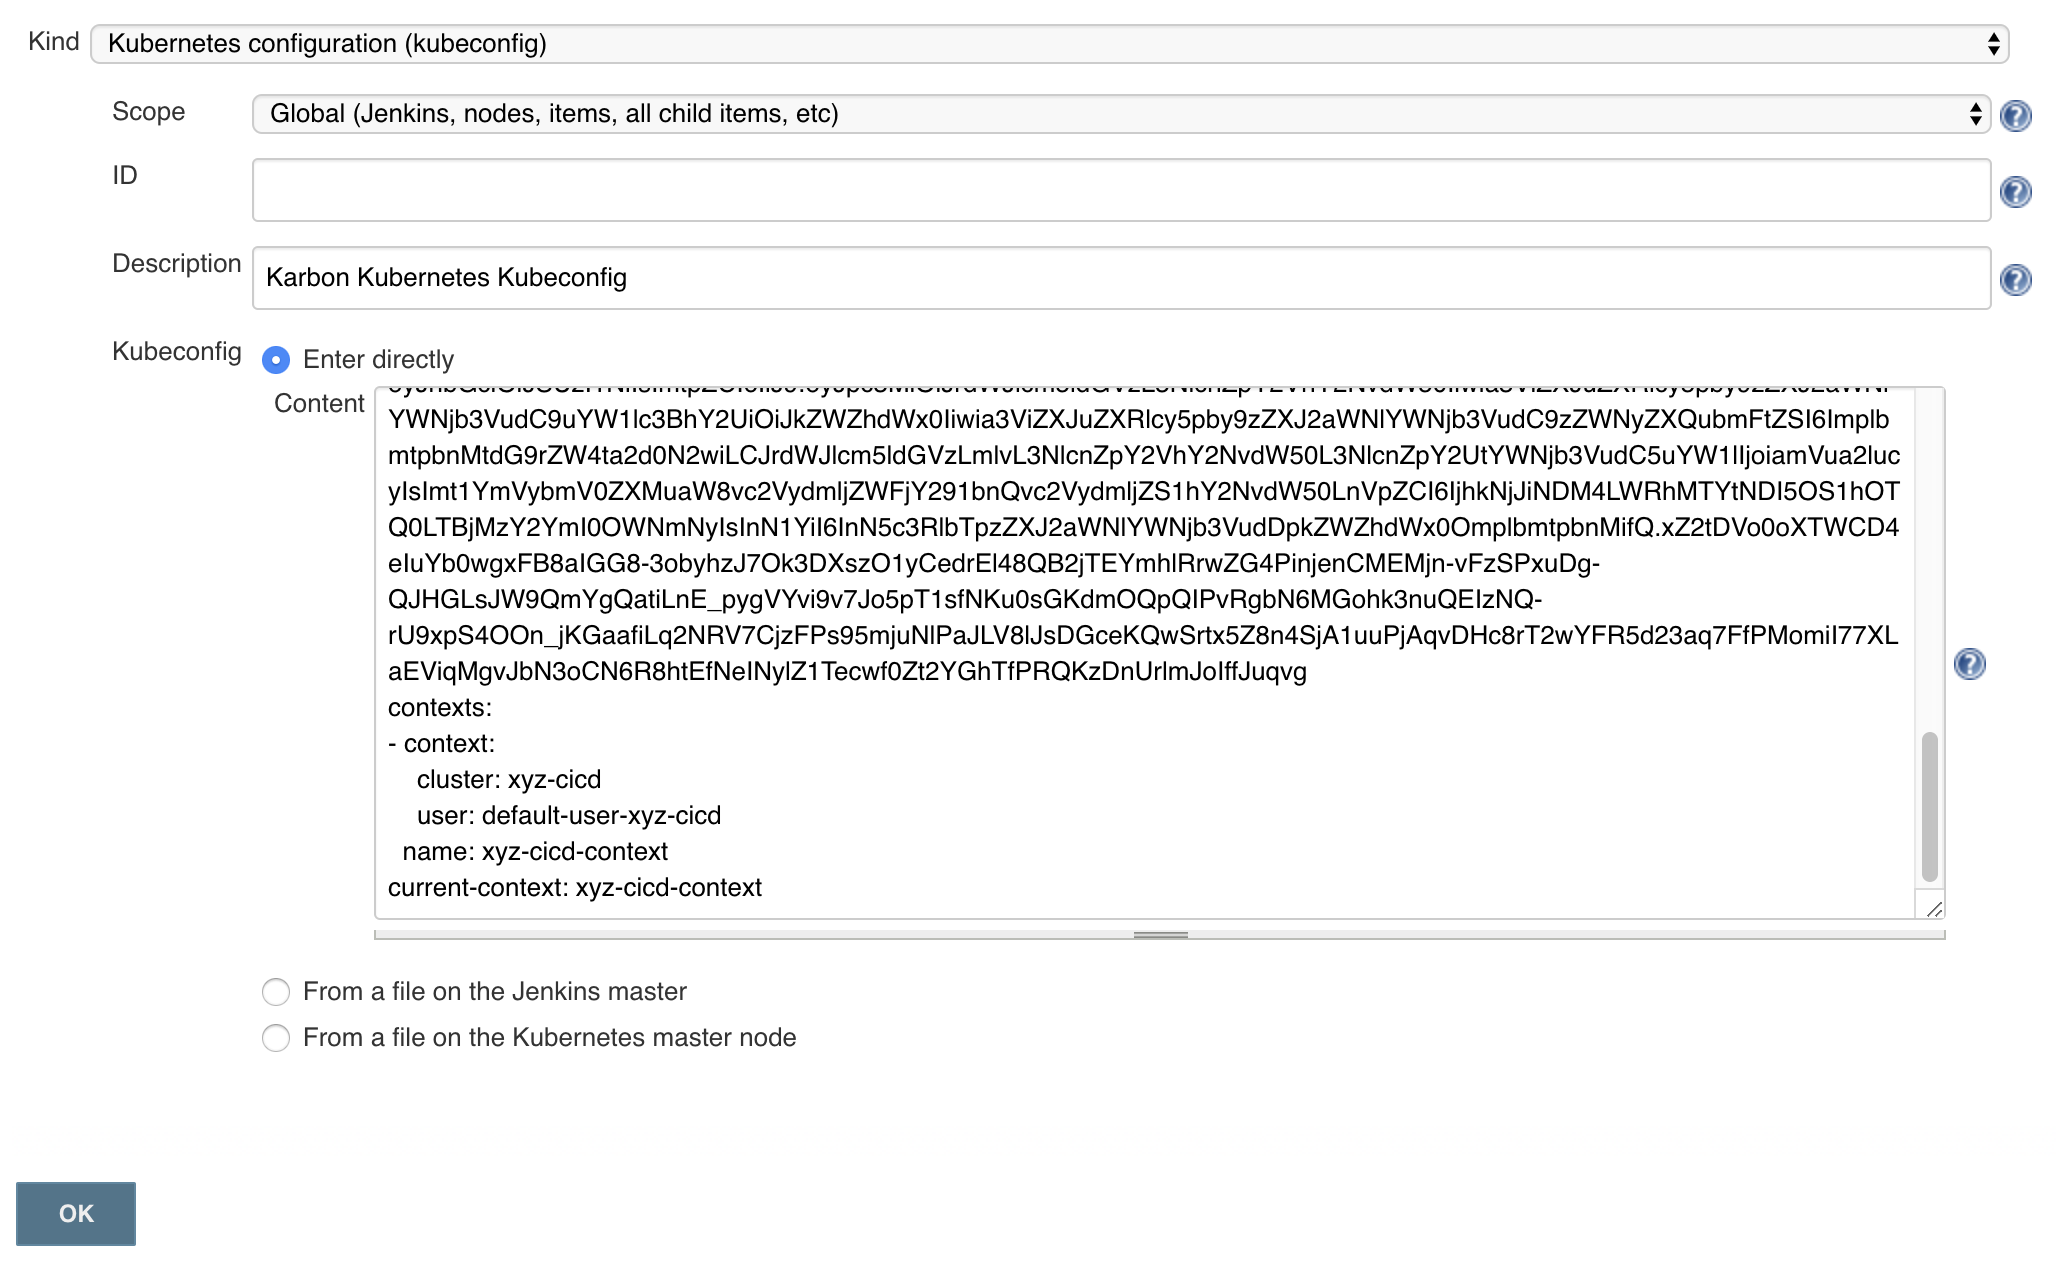
Copy the long output of that command into your buffer, and head back into the Jenkins UI. Select Add Credentials again, fill in the following fields, and click OK.
Kind - Kubernetes configuration (kubeconfig)
Scope - leave as default (Global)
ID - leave blank
Description - Karbon Kubernetes Kubeconfig
Kubeconfig - select the Enter directly radio button
Content - paste in the output from the previous step
Jenkins Pipeline Creation
It’s now time to create our Jenkins Pipeline. The pipeline is the crux of this entire CI/CD workload: our Gitea webhook calls this pipeline, which is then responsible for building our docker container, uploading the container to DockerHub, and deploying the new container to our Karbon Kubernetes cluster.
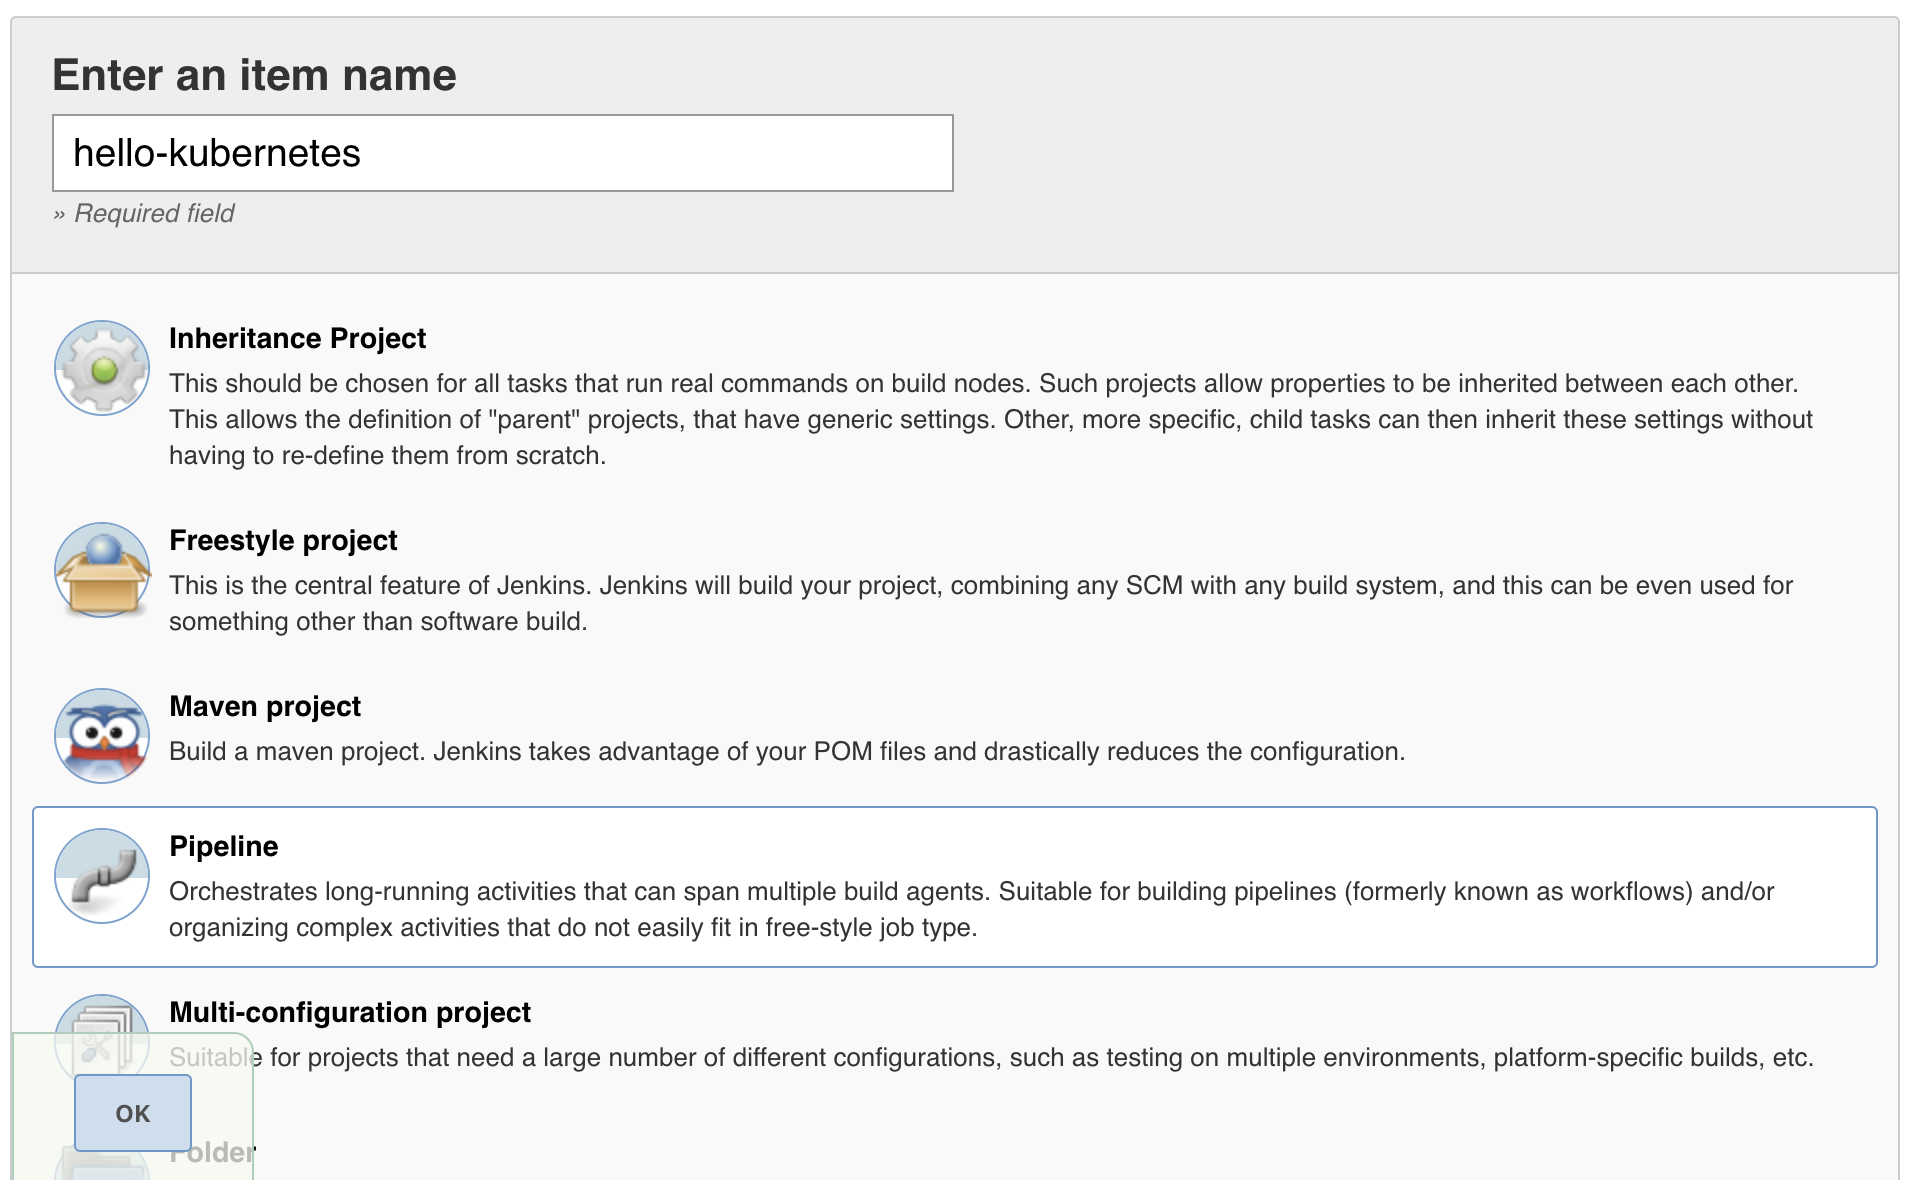
In the Jenkins UI, click New Item in the upper left, enter hello-kubernetes as the name, select Pipeline, and click OK.
Under the General section, give your pipeline a description, and leave all checkboxes as unselected.
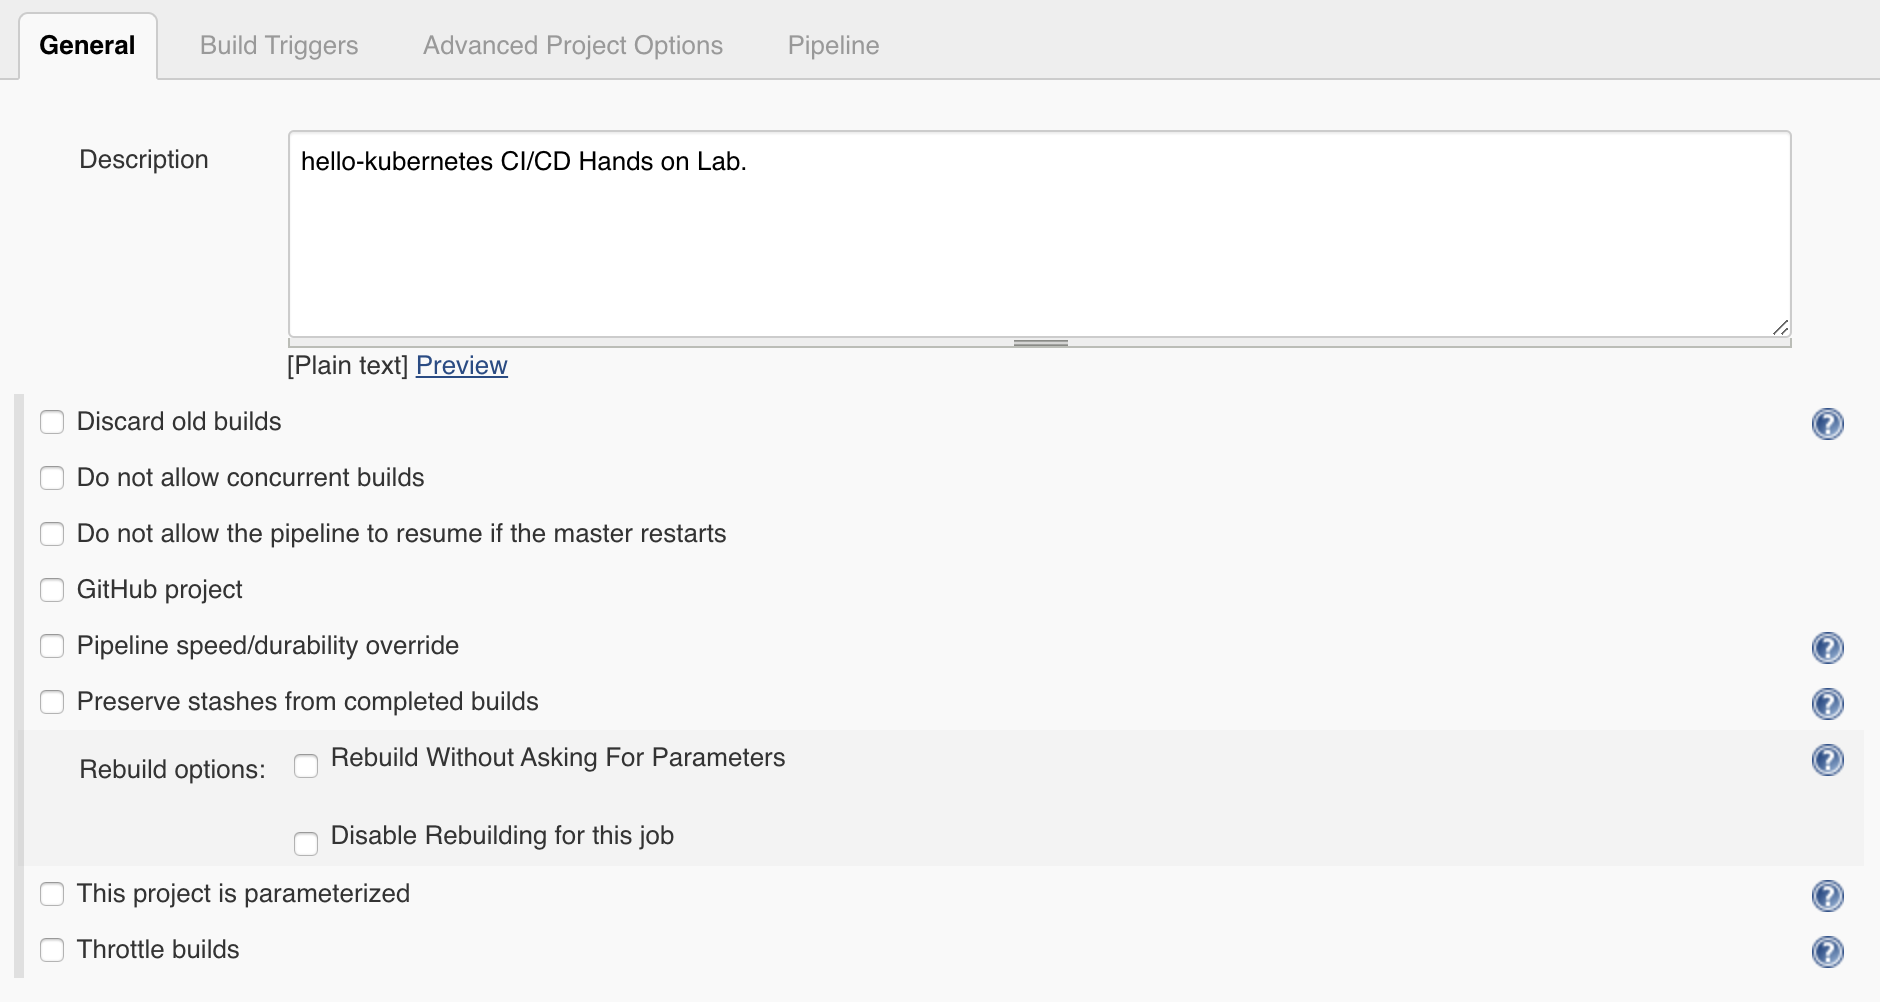
Under the Build Triggers section, select Poll SCM, and leave the Schedule blank. Without a schedule, Jenkins will only run this pipeline from a Webhook, which is desired for this setup. Leave all other checkboxes as unselected.

Skip the Advanced Project Options section.
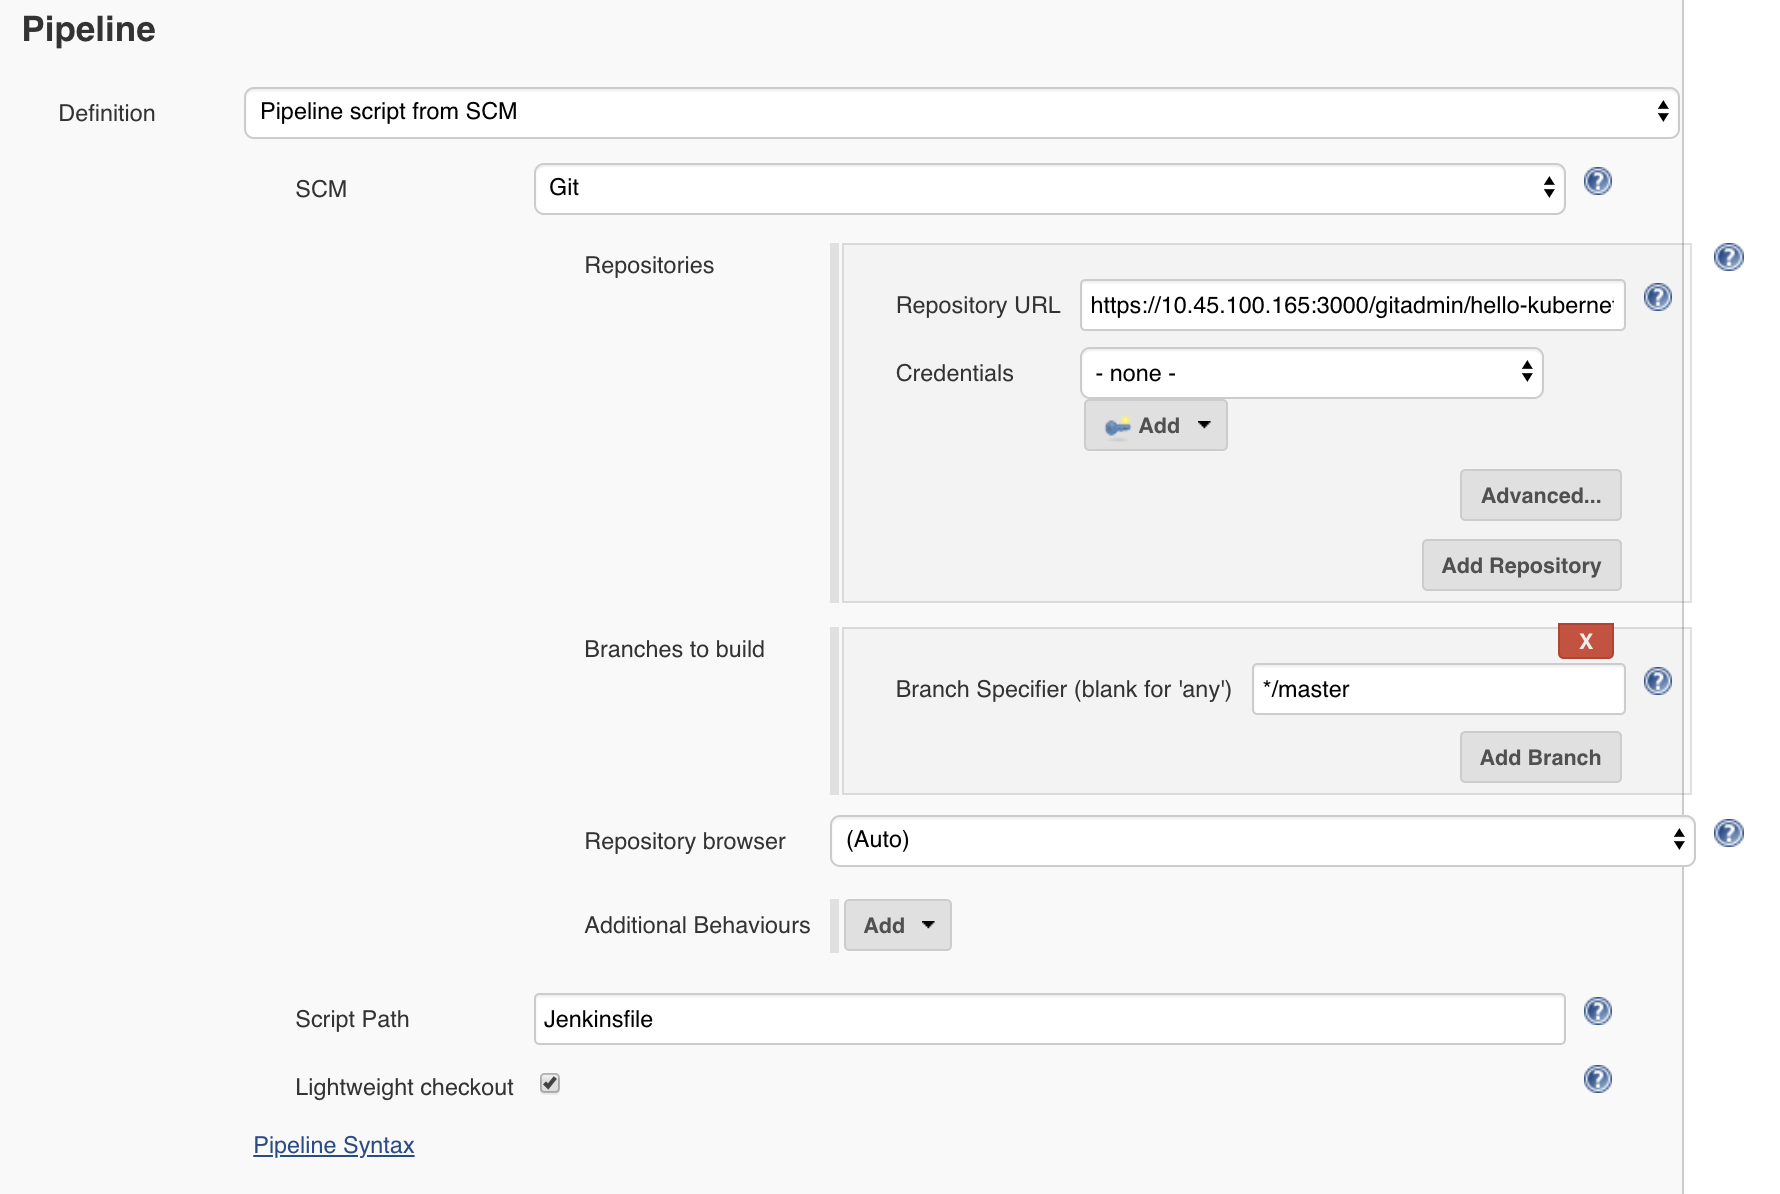
Under the Pipeline section, fill in the following fields.
Definition - Change the dropdown to Pipeline script from SCM, which allows us to store our Jenkinsfile in the same source code repository as our application
SCM - Change the dropdown to git
Repositories
Repository URL - Fill in your Gitea repository URL, which can be found by running echo $GIT_REPO_URL from your Workstation, and should be of the format https://<gitea-ip>:3000/gitadmin/hello-kubernetes
Credentials - Leave as default none (if your git repository is private, you would need to specify your git credentials here)
Branches to build - Leave all as default
Repository browser - Leave as default of Auto
Additional Behaviours - Leave default of none
Script Path - Leave as default of Jenkinsfile
Lightweight checkout - Leave as default checked
Click Save to save the pipeline configuration.
Jenkins Pipeline Snippet Generator
We’ll now use the Jenkins Pipeline Syntax Snippet Generator to assist us when we go to create our Jenkinsfile in the upcoming section. Since the result of this section is a text string which will be included in our Jenkinsfile (and will be provided in the next section), it’s not required to perform the same steps on your system. However, it is good practice as it’s something you’ll likely need to do if you expand upon this example.
Within your pipeline homepage, click the Pipeline Syntax button in the left column, and fill out the following fields.
Sample Step - change the dropdown to kubernetesDeploy: Deploy to Kubernetes
Kubeconfig - select the Kubeconfig that was added in a previous section
Config Files - enter hello-kubernetes-dep.yaml (we have not created this file yet, but will in an upcoming section)
Leave all other options as defaults
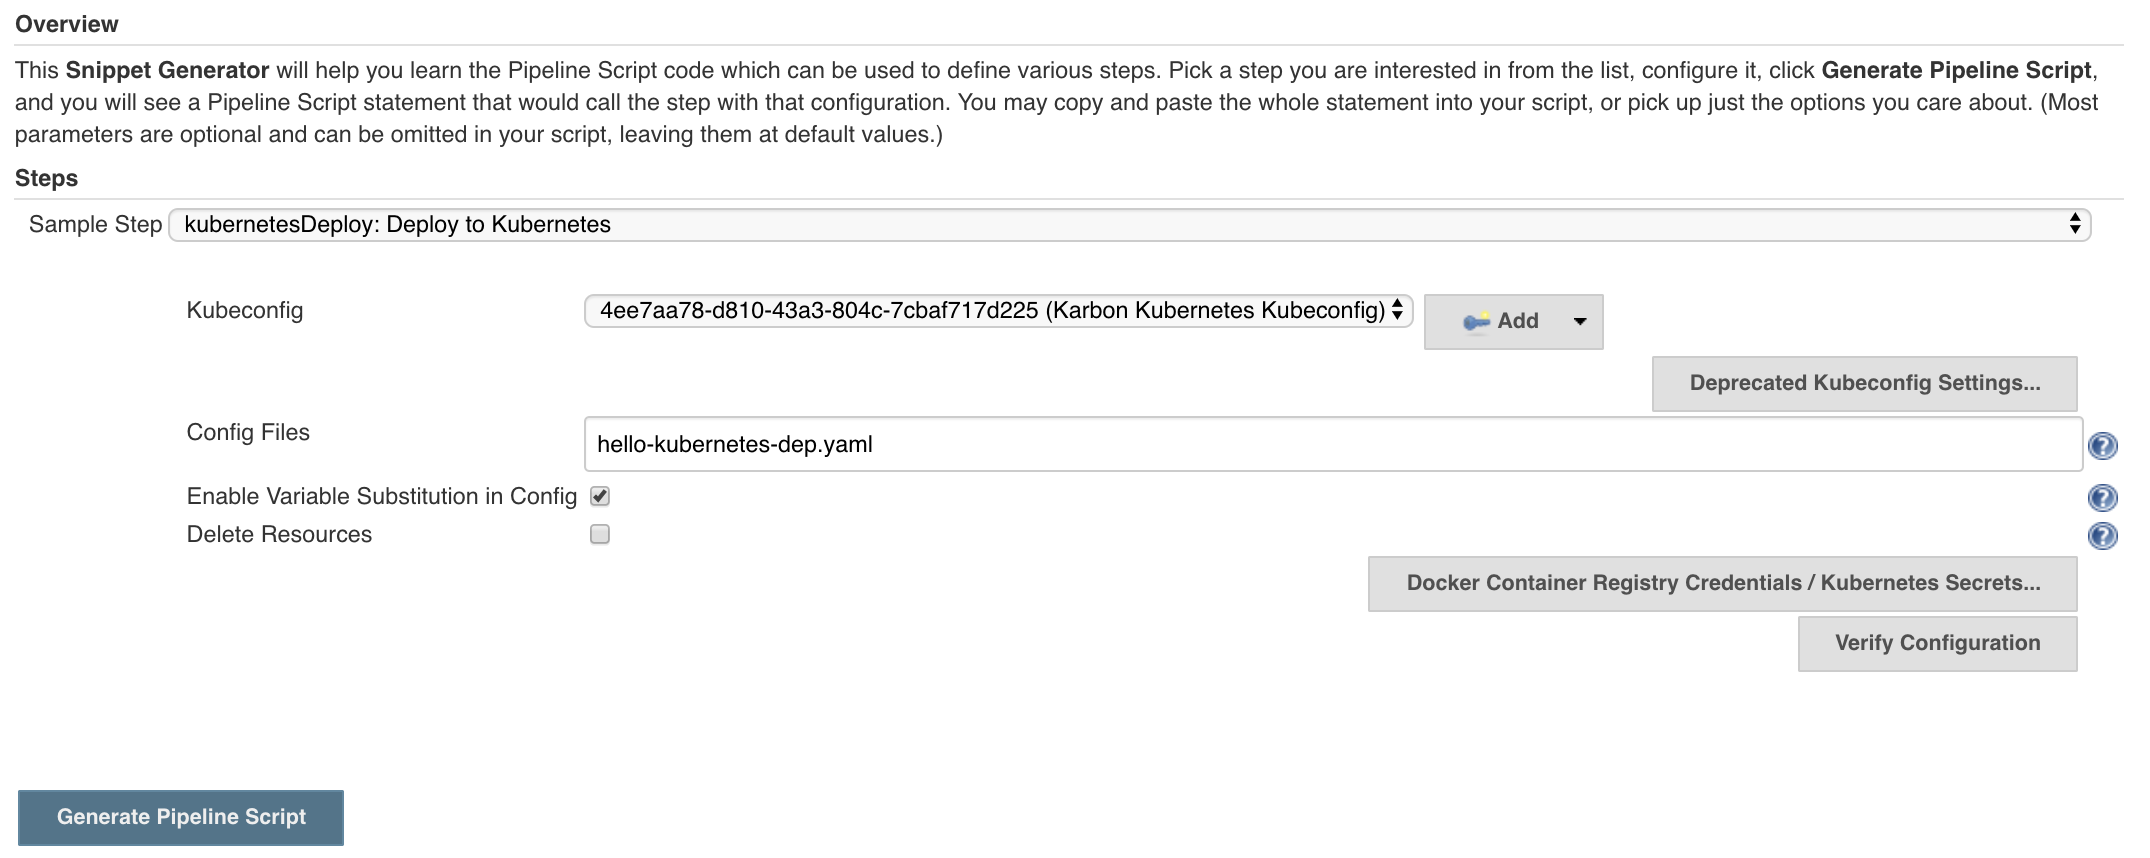
Click Generate Pipeline Script. In the text box that appears, you should see a string like this, however your kubeconfigId will be different. When this string is placed in a Jenkinsfile, it instructs Jenkins to deploy a certain configuration (hello-kubernetes-dep.yaml) against a particular Kubernetes cluster (in our case the cluster config is stored in the kubeconfig credential we created in an earlier section).
kubernetesDeploy configs: 'hello-kubernetes-dep.yaml', kubeConfig: [path: ''], kubeconfigId: '4ee7aa78-d810-43a3-804c-7cbaf717d225', secretName: '', ssh: [sshCredentialsId: '*', sshServer: ''], textCredentials: [certificateAuthorityData: '', clientCertificateData: '', clientKeyData: '', serverUrl: 'https://']
Note
The serverUrl field does not need an actual URL as that information is stored in our Kubeconfig.
Optionally copy this script for later use.
Jenkinsfile and Yaml Creation
We’ll now create our Jenkinsfile, which is the script Jenkins uses to run our Pipeline, and our Kubernetes YAML, which is what defines our application. We’ll first grab some information from our Jenkins and DockerHub UIs, and then head over into our workstation to create our files.
In the Jenkins UI, click the Jenkins icon in the upper left to navigate home, and then select Credentials along the left column.
Take note of the ID column in the Credentials table. These values will be unique on every system, and your specific values are needed when we create our Jenkinsfile.
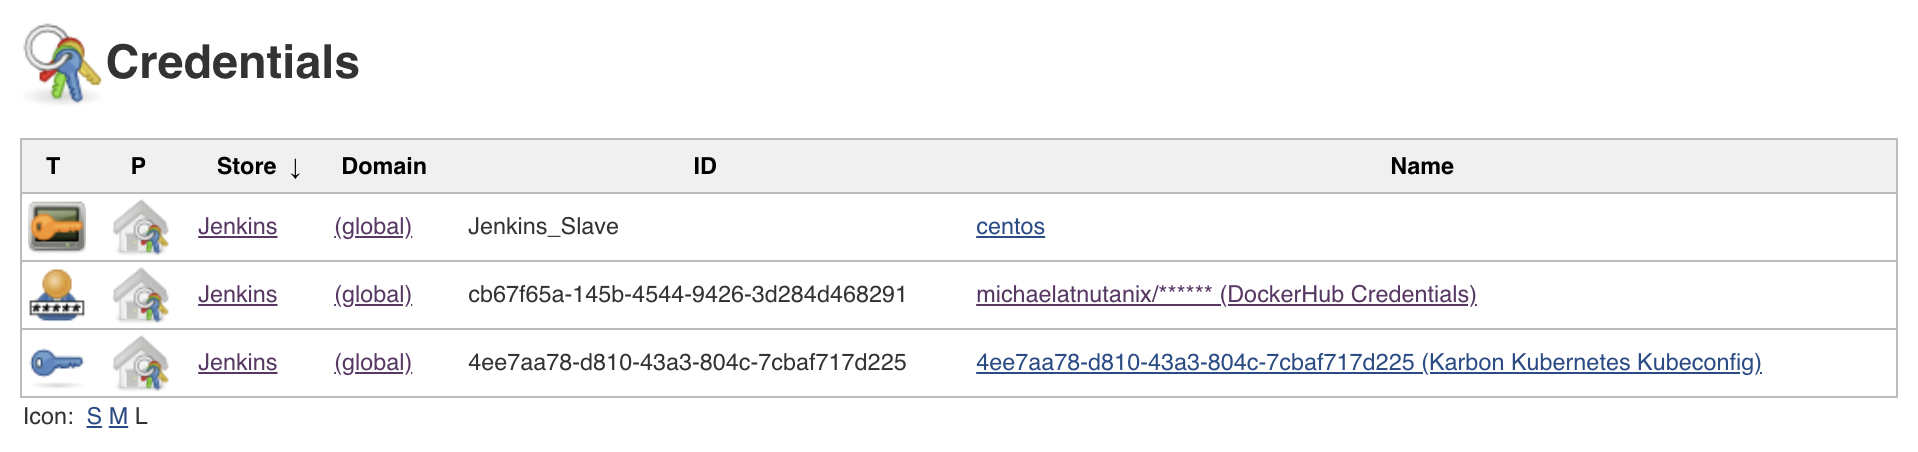
In your DockerHub UI, select your hello-kubernetes repository, and along the right side, take note of the docker push <your-username>/hello-kubernetes:tagname field. Your username will be needed in the next step when we create our Jenkinsfile.

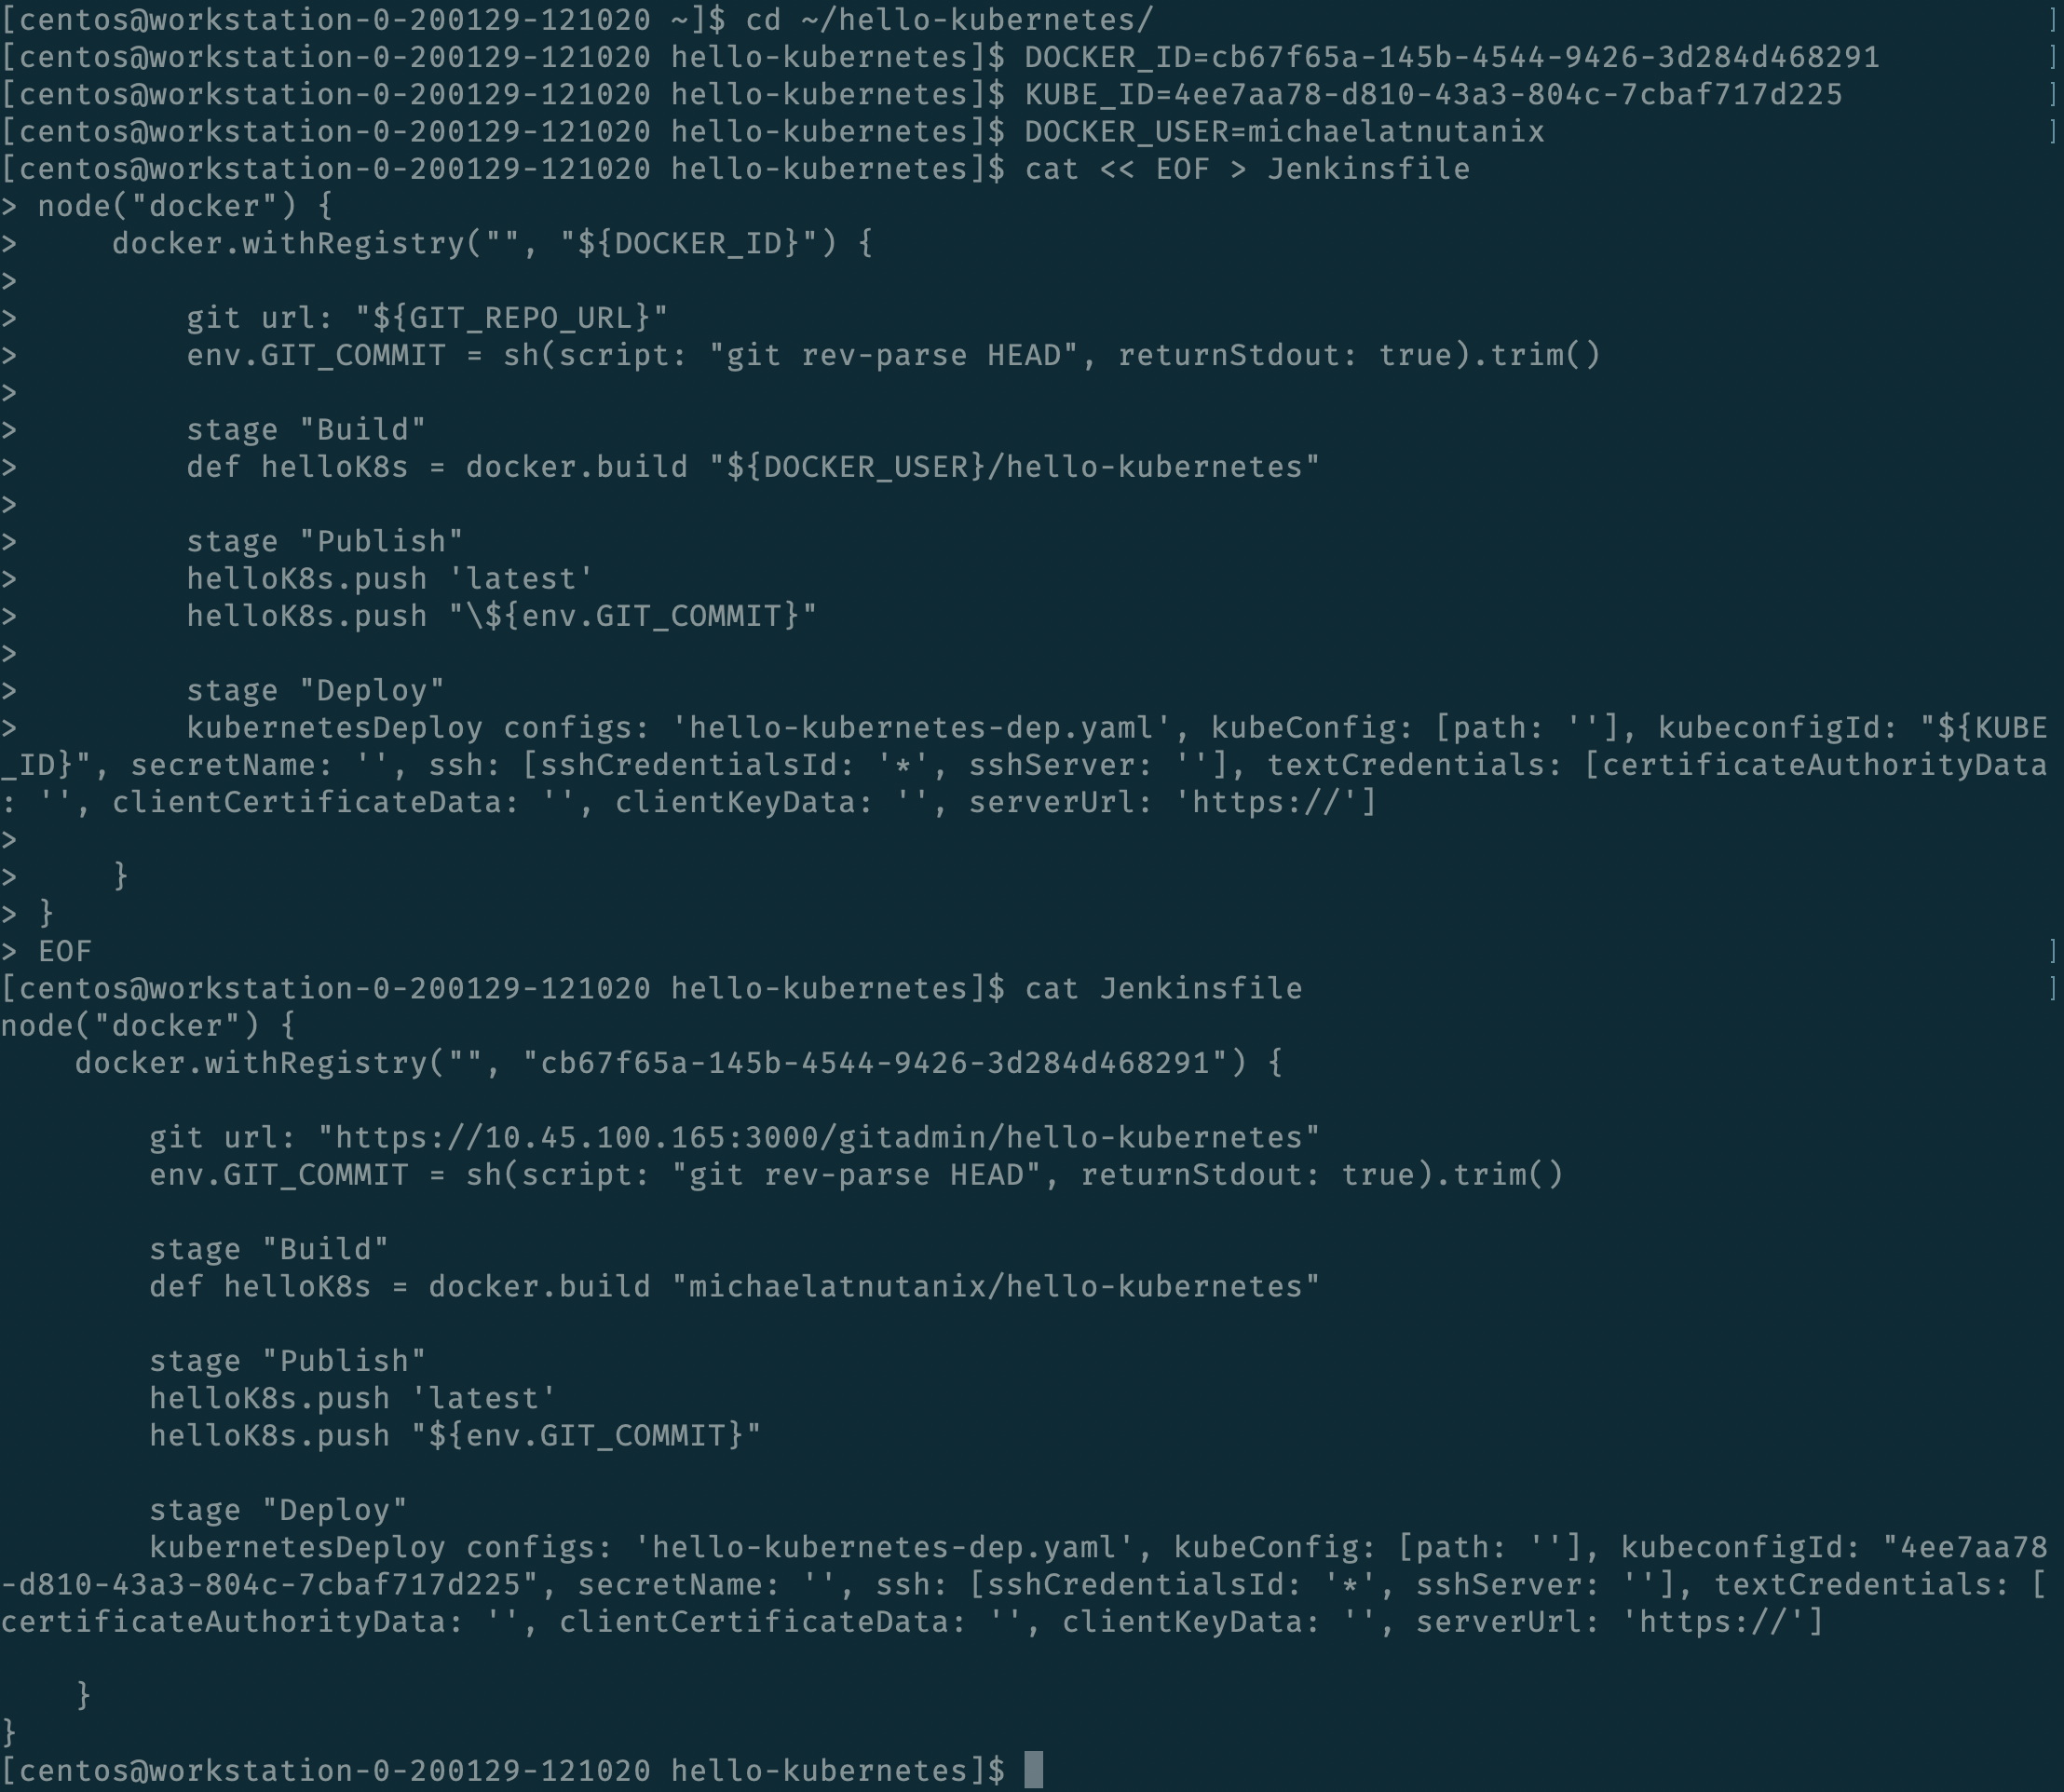
Head over into your Workstation SSH session, and run the following commands to create our Jenkinsfile, substituting your unique credential IDs in the second and third commands, and DockerHub username in the fourth (each individual command starts with a “$”, they should be run one at a time, and do not include the “$” in the command).
$ cd ~/hello-kubernetes/
$ DOCKER_ID=<your-dockerhub-cred-id>
$ KUBE_ID=<your-kubernetes-kubeconfig-id>
$ DOCKER_USER=<your-dockerhub-username>
$ cat << EOF > Jenkinsfile
node("docker") {
    docker.withRegistry("", "${DOCKER_ID}") {

        git url: "${GIT_REPO_URL}"
        env.GIT_COMMIT = sh(script: "git rev-parse HEAD", returnStdout: true).trim()

        stage "Build"
        def helloK8s = docker.build "${DOCKER_USER}/hello-kubernetes"

        stage "Publish"
        helloK8s.push 'latest'
        helloK8s.push "\${env.GIT_COMMIT}"

        stage "Deploy"
        kubernetesDeploy configs: 'hello-kubernetes-dep.yaml', kubeConfig: [path: ''], kubeconfigId: "${KUBE_ID}", secretName: '', ssh: [sshCredentialsId: '*', sshServer: ''], textCredentials: [certificateAuthorityData: '', clientCertificateData: '', clientKeyData: '', serverUrl: 'https://']

    }
}
EOF
$ cat Jenkinsfile
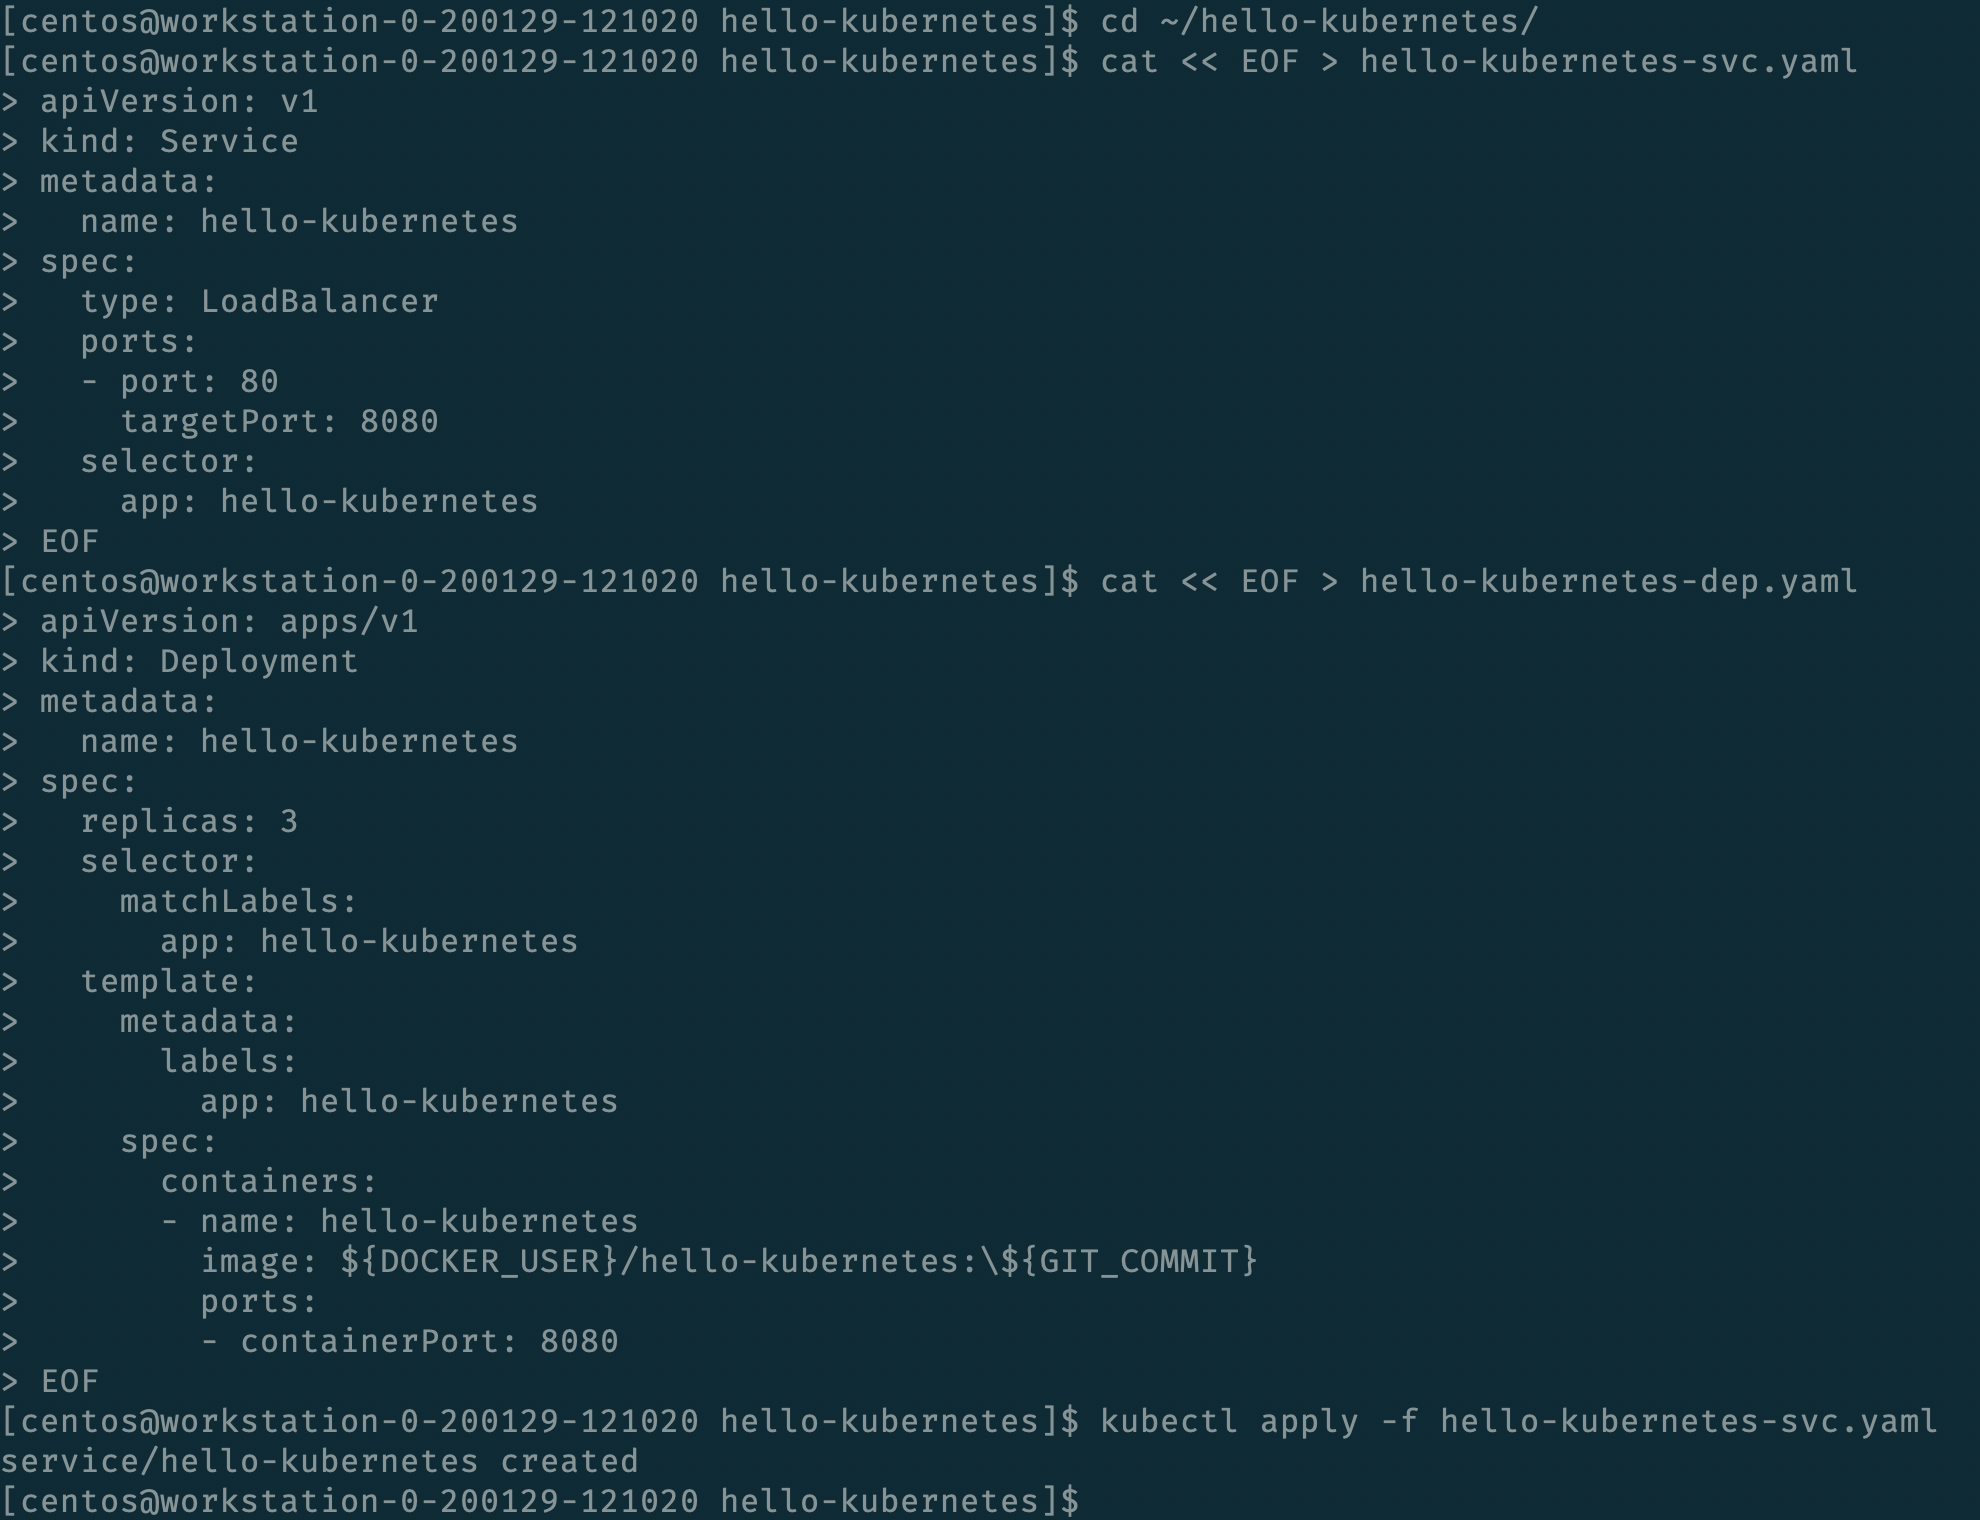
We’ll now create our two Yaml files which will define our application. The first is a Service to expose the application outside of the Karbon Kubernetes cluster, and the second is a Deployment which defines the application containers. We’ll create both files within the hello-kubernetes/ directory, but we’ll only apply the service yaml, as Jenkins will apply the deployment yaml (each individual command starts with a “$”, they should be run one at a time, and do not include the “$” in the command).
$ cd ~/hello-kubernetes/
$ cat << EOF > hello-kubernetes-svc.yaml
apiVersion: v1
kind: Service
metadata:
  name: hello-kubernetes
spec:
  type: LoadBalancer
  ports:
  - port: 80
    targetPort: 8080
  selector:
    app: hello-kubernetes
EOF
$ cat << EOF > hello-kubernetes-dep.yaml
apiVersion: apps/v1
kind: Deployment
metadata:
  name: hello-kubernetes
spec:
  replicas: 3
  selector:
    matchLabels:
      app: hello-kubernetes
  template:
    metadata:
      labels:
        app: hello-kubernetes
    spec:
      containers:
      - name: hello-kubernetes
        image: ${DOCKER_USER}/hello-kubernetes:\${GIT_COMMIT}
        ports:
        - containerPort: 8080
EOF
$ kubectl apply -f hello-kubernetes-svc.yaml
Note
Take note of the ${GIT_COMMIT} value in the deployment YAML. Jenkins will automatically substitute in the git commit ID, so each time the deployment is applied, the image tag is incremented, and the pods are re-deployed.
Now that our Service is deployed, and our local files are written, it’s time to commit and push changes to our repository with the following commands.
git add Jenkinsfile hello-kubernetes-dep.yaml hello-kubernetes-svc.yaml
git commit -m 'Added Jenkinsfile and Application yaml'
git push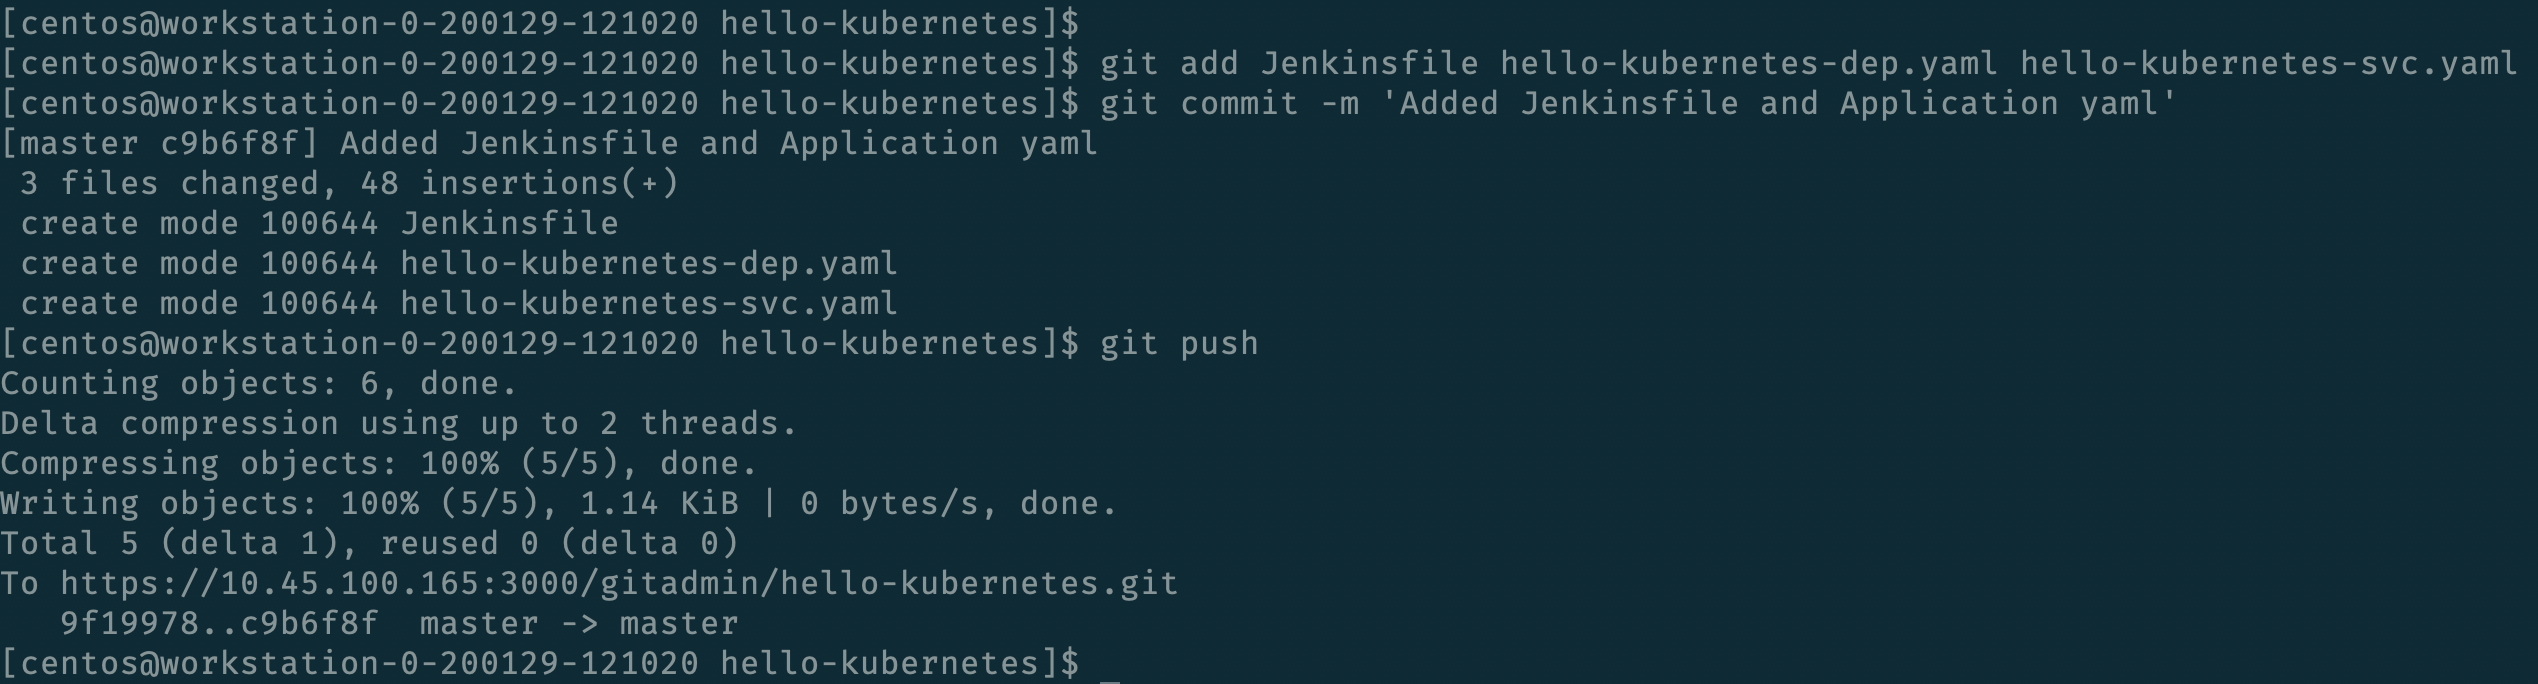
Manual Build and Application Deployment
Typically, running git push will trigger a Jenkins build through the GitHub webhook, however this will not work until we manually trigger a build. This is because the SCM details (including the project URL) in the Jenkins pipeline are not initialized until the first build, and without those details Jenkins is not able to determine the correlation between the webhook and the pipeline. Let’s manually kick off a build to get things started.
In the Jenkins UI, navigate to our hello-kubernetes Pipeline, and click the Build Now link in the left column.
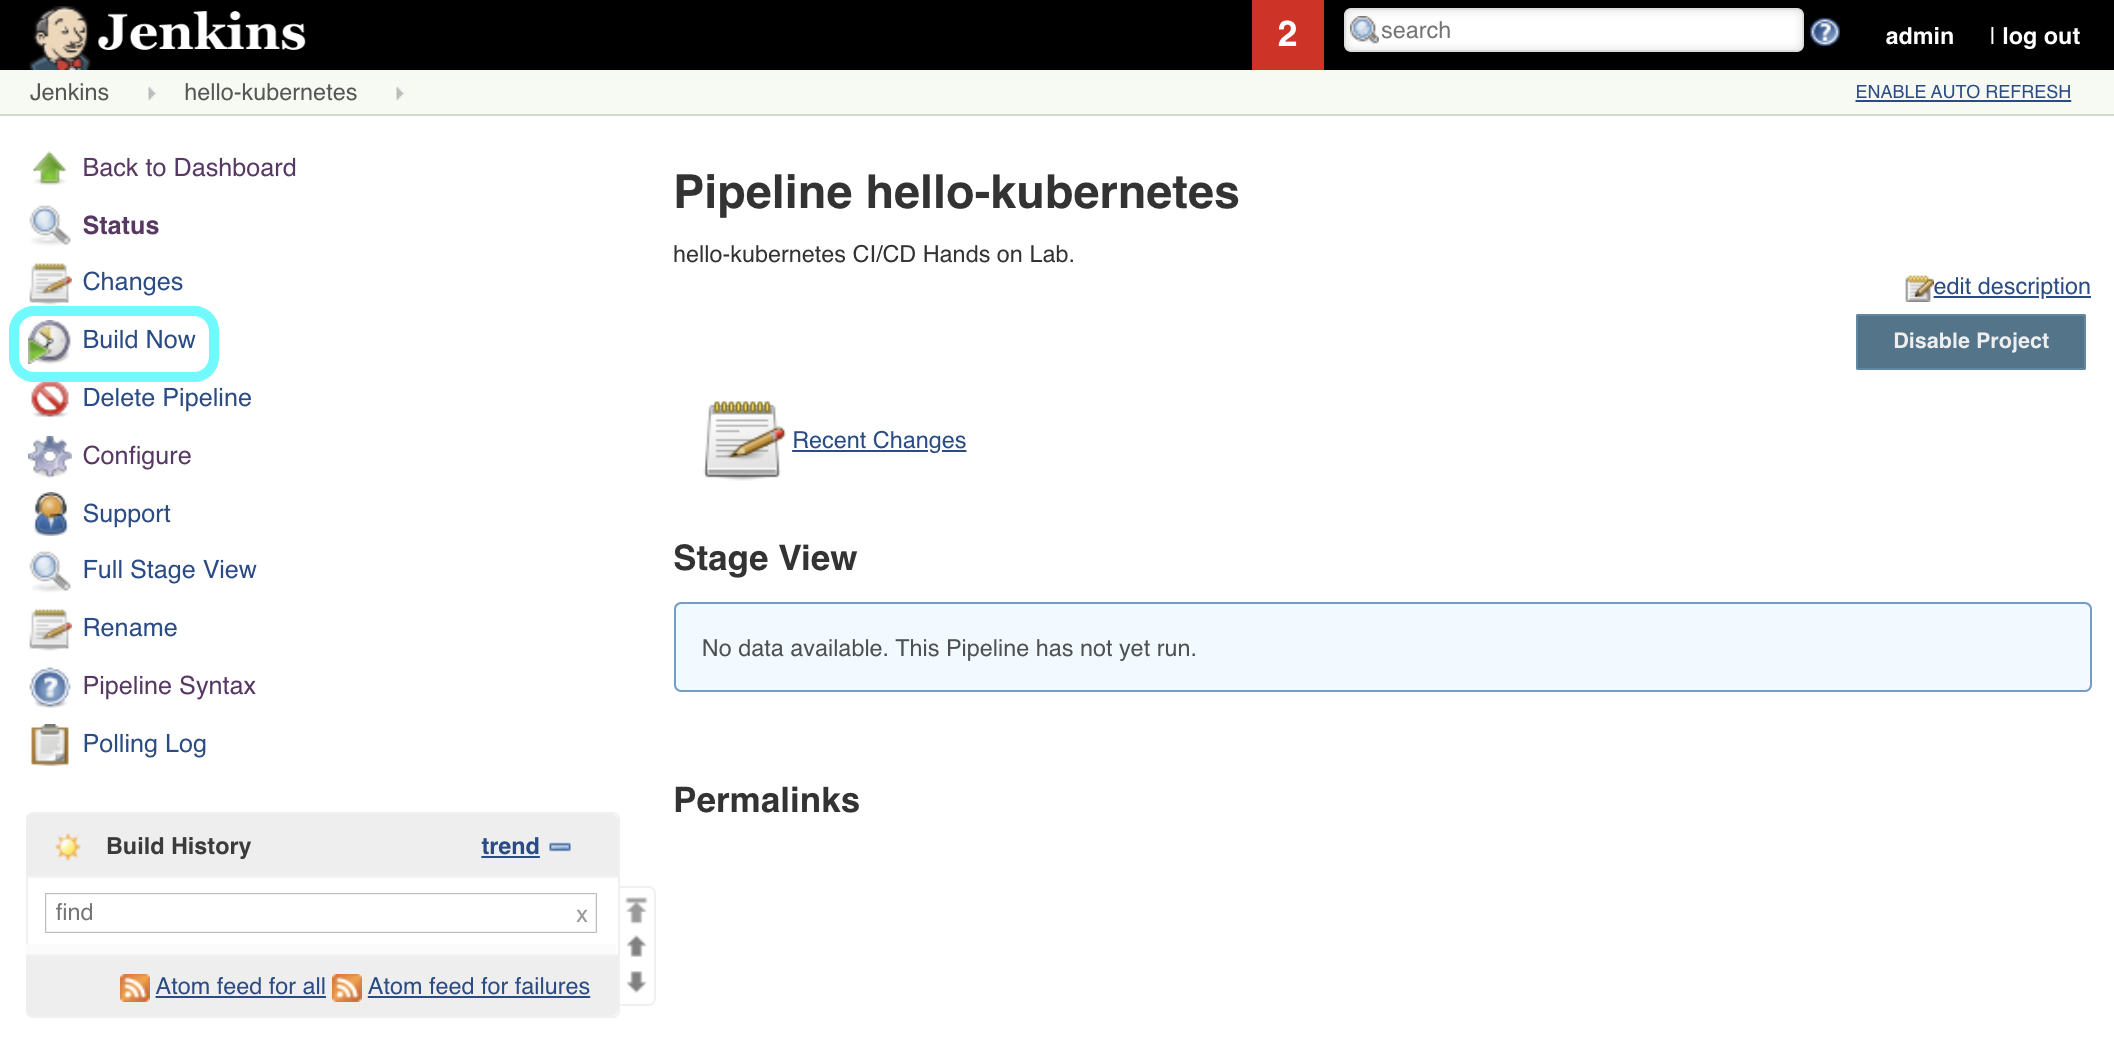
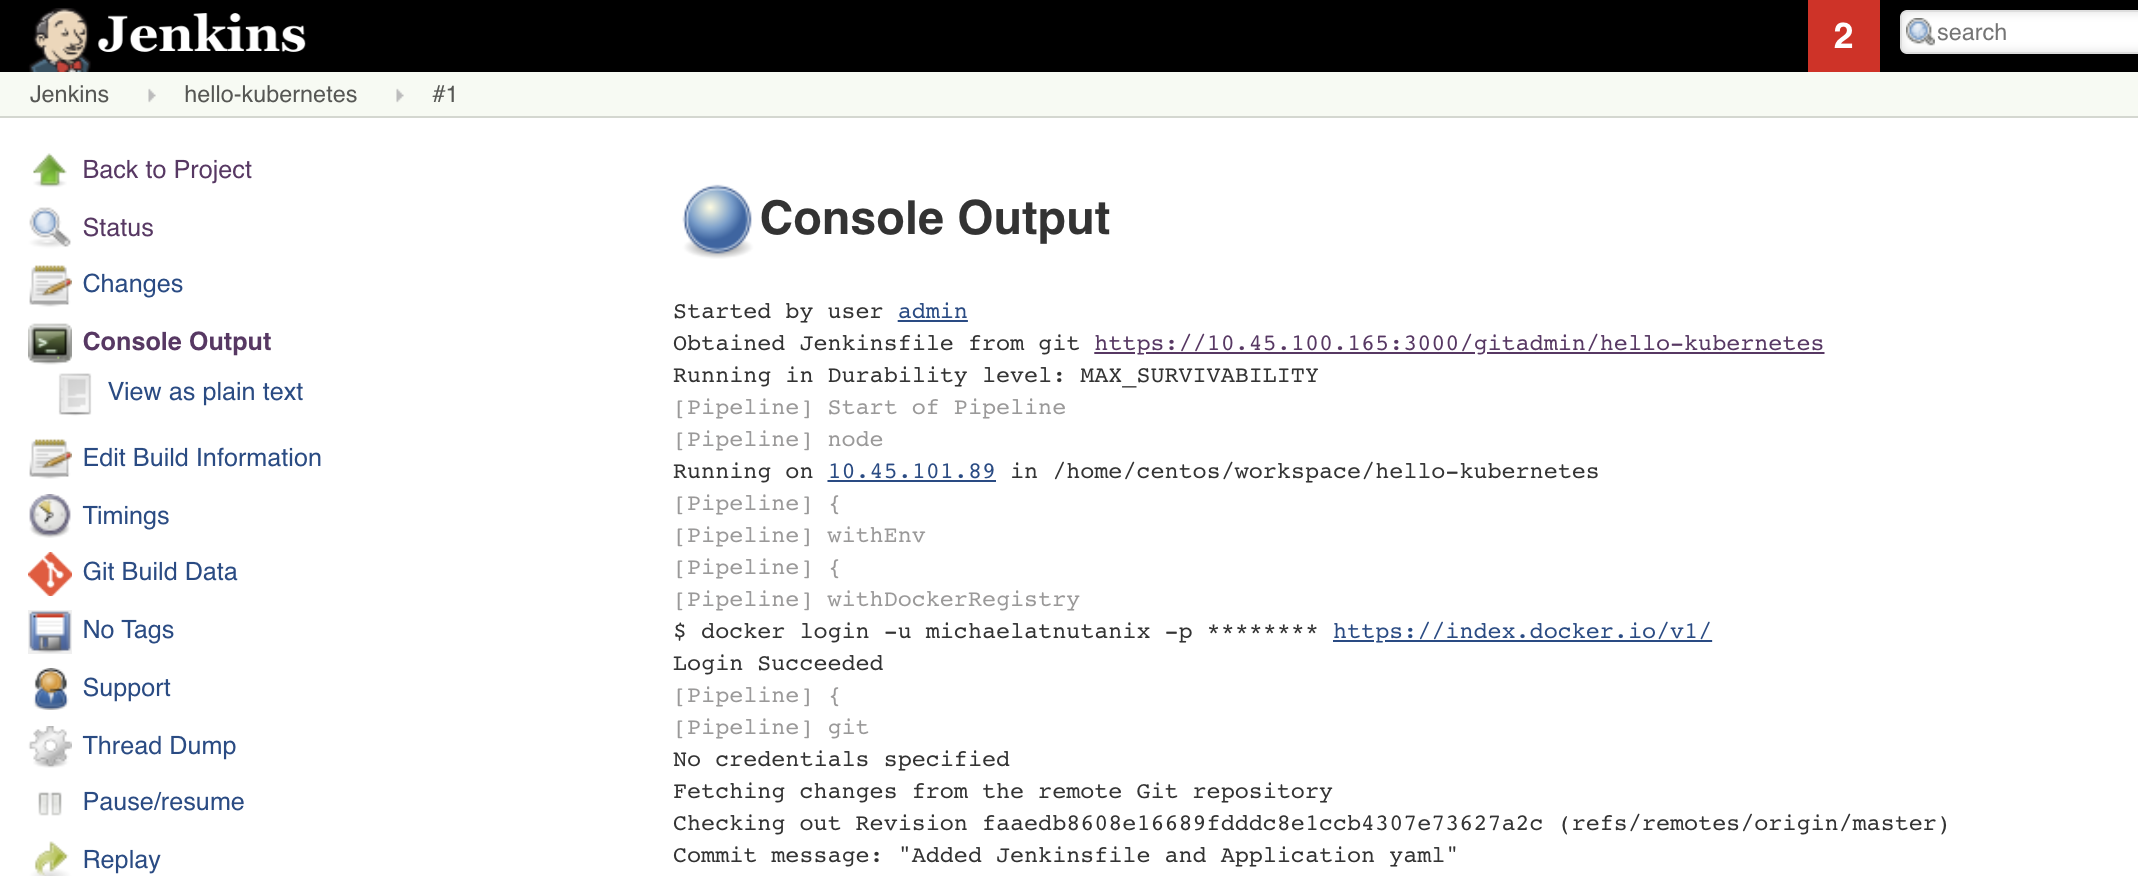
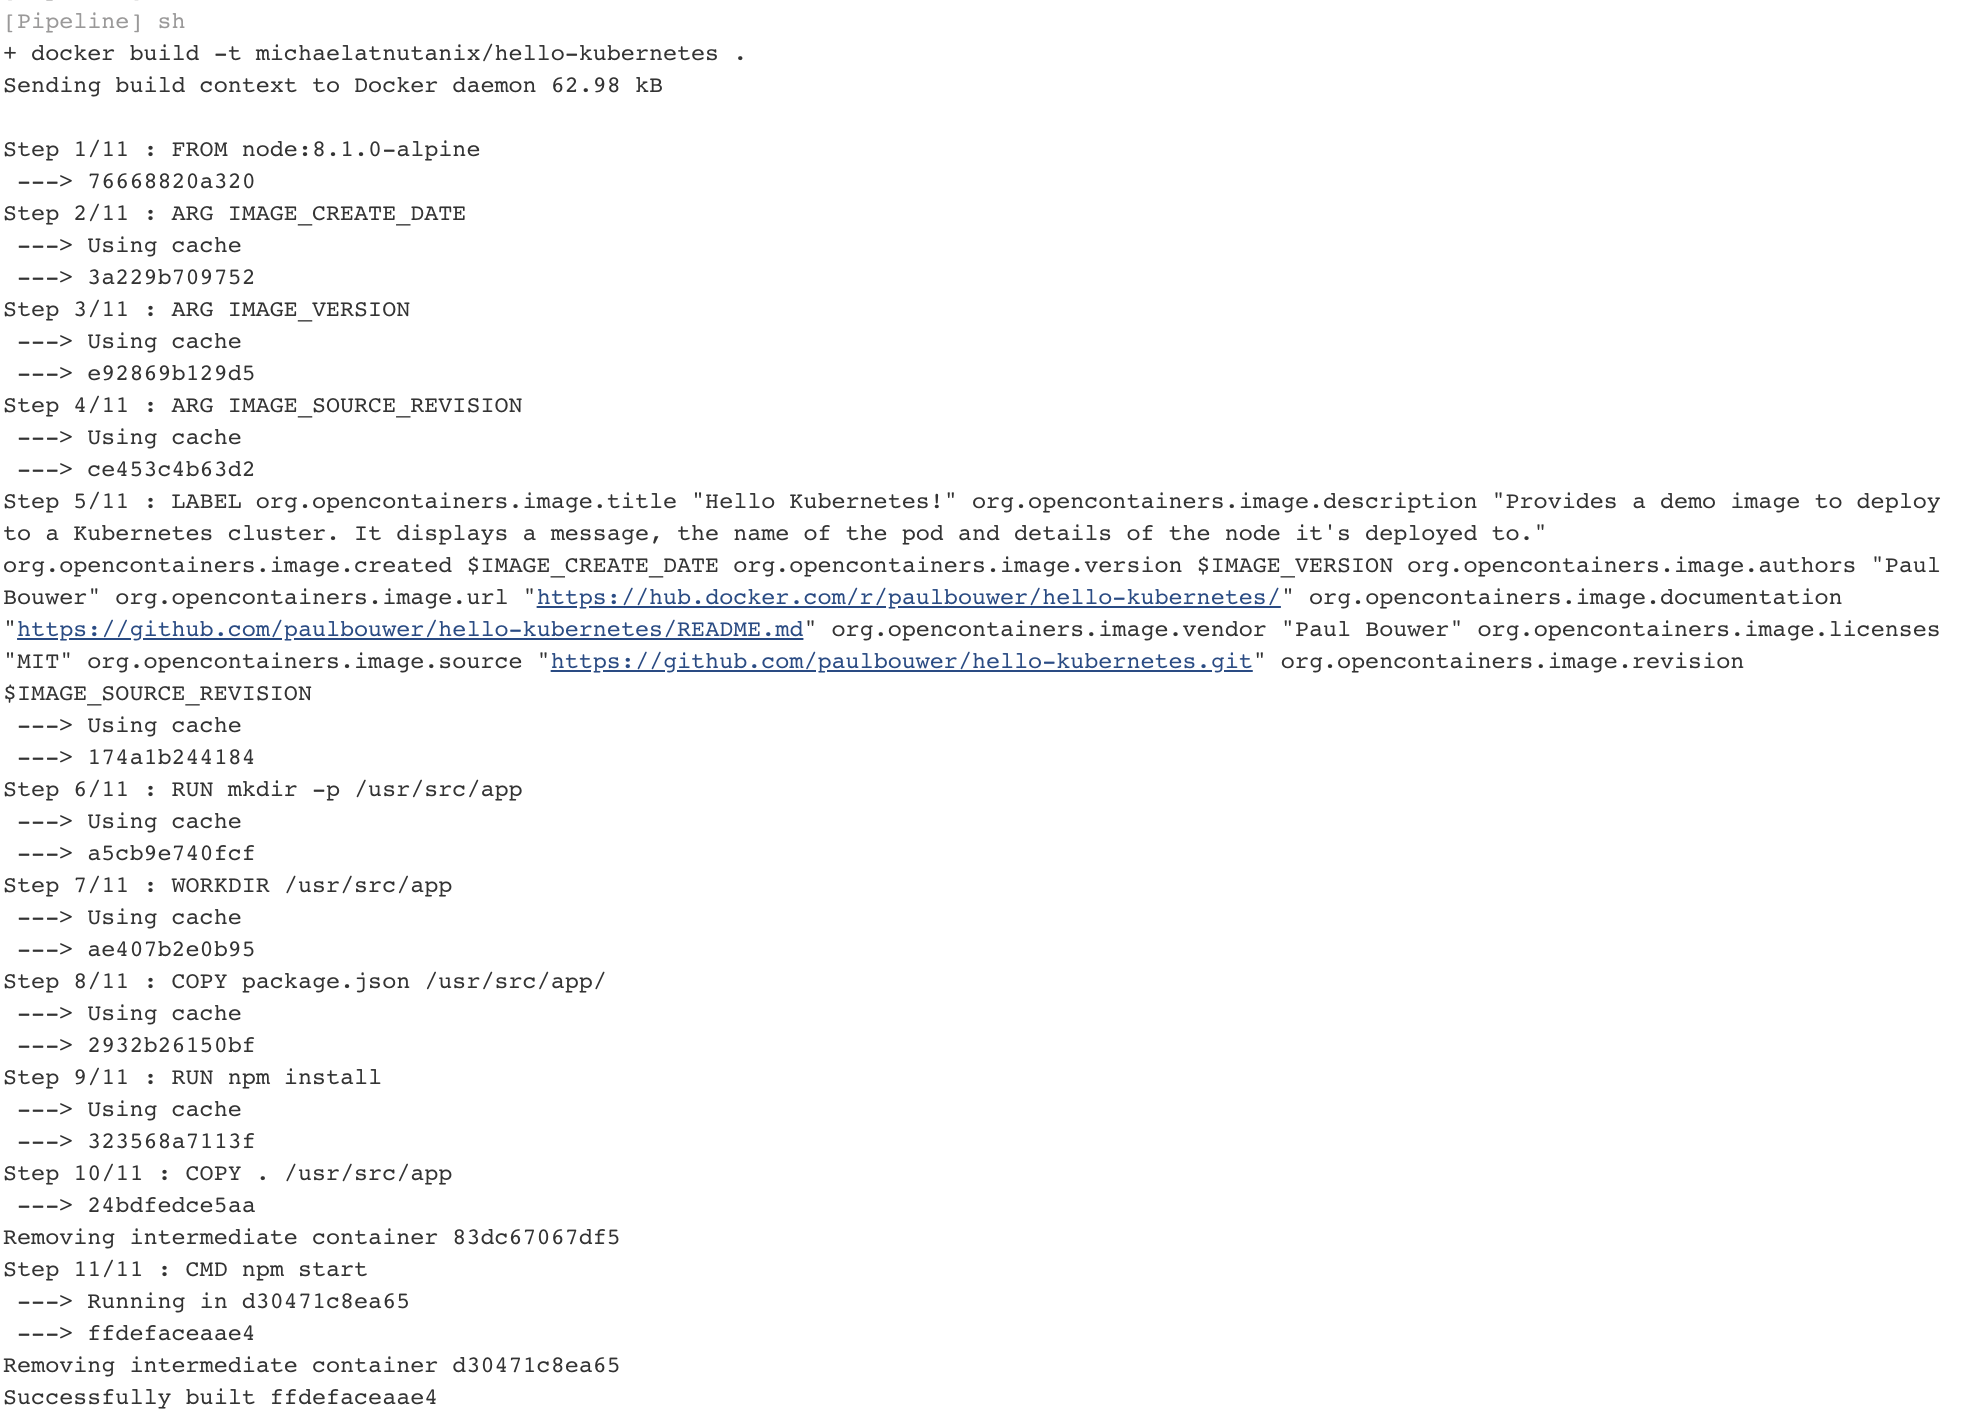
Build #1 should appear in the Build History section in the left column. Click the #1 link, and then select Console Output in the left column. This allows us to monitor the status of the Jenkins build. At the top of the build, we should see a successful login to DockerHub.
In the middle of our console output we should see the docker image being successfully built.
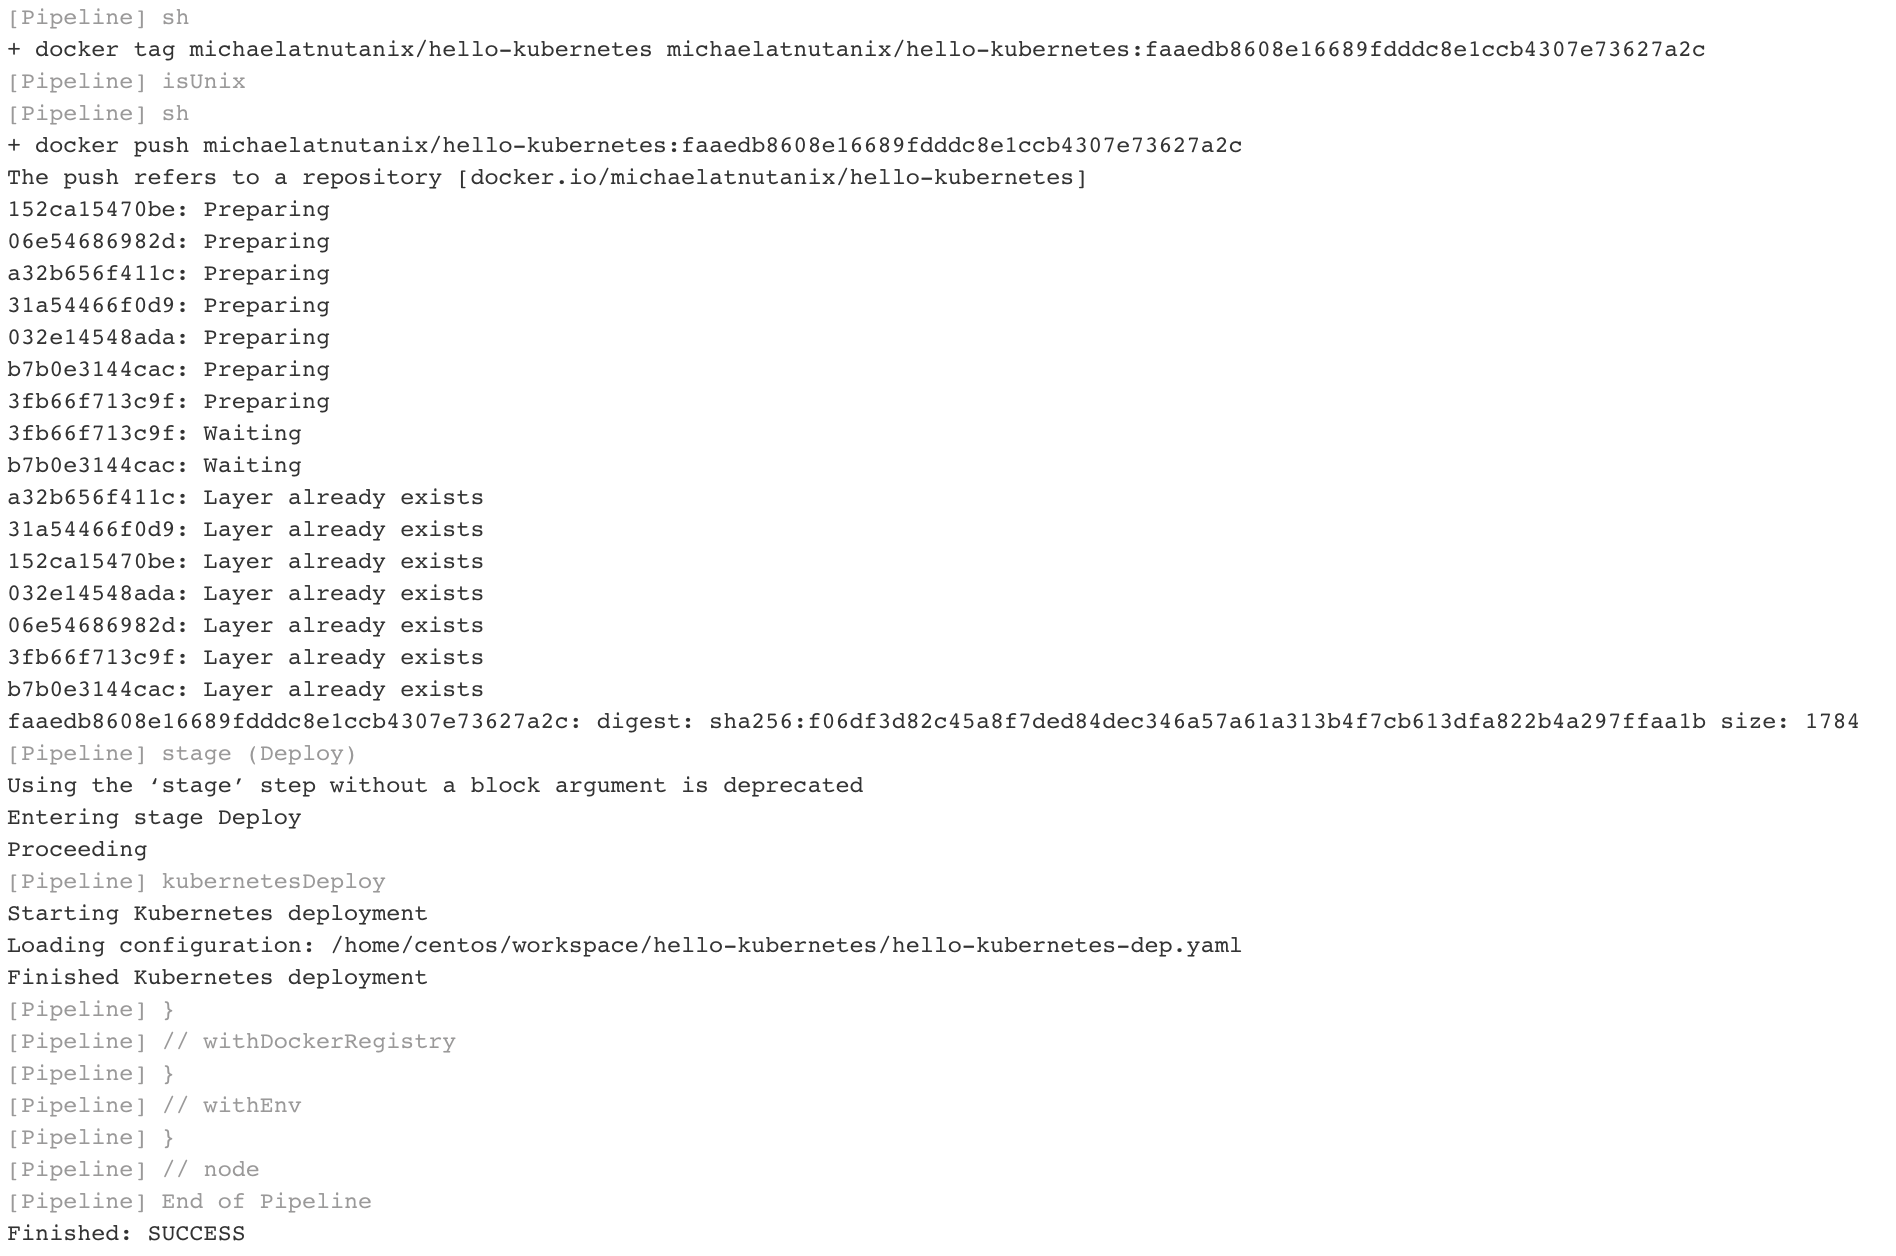
At the bottom of the console output we should see our image being tagged, pushed to DockerHub, and then finally our kubernetesDeploy task deploying our containers to our Karbon Kubernetes cluster.
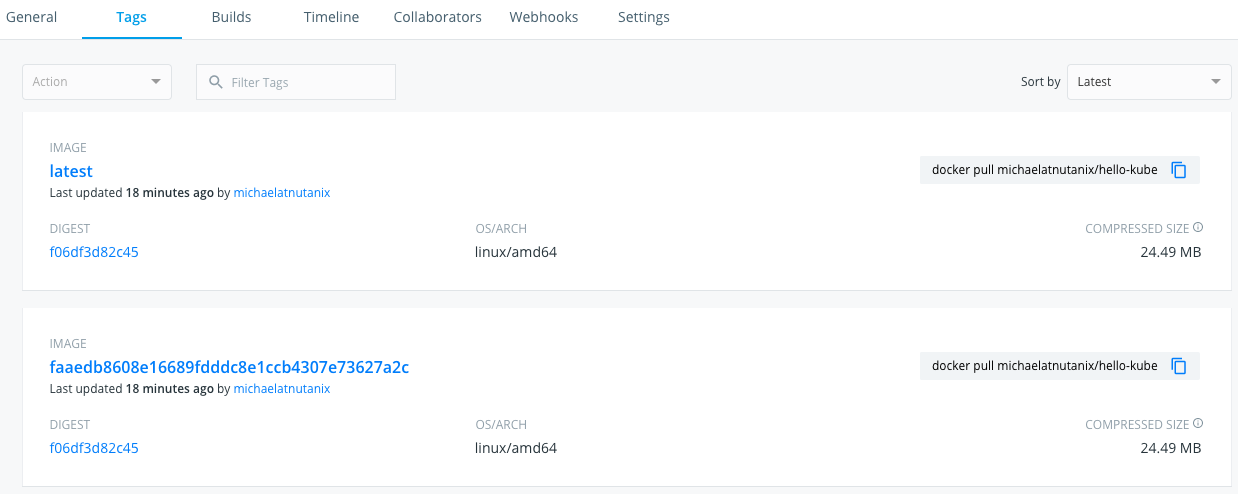
In DockerHub, we can validate that our newly pushed container is present, with both our GIT_COMMIT and latest labels.
We can also validate through the command line that our pods have been deployed, and our application Service has an IP by running the following commands from our Workstation.
kubectl get pods
kubectl get svc
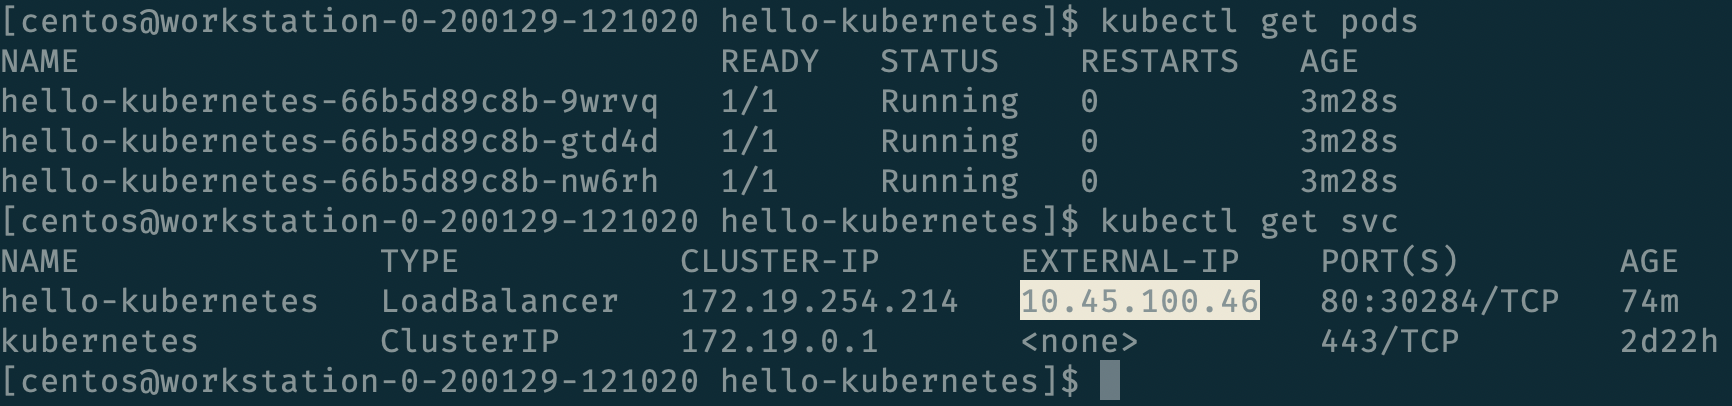
We can then access our application via the External-IP value of the hello-kubernetes service (10.45.100.46 in my case). Be sure to refresh the page several times to see the pod change.

Automated Application Deployment Through a Git Push
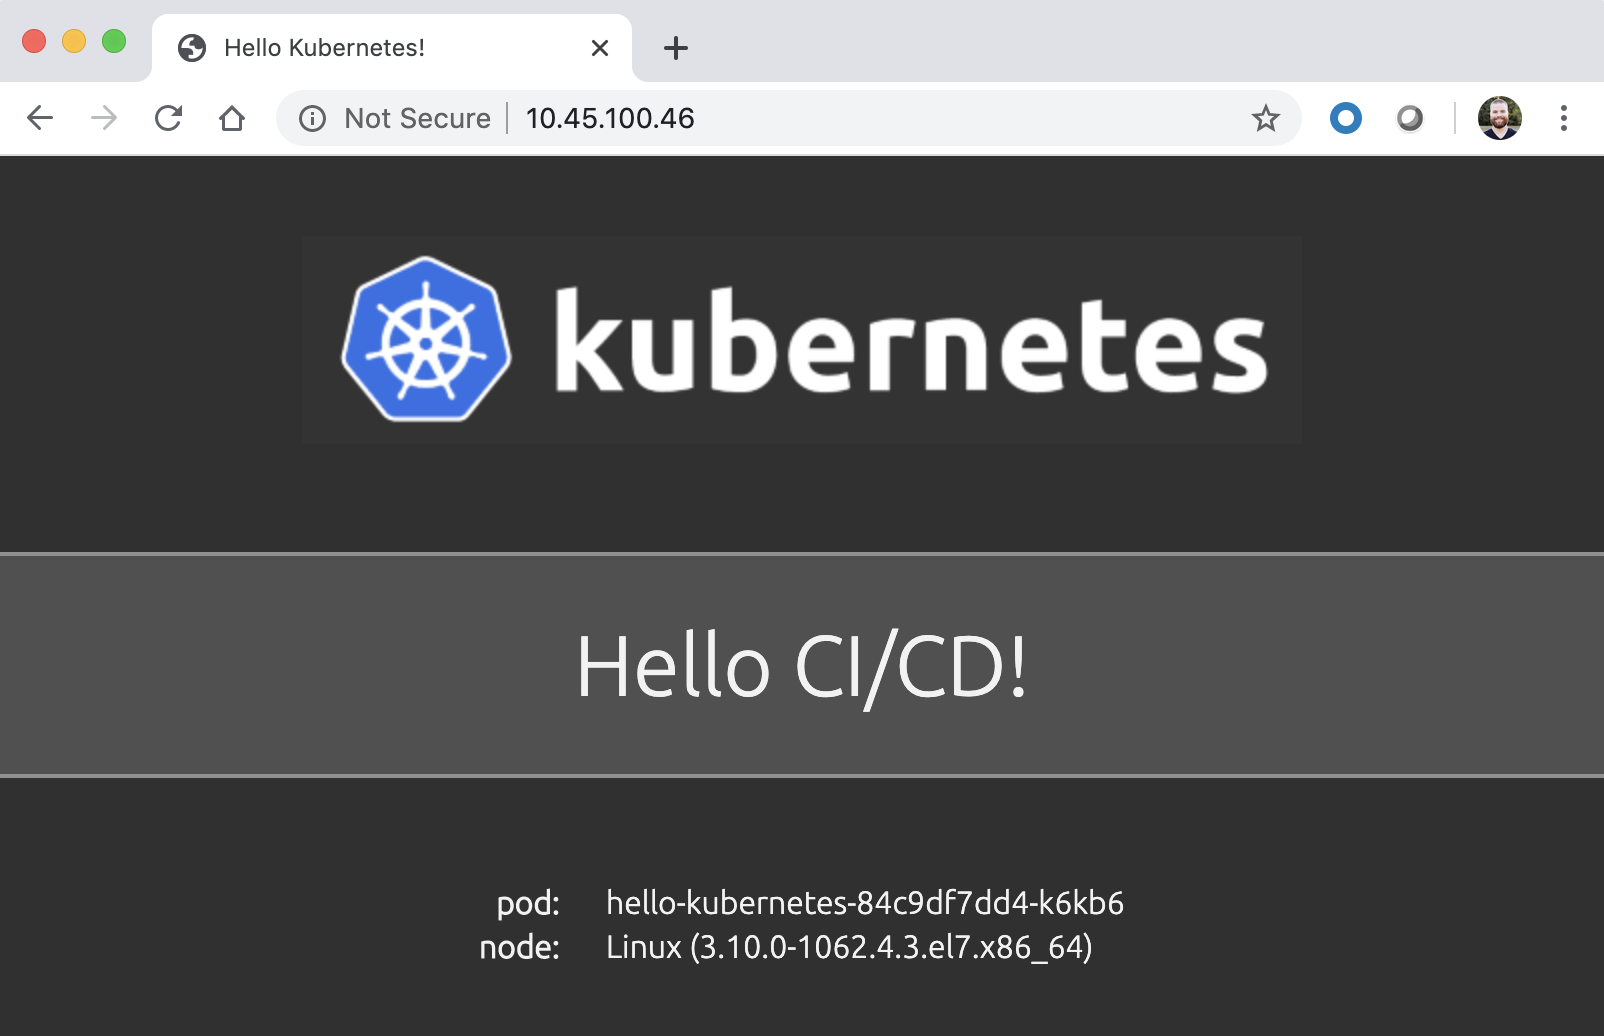
If you’ve made it this far, congratulations! We’re finally at a point where we can kick off fully automated builds and deployments. To do so, we need to commit and push a change in our application code. So our change is obvious, we’ll change the Hello Nutanix! message to Hello CI/CD!.
From within the hello-kubernetes/ directory on your workstation, run the following commands to change the code, add the change, commit the change, and finally push the change.
sed -i 's|Nutanix|CI/CD|g' server.js
git add server.js
git commit -m 'Modified Hello message'
git push
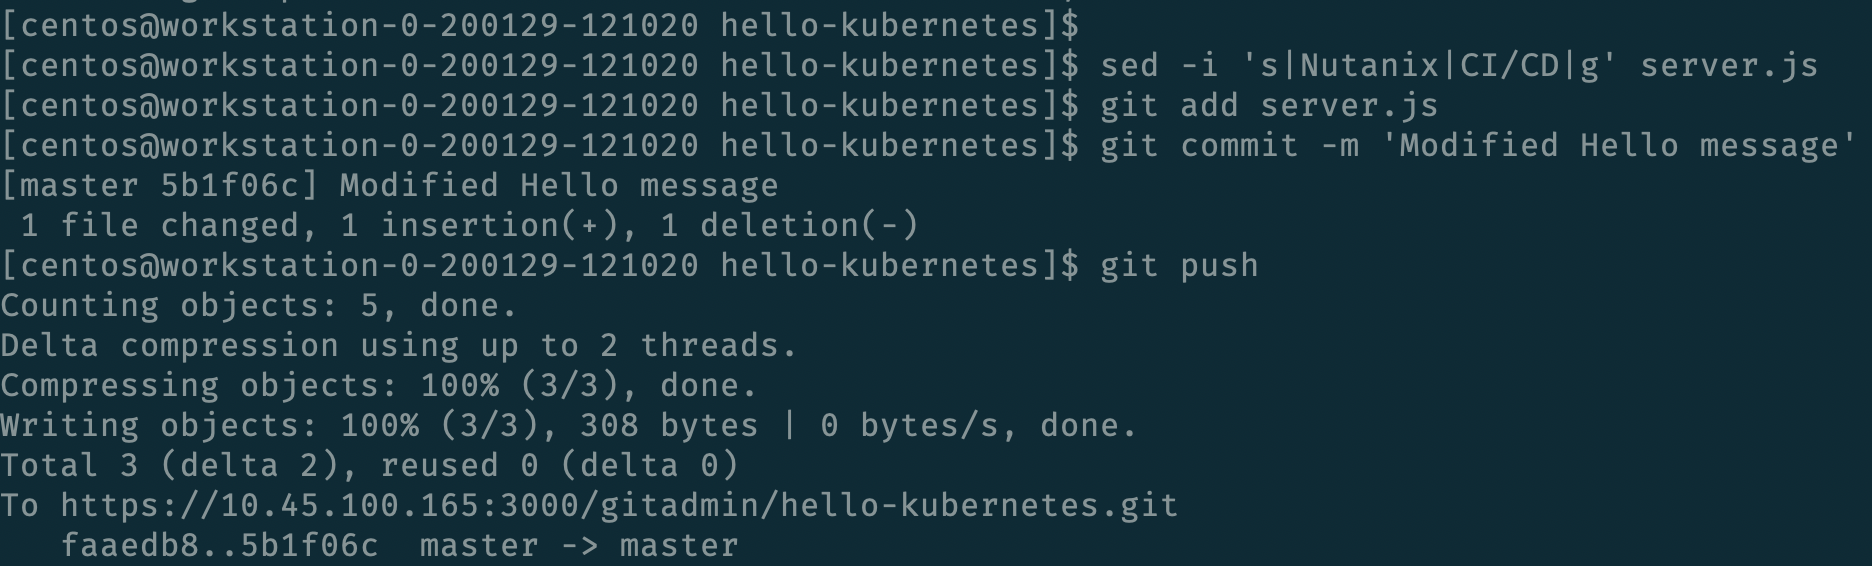
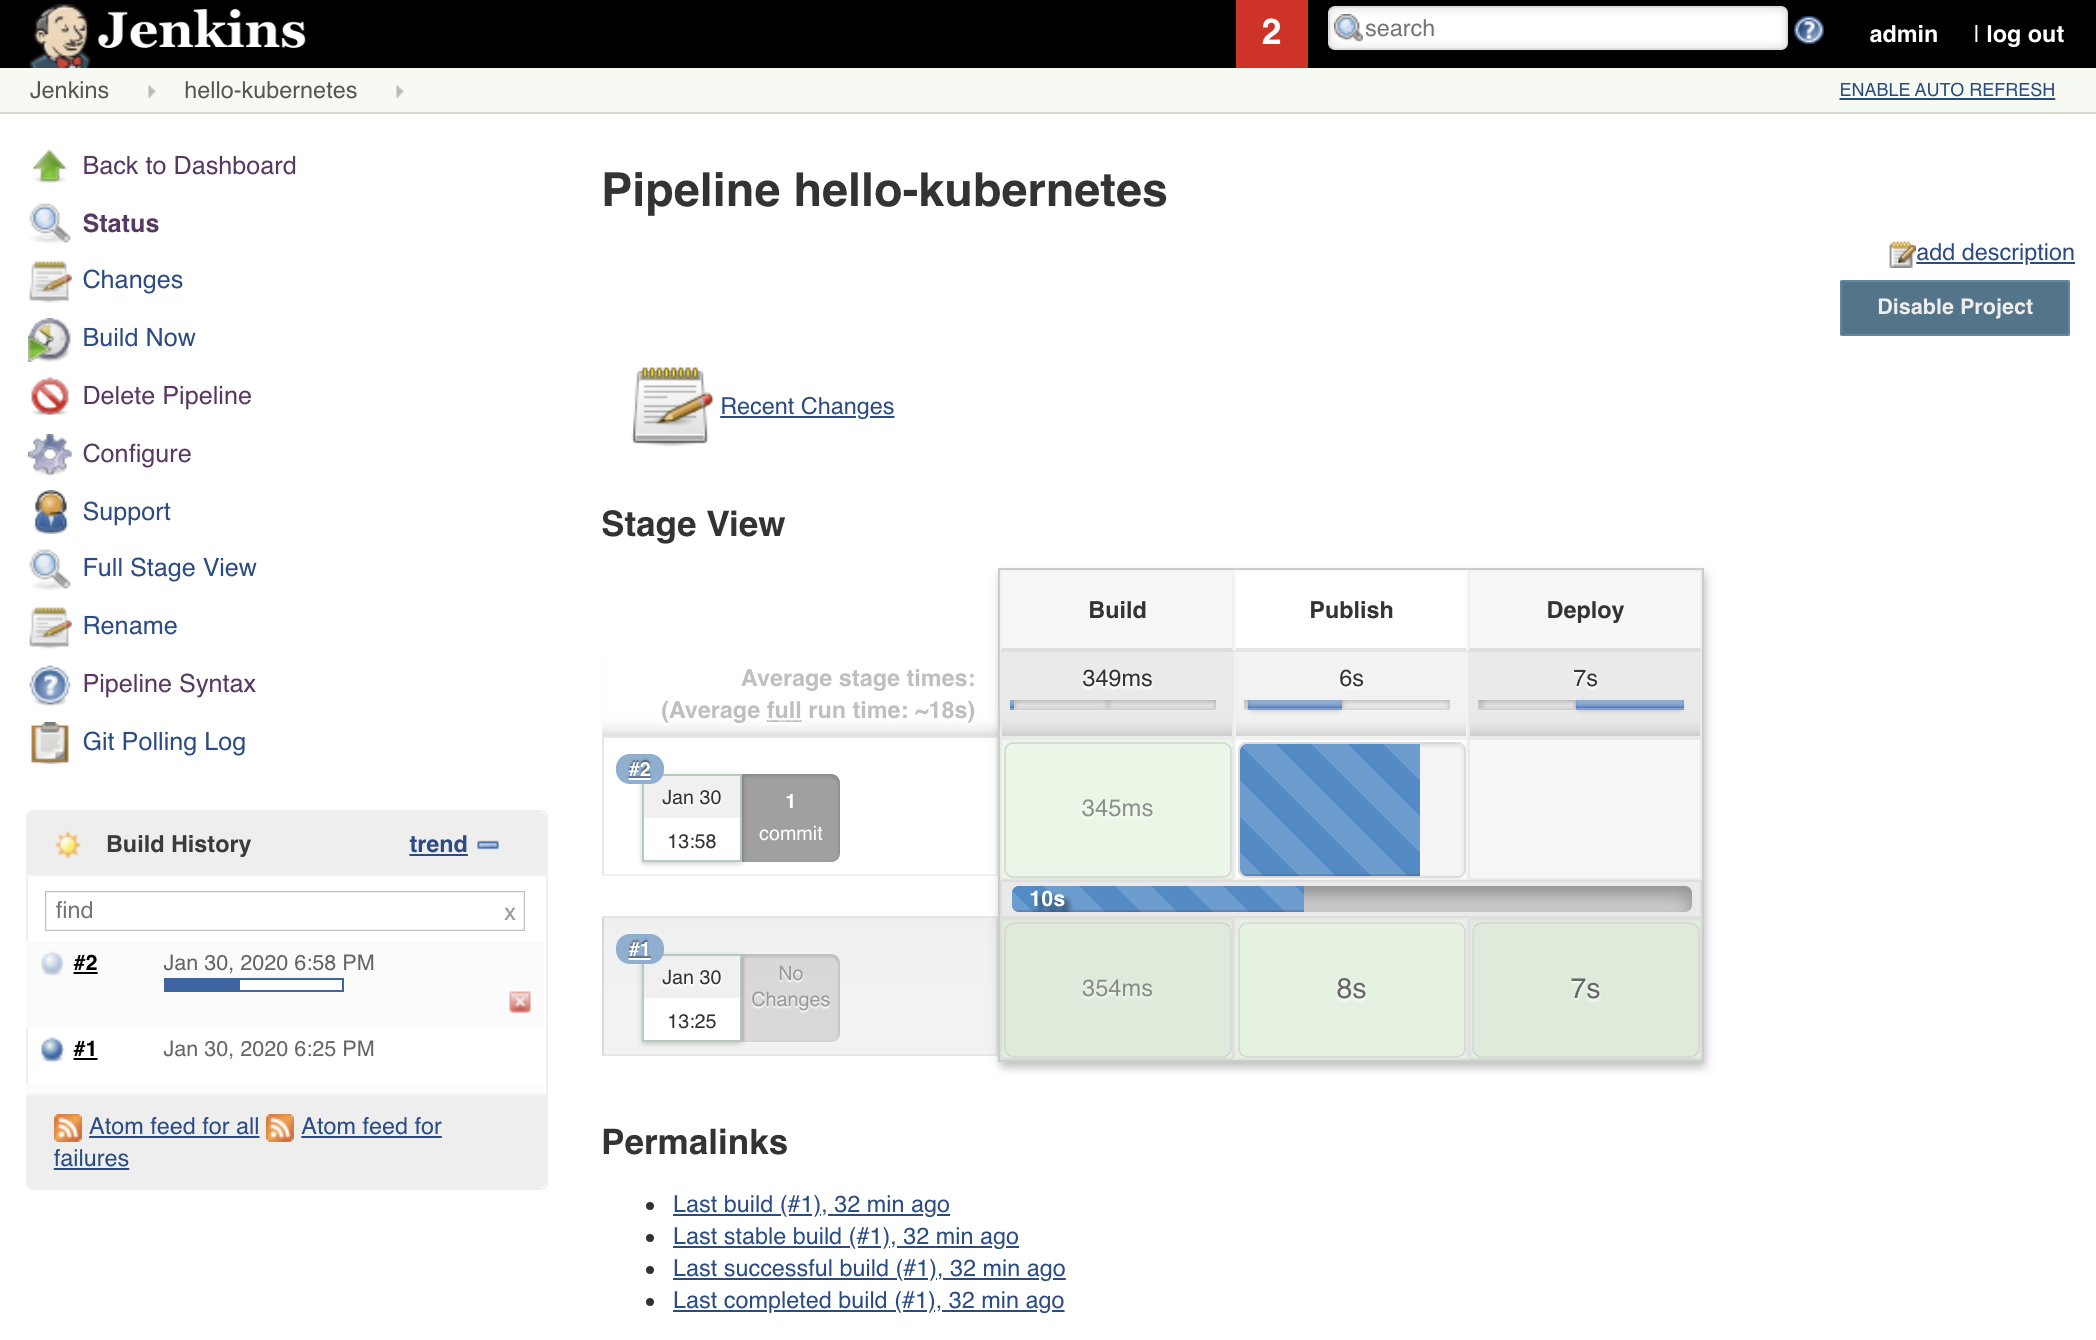
As soon as you run git push, you should see an automated build started in your Jenkins project.
Once the build is complete, let’s first verify we have new pods deployed via the command line.
kubectl get pods

Finally, refresh our application page to view the updated message.
Takeaways
While setting up a CI/CD pipeline can be quite a bit of effort, the value it brings to your organization makes it well worth it. Once configured, a simple git push – an operation your developers likely run several times a day – results in a brand new application, with minimal to no effort on your or the developers part. This can be further expanded into advanced techniques like Canary releases or A/B testing. Thanks for reading!
(Optional) Use Nutanix Calm Jenkins Plugin
In this lab, we utilized the Kubernetes-Continuous-Deploy Jenkins Plugin to deploy our new docker containers. Another option would be to utilize the Nutanix-Calm Jenkins Plugin to call a Calm application action to deploy our new docker containers. Can you change the existing Jenkins Pipeline to utilize the Nutanix Calm plugin instead?
Hints
You’ll first want to define our hello-kubernetes application as a Calm Application Blueprint, rather than the YAML we were using.
Once you successfully build the blueprint, create a profile action which accepts a runtime variable (which represents the docker label / tag) and makes an API call into the Kubernetes API to update the containers.
Once that is built, utilize the Jenkins syntax generator to create the relevant Jenkinsfile snippet to call your Calm Application Action.
Substitute out the Kubernetes Deploy snippet with the Calm Application Action snippet in your Jenkinsfile.