Karbon: Enable and Upload Images
Overview
Note
Estimated time to complete: 15 MINUTES
In this exercise you will enable Nutanix Karbon and upload the Karbon OS images to your Nutanix cluster.
Enable Karbon in Prism Central
Before we can use Karbon, we need to enable it in Prism Central following these steps:
Open https://<Prism-Central-IP>:9440/ in a browser and log in.
Click on the three dash in the top left corner.
Go to Services > Karbon.
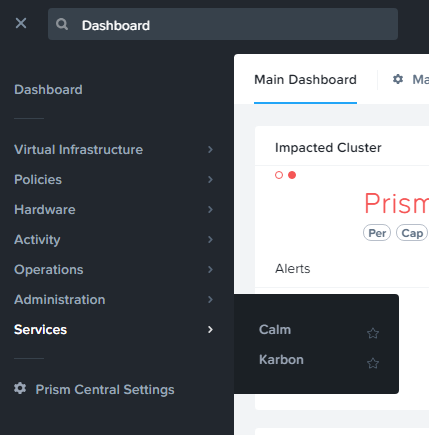
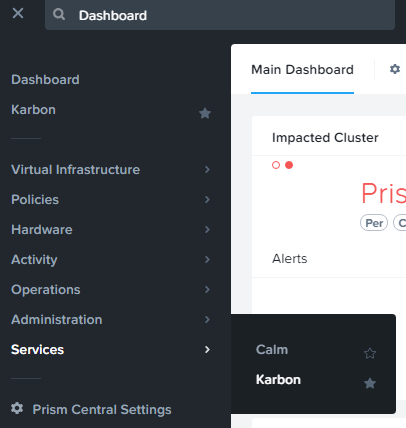
If you click on the Star Icon, it will be on top of the list.
Click the Enable Karbon button.

After a few minutes (depending on the resources your cluster has) Karbon will be activated.
Click on the here link to open the Karbon UI.

Your Karbon instance is ready for use.
Upload images
Karbon needs to have images it can use.
Nutanix has prebuilt two images based on Ubuntu 16.0.4. LTS and CentOS 7.4.
Only these images are supported for now.
Note
If you or the customer wants to use other distributions of Linux, for now the answer is “sorry we can’t do that right now”.
Upload Ubuntu Image
To upload images proceed with the normal process that you would do for other images.
Open the Image Configuration wizard.
Click on Upload file.

In the Image Source screen provide the following parameters:
URL: - http://download.nutanix.com/karbon/0.8/acs-ubuntu1604.qcow2
Image Name: - acs-ubuntu (This most be staring with acs- or Karbon will NOT recognize the image!!)
Image Type: - Disk
Image Description: - can be left blank
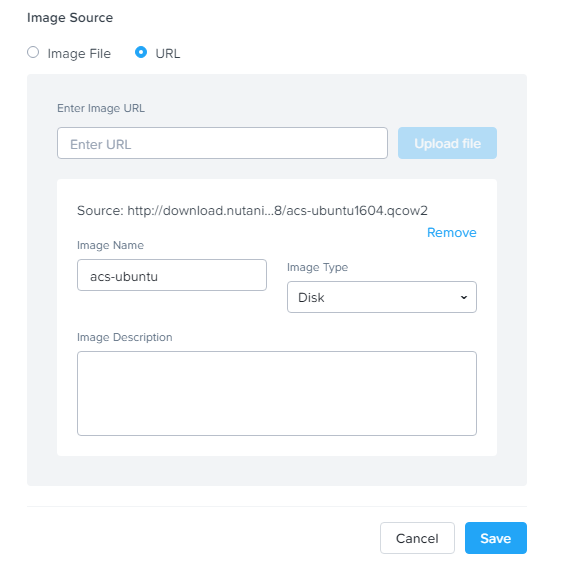
Click the Save
Upload CentOS Image
To upload images proceed with the normal process that you would do for other images.
Open the Image Configuration wizard.
Click on Upload file.
In the Image Source screen provide the following parameters:
URL: - http://download.nutanix.com/karbon/0.8/acs-centos7.qcow2
Image Name: - acs-centos (This most be staring with acs- or Karbon will NOT recognize the image!!)
Image Type: - Disk
Image Description: - can be left blank
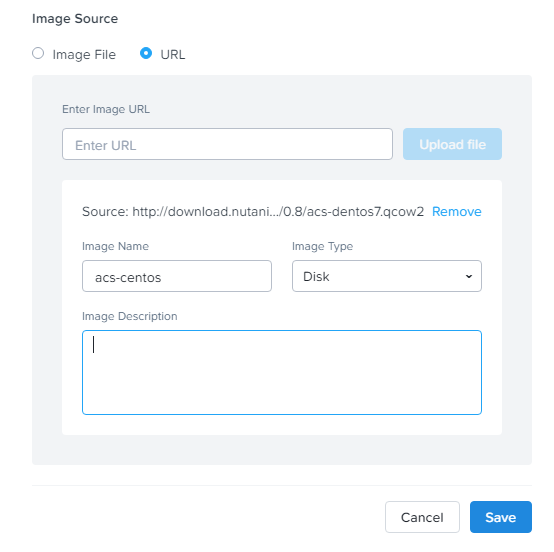
Click the Save
Your Karbon environment is ready to start using the images.