DB Administration with Era
We will now see how to perform normal database admin task with Era.
In this lab you will Administor your MSSQL DB
Register Your Database
In Era, select Databases from the dropdown menu and Sources from the lefthand menu.
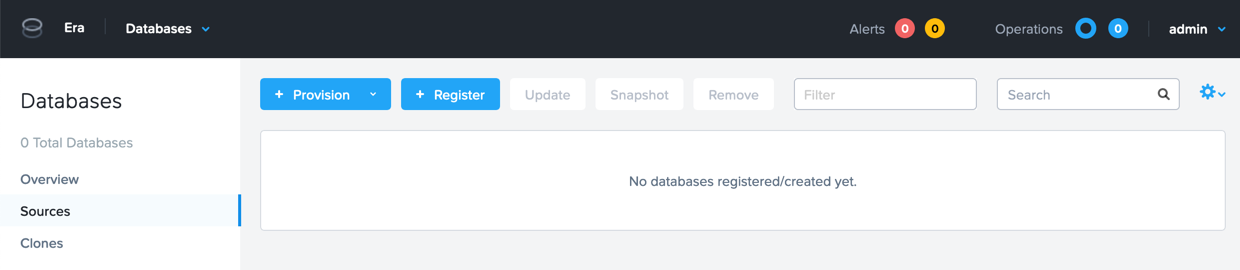
Click + Register and fill out the following fields:
Engine - Microsoft SQL Server
Database is on a Server that is: - Registered
Registered Database Servers - Select your registered Initials-MSSQL VM

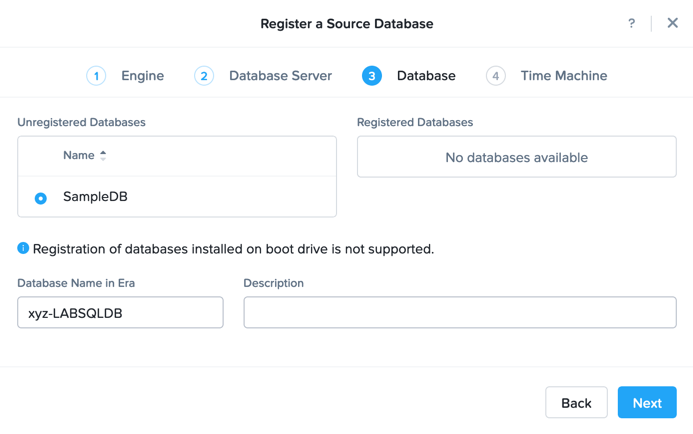
Unregistered Databases - Select SampleDB
Database Name in Era - Initials-LABSQLDB
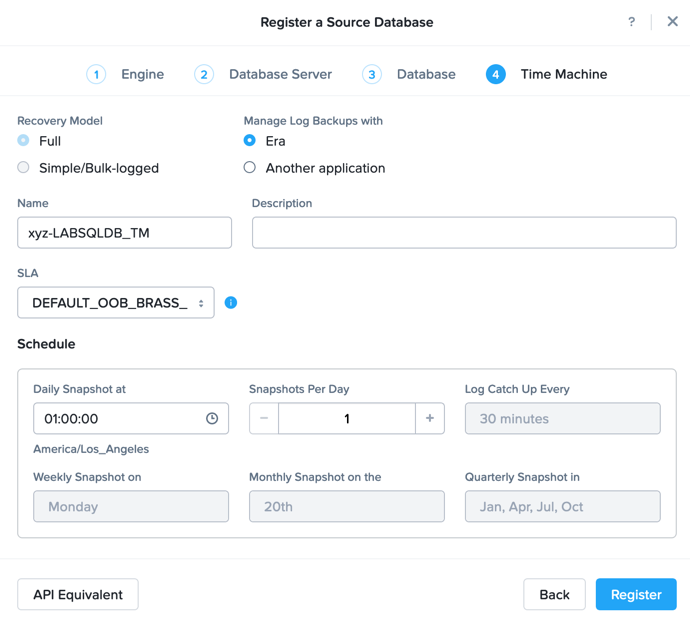
Recovery Model - Full
Manage Log Backups with - Era
Name - Initials-MSSQL_TM
SLA - DEFAULT_OOB_BRASS_SLA (no continuous replay)
Click Register
Select Operations from the dropdown menu to monitor the registration. This process should take approximately 5 minutes.
Snapshot Your Database
Before we take a manual snapshot of our Database, lets write a new table into SampleDB
Write New Table Into Database
RDP/Console into your Initials-MSSQL VM
Open SQL Server Managment Studio (SSMS), and Connect using Windows Authentication.
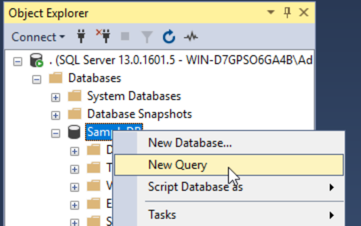
Right-Click on SampleDB and Select New Query.
Execute the following SQL Query:
select * into dbo.testlabtable from sales.orders;

Verify the new table is there by doing a refresh on Tables.
Take Manual Snapshot of Database
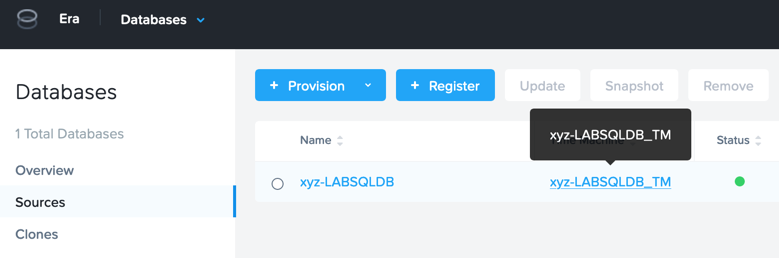
In Era, select Databases from the dropdown menu and Sources from the lefthand menu.
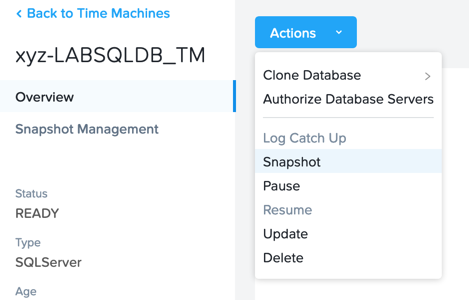
Click on the Time Machine for your Database Initials-MSSQL_TM
Once that is complete, click Actions > Snapshot.
Snapshot Name - Initials-MSSQL-1st-Snapshot
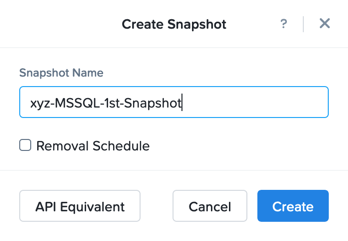
Click Create
Select Operations from the dropdown menu to monitor the registration. This process should take approximately 2-5 minutes.
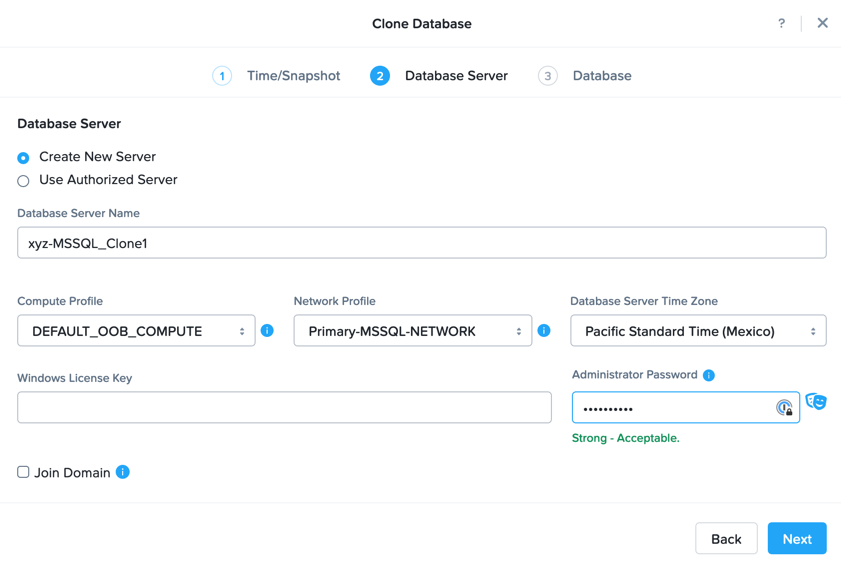
Clone Your Database Server & Database
In Era, select Time Machines from the dropdown menu and select Initials-MSSQL_TM
Click Actions > Clone Database > Single Node Database.
Snapshot - Initials-MSSQL-1st-Snapshot (Date Time)
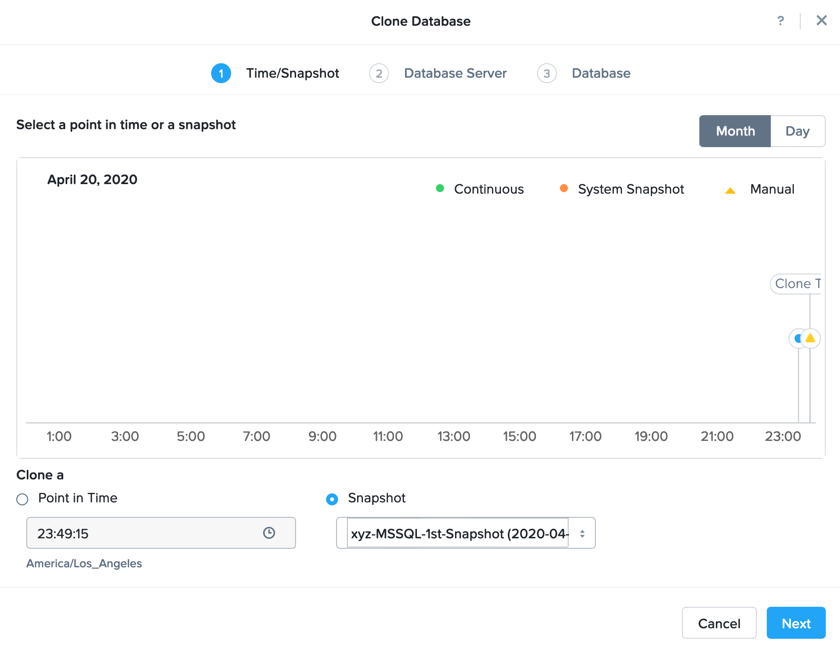
Database Server - Create New Server
Database Server Name - Initials-MSSQL_Clone1
Compute Profile - DEFAULT_OOB_COMPUTE
Network Profile - Primary-MSSQL-Network
Administrator Password - Nutanix/4u
Clone Name - Initials-LABSQLDB_Clone1
Database Name on VM - SampleDB_Clone1
Instance Name - MSSQLSERVER
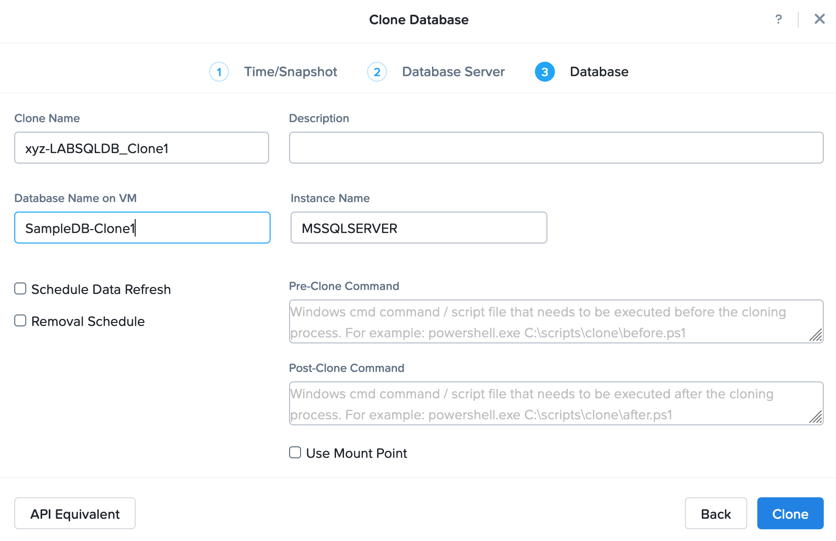
Click Clone
Select Operations from the dropdown menu to monitor the registration. This process should take approximately 30-50 minutes.
Delete Table and Clone Refresh
There are times when a table or other data gets deleted (by accident), and you would like to get it back. here we will delete a table and use the Era Clone Refresh action from the last snapshot we took.
Delete Table
RDP/Console into your Initials-MSSQL_Clone1 VM
Open SQL Server Managment Studio (SSMS), and Connect using Windows Authentication.
Expand SampleDB_Clone1 > Tables, Right-Click on dbo.testlabtable and Select Delete and OK.
Clone Refresh
In Era, select Databases from the dropdown menu and Clones from the lefthand menu.
Select the Clone for your Database Initials-LABSQLDB_Clone1 and Click Refresh.
Snapshot - Initials-MSSQL-1st-Snapshot (Date Time)
Click Refresh
Select Operations from the dropdown menu to monitor the registration. This process should take approximately 2-5 minutes.
Verify Table is Back
RDP/Console into your Initials-MSSQL_Clone1 VM
Open SQL Server Managment Studio (SSMS), and Connect using Windows Authentication.
Expand SampleDB_Clone1 > Tables, verify dbo.testlabtable is there.