Performance Testing of MSSQL using HammerDB
In this bonus lab you will install HammerDB tool and use it to benchmark MSSQL database performance on a given VM
Lab Agenda
Test database performance on MS SQL database configured following Best Practices
Test database performance on MS SQL database configured without following Best Practices - here all the database files are located in a single OS drive
Note
This bonus lab takes between 60 and 90 minutes depending on your familiarity with MS SQL databases.
Install HammerDB
Select your Initials-MSSQL-Manual VM and click Actions > Power On.
Log in to the VM using Remote Desktop Client/Console using the Administrator password you configured in Manual VM Deployment in Deploying MS SQL lab.
Download the HammerDB setup binaries on your VM from here. (Copy link address)
Go to the downloaded location: righ-click on the file and click on Advanced.
Install HammerDB using the instuctions here and make sure to install HammerDB in
C:drive (default).Note
If the installation URL doesn’t work. Install the exe file as you would install any normal windows package. It is as simple as clicking Next.
Once installed, Close HammerDB window (if you chose to Launch HammerDB).
Database Test 1 (with best practices on SQL)
In this section you will create a sample database (tpcc) following MS SQL Best Practices for database files on different drives. Once created, you will populate the database with data using HammerDB tool and run IO tests on it.
This will give you an opportunity to learn to use HammerDB tool and prepare you for the real world DB performance testing situations.
Open SQL Server Management Studio from you VM’s windows menu.
Enter user name: administrator and Nutanix/4u password and click on connect.
Go to Windows Explorer and create the the following folders:
E:\data
F:\data
G:\data
I:\logs
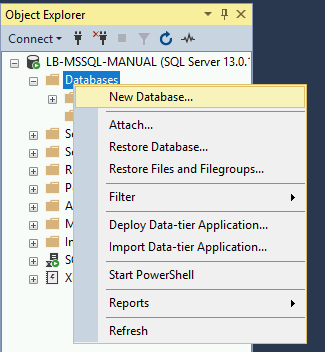
Right click on databases and select New database.
Give the name of the database as tpcc.
In the Database files table, scroll and select the path for tpcc and tpcc_log folder.
For tpcc, set path to
E:\data.For tpcc_log, set path to
I:\logs.Click on Add button twice to create two more database files.
Name them as tpcc_f and tpcc_g.
Set the path for two files as
F:\dataandG:\data.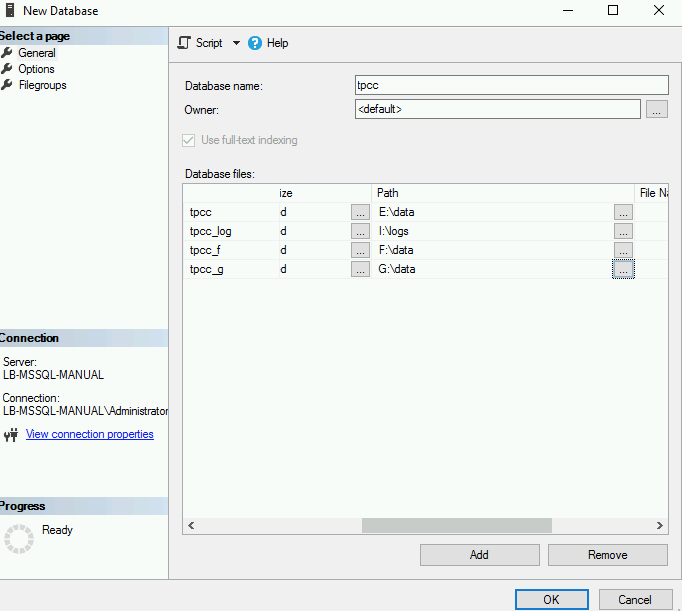
To make sure the tables are created properly, right click on tpcc DB and select properties. Click on Files and make sure the path of the folders are set right.
Go to
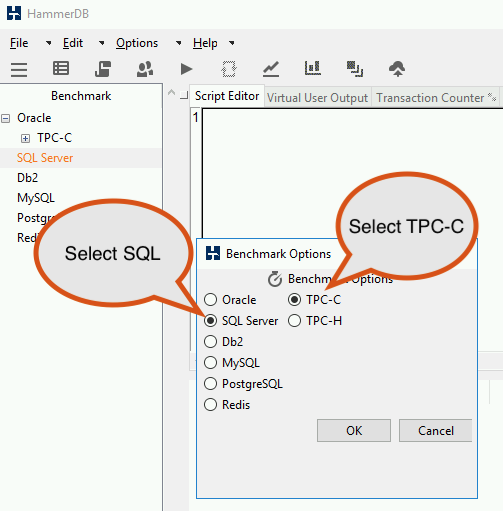
C:\Program Files\HammerDB-*.*\Hammerdb(windows batch file)Double click on SQL
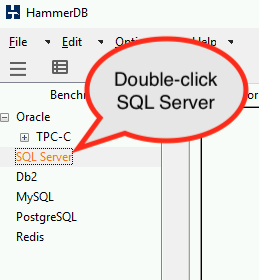
Select SQL-Server and TPC-C options and click on OK
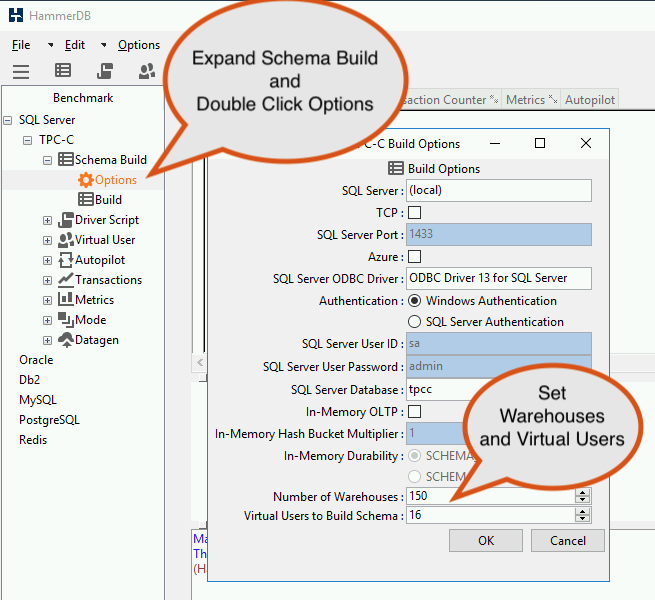
Expand Schema Build and Double click on Options.
Change Sql Server Database name to tpcc.
Change number of warehouses to 150.
Change virtual users to build schema to 16.
Click on OK
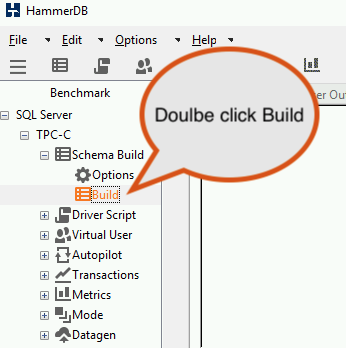
Double click on Build option. click on ok, data will start building.
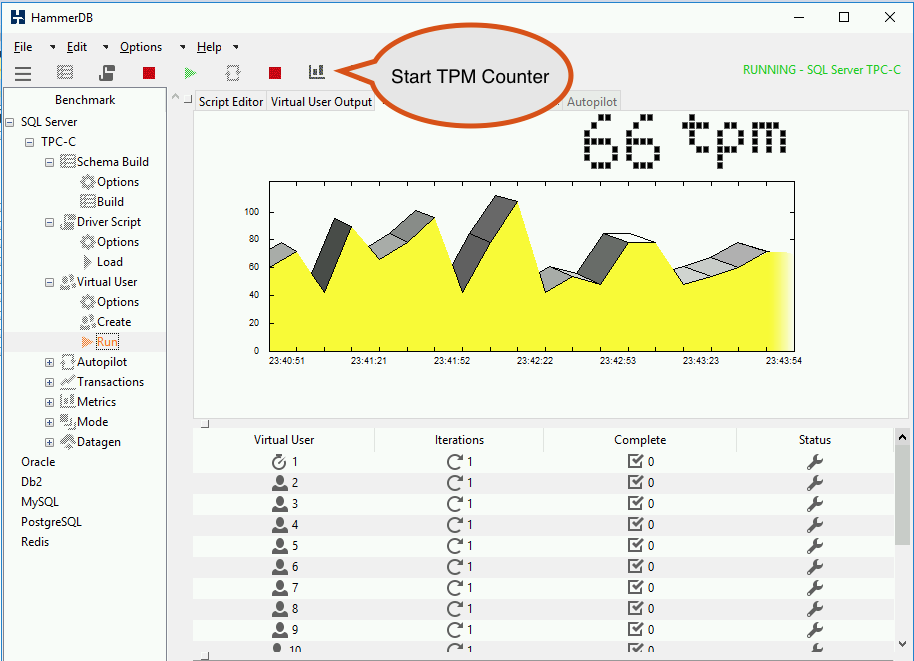
Click on Start Transaction Counter and observer transactions.
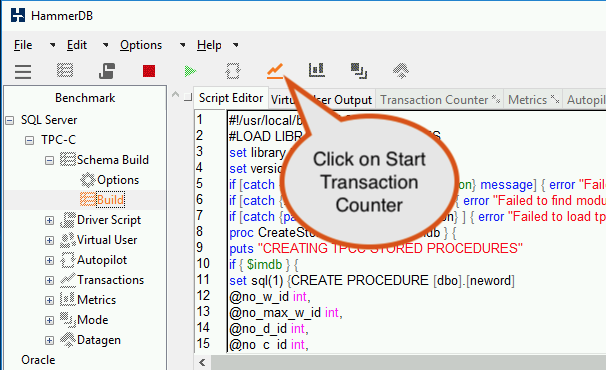
Do not close HammerDB, just minimize the window.
Note
If you close HammerDB, populating of data will stop
Go to the drives
E\data,F:\data,F:\data,I:\logsand check if the size of the folders is increasing.Wait until the data gets generated. This generates up to 15GB of data.
Note
It may take from 15 - 20 minutes for data population
Once the data is generated, open hammer db that is already minimized.
Click on Destroy Virtual Users.

Double click on Driver Script > Options. Make sure SQL Server Database name is tpcc (the database you created in the previous few steps).
Select “TPC-C driver script” as Timed Driver Script.
Leave rest of them as-is and select OK.
Note
Optional: You can also try using the option Keying and thinking time for making the IOPS more intensive.

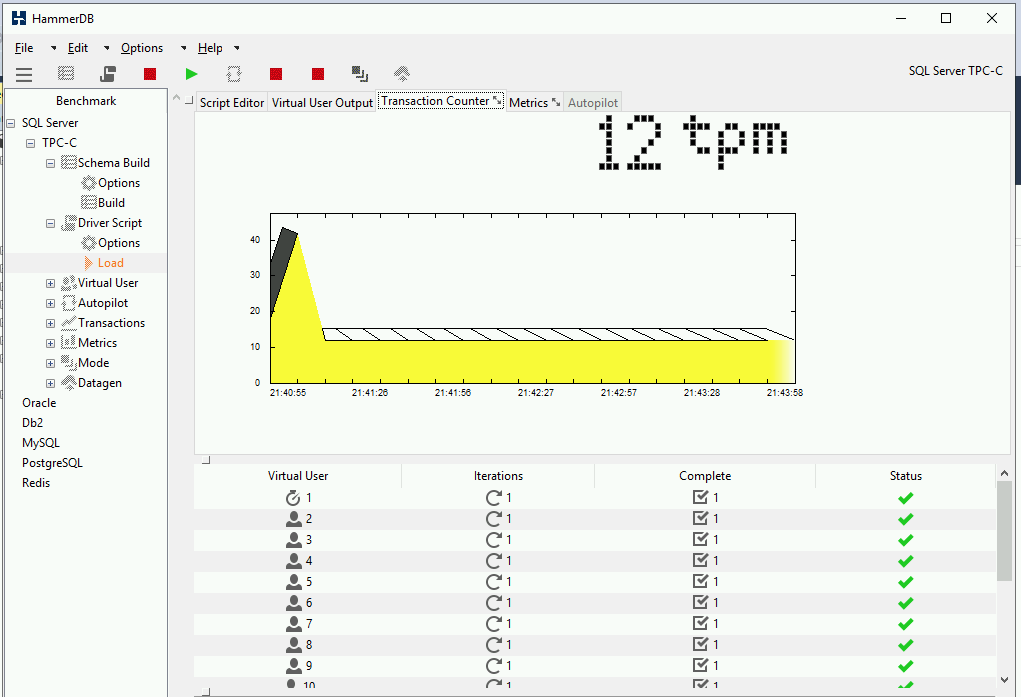
Double click on Load
Go to Virtual users and click on Options.
Make sure Virtual users in the popped-up window is 17 and click OK
Double click on Create and then double click on Run operations.

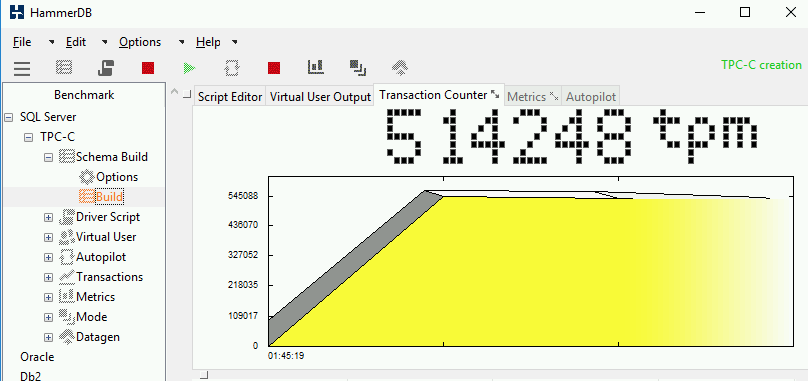
While IO is getting generated, click on Transactions Counter and note the TPM. (Start the TPM counter if not already started)
Take screenshots and send TPM results to prospective customers or use it for your own reference.
Database Test 2 (without best practices on SQL)
Let’s simulate a scenario where best practices for MS SQL databases are not followed. In this screnario the data and log files for a SQL database is in the same drive.
Repeat the same procedure for another database.
Name the datbase tpcc1
For tpcc1, set path to
E:\data.For tpcc1_log, set path to
E:\logs. (create logs folder)Populate the database with data using the same procedure as above in HammerDB.
Wait for the data to be populated
Note
It may take from 15 - 20 minutes for data population
Confirm data is populated using the same procedure as above.
Click on Destroy Virtual Users.
Double click on Driver Script > Options. Make sure SQL Server Database name is tpcc1 (the database you created in the previous few steps).
Select “TPC-C driver script” as Timed Driver Script.
Leave rest of them as-is and select OK.
Note
Optional: You can also try using the option Keying and thinking time for making the IOPS more intensive.
Double click on Load
Go to Virtual users and click on Options.
Make sure Virtual users in the popped-up window is 17 and click OK
Double click on Create and then double click on Run operations.
While IO is getting generated, click on Transactions Counter and note the TPM. (Start the TPM counter if not already started)
Take screenshots and send TPM results to prospective customers or use it for your own reference.
Note
You should now notice that a database configured withouth following best practices performs slower than the database created following best practices. In this case, the database tpcc1 is four times slower than database tpcc.
Note
Please note that the test used here are using heavy I/O. Consider changing them in your own test to suit customers workloads.
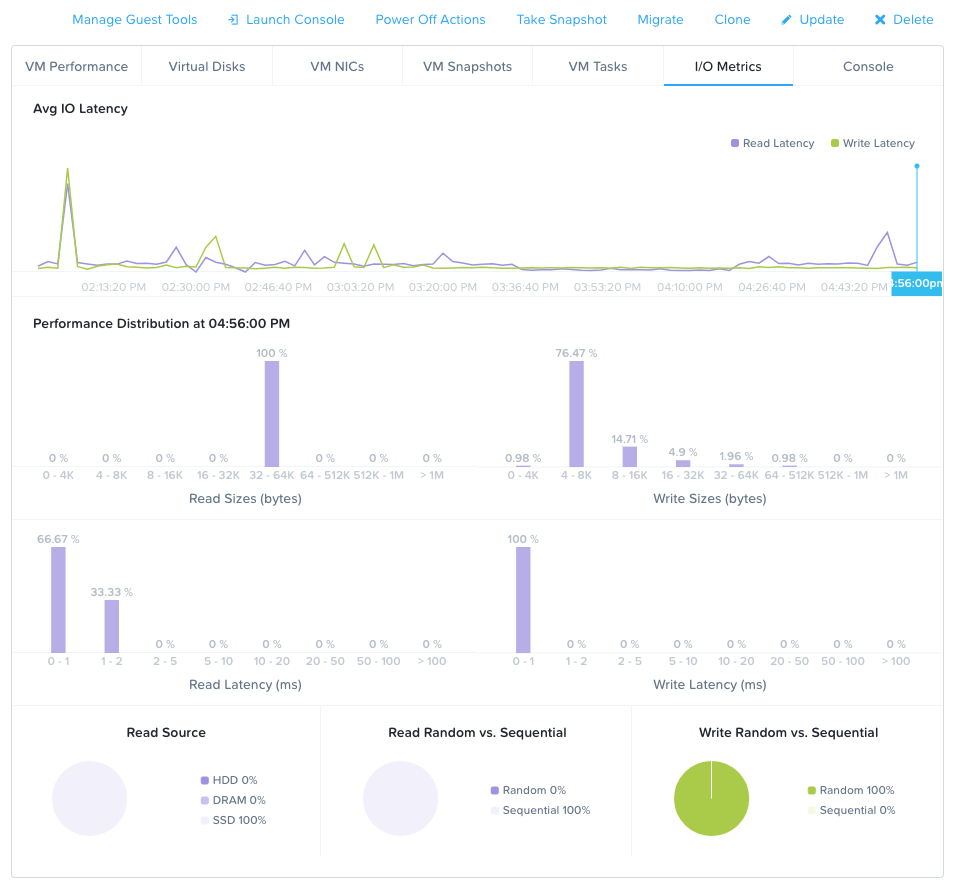
Also check the I/O Metrics in Prism Element to see if you can observe I/O patterns, latencies, SSD/HDD usage and block sizes of files used by the VM you are running HammerDB tests on.
Takeaways
HammerDB gives you a way to test DB performance with dummy data that it generates
HammerDB is free and easy to use
Following best practices is the key to SQL DB Performance
Always right-size DB and DB Servers (do not over-provision or under-provision)
Introduce performance benchmarking to your customers as much as possible. It will make your life easier
Nutanix Era deploys databases with best practices