Files: Create SMB Share
Overview
In this exercise you will create and test a SMB share, used to support home directories, user profiles, and other unstructured file data such as departmental shares commonly accessed by Windows clients.
Lab Setup
This lab requires applications provisioned as part of the Windows Tools VM.
If you have not yet deployed this VM, see the linked steps before proceeding with the lab.
While waiting for the file server deployment, if you have not already done so deploy the Windows Tools VM.
Connect to the Windows Tools VM via RDP or console
Download the sample files for File Analytics to the Tools VM:
Using SMB Shares
Creating the Share
In Prism > File Server, click + Share/Export.
Fill out the following fields:
Name - Marketing
Description (Optional) - Departmental share for marketing team
File Server - BootcampFS
Share Path (Optional) - Leave blank. This field allows you to specify an existing path in which to create the nested share.
Max Size (Optional) - Leave blank. This field allows you to set a hard quota for the individual share.
Select Protocol - SMB
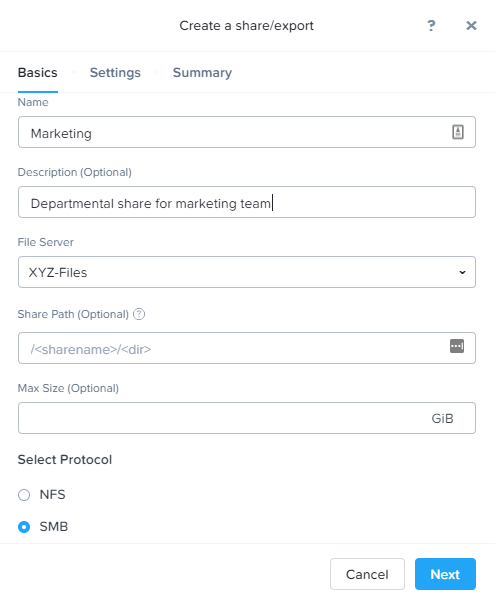
Click Next.
Select Enable Access Based Enumeration and Self Service Restore.
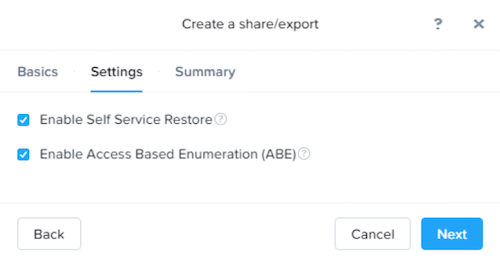
As you are creating a departmental share, it should be created as a Standard share. This means that all top level directories and files within the share, as well as connections to the share, are served from a single Files VM.
Distributed shares are appropriate for home directories, user profiles, and application folders. This type of share shards top level directories across all Files VMs and load balances connections across all Files VMs within the Files cluster.
Access Based Enumeration (ABE) ensures that only files and folders which a given user has read access are visible to that user. This is commonly enabled for Windows file shares.
Self Service Restore allows users to leverage Windows Previous Version to easily restore individual files to previous revisions based on Nutanix snapshots.
Click Next.
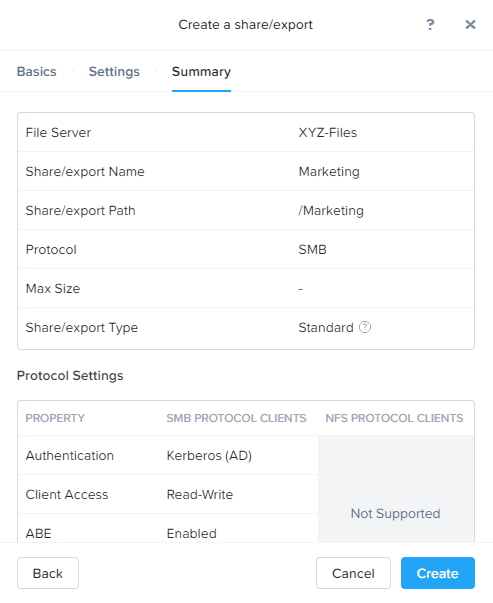
Review the Summary and click Create.
Testing the Share
Connect to your Initials-ToolsVM via RDP or console.
Note
The Tools VM has already been joined to the NTNXLAB.local domain. You could use any domain joined VM to complete the following steps.
Open
\\BootcampFS.ntnxlab.local\in File Explorer.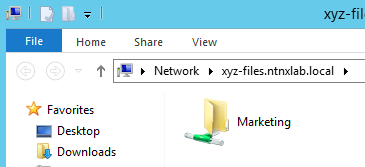
Test accessing the Marketing share by extracting the SampleData_Small.zip files downloaded in the previous step into the share.

The NTNXLAB\Administrator user was specified as a Files Administrator during deployment of the Files cluster, giving it read/write access to all shares by default.
Managing access for other users is no different than any other SMB share.
Right-click Marketing > Properties.
Select the Security tab and click Advanced.
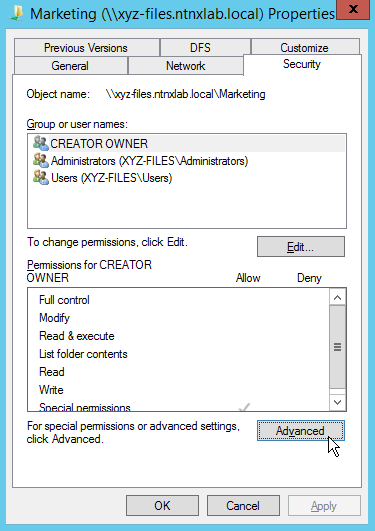
Select Users (BootcampFS\Users) and click Remove.
Click Add.
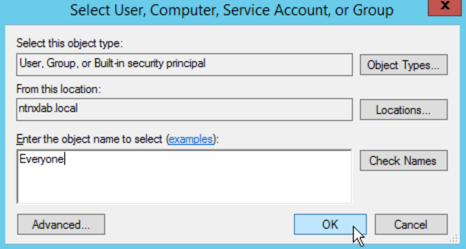
Click Select a principal and specify Everyone in the Object Name field. Click OK.
Fill out the following fields and click OK:
Type - Allow
Applies to - This folder only
Select Read & execute
Select List folder contents
Select Read
Select Write
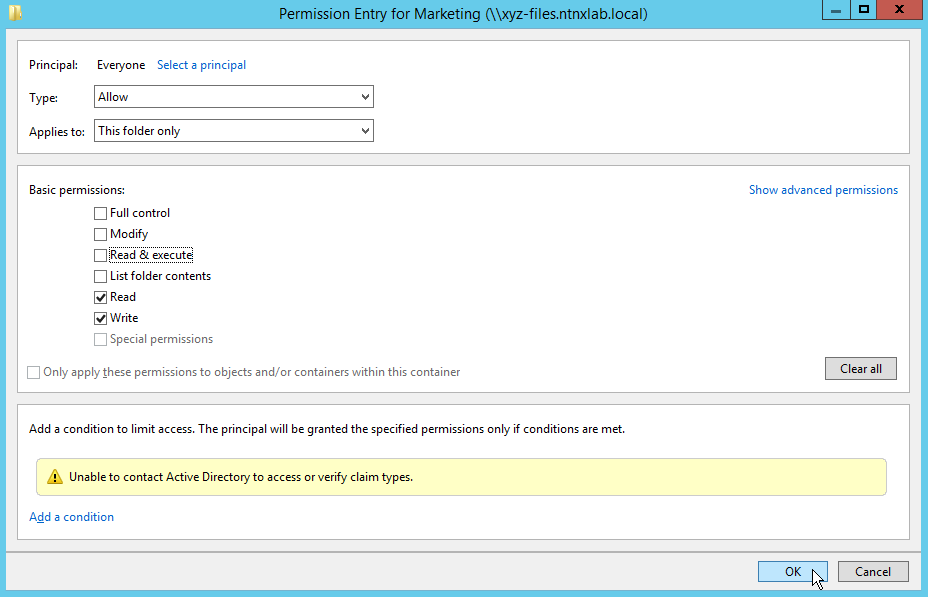
Click OK > OK > OK to save the permission changes.
All users will now be able to create folders and files within the Marketing share.
It is common for shares utilized by many people to leverage quotas to ensure fair use of resources. Files offers the ability to set either soft or hard quotas on a per share basis for either individual users within Active Directory, or specific Active Directory Security Groups.
In Prism > File Server > Share > Marketing, click + Add Quota Policy.
Fill out the following fields and click Save:
Select Group
User or Group - SSP Developers
Quota - 10 GiB
Enforcement Type - Hard Limit
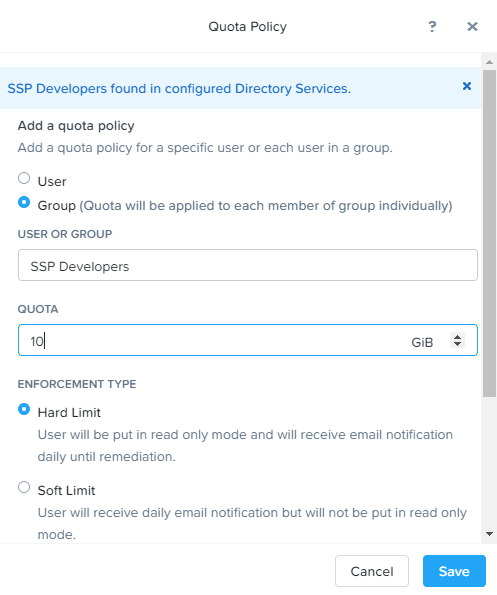
Click Save.
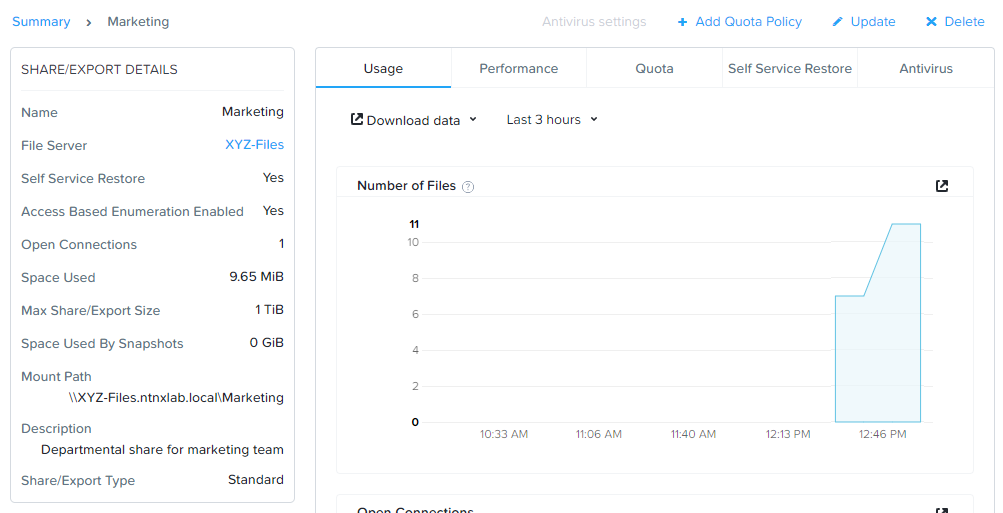
With the Marketing share still selected, review the Share Details, Usage and Performance tabs to understand the available on a per share basis, including the number of files & connections, storage utilization over time, latency, throughput, and IOPS.