Building & Optimizing the Gold Image
When we install a vanilla client operating system, we need to keep in mind that this OS was built for physical devices (i.e. laptops and desktops), with direct attached devices and limited noisy neighbor effects. If we install that same OS in a VM we might see different results, hence the need for optimization. The Nutanix Performance/Solutions Engineering team for EUC has tested various optimizations and the lab, and validated the following results:
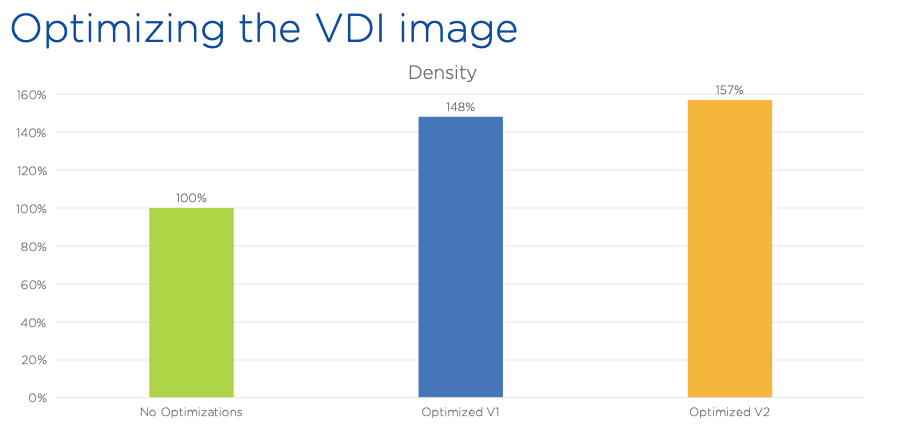
As you can see there’s a 48% improvement of desktop density per node when applying baseline Citrix optimizations, and increases to 57% with a second pass using VMware OS optimization recommendations. Note that both sets of optimizations are independent of underlying hypervisor, and rather tune services within the OS guest.
In this lab you will install the Citrix Virtual Desktop Agent on a Windows 10 VM, and optimize the VM using both the Citrix Optimizer and VMware OS Optimization Tool.
Deploying a VM
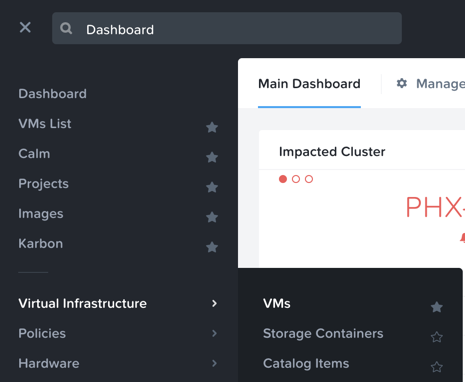
In Prism Central, select > Virtual Infrastructure > VMs.
Click Create VM.
Select your assigned cluster and click OK.
Fill out the following fields:
Name - Initials-GoldImage
Description - (Optional) Description for your VM.
vCPU(s) - 2
Number of Cores per vCPU - 1
Memory - 4 GiB
- Select + Add New Disk
Type - DISK
Operation - Clone from Image Service
Image - Win10v1903.qcow2
Select Add
- Select Add New NIC
VLAN Name - Secondary
Select Add
Click Save to create the VM.
Select your VM and click Power On.
Pausing Updates
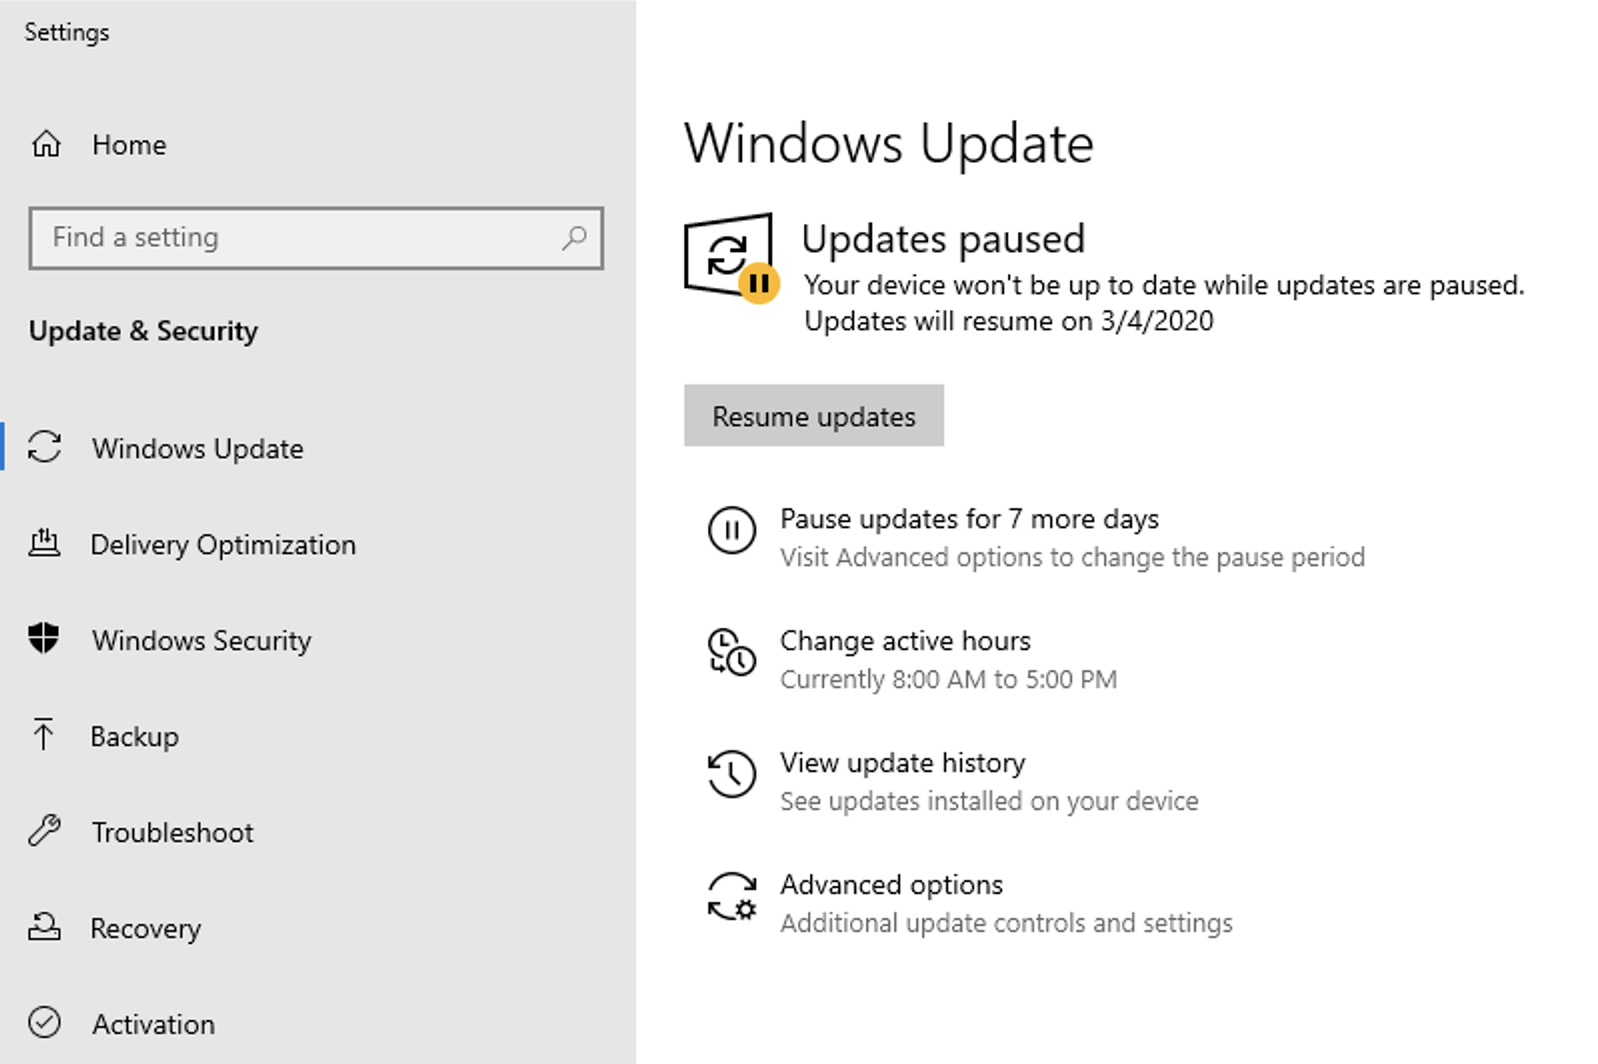
Before starting to build your Windows 10 image it is important the ensure that no Windows Updates are in progress, as this can cause issues with cloning.
Open the VM console or connect via RDP.
User Name - Nutanix
Password - nutanix/4u
Open System Settings > Windows Update and click Pause Updates for 7 Days.
Restart the VM.
Installing the VDA
The Virtual Delivery Agent (VDA) is a collection of drivers and services installed on each physical or virtual machine available for user connection. The VDA allows the machine to register with the Delivery Controller, allowing the Delivery Controller to assign those resources to users. The VDA is also responsible for establishing the HDX connection, the Citrix remoting protocol, between the machine and the user device, verifying licensing, and applying Citrix Policy.
Once the VM has restarted, reconnect to the VM console or connect via RDP.
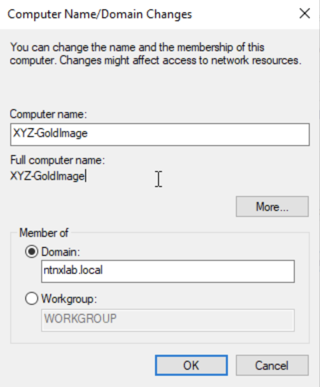
Change the Computer Name (e.g. Initials-GoldImage) and join the NTNXLAB.local domain using the following credentials:
User Name - NTNXLAB\Administrator
Password - nutanix/4u
Note
Open Control Panel > System and Security > System > Change Settings to access the traditional Windows domain join field in Windows 10.
Restart your VM and log in using the following credentials:
User Name - NTNXLAB\Administrator
Password - nutanix/4u
In Prism Central, select your GoldImage VM and click Actions > Update.
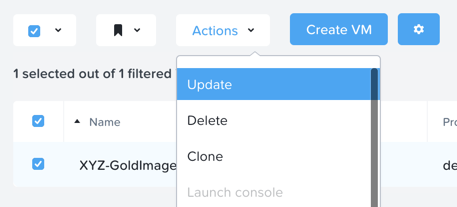
Under Disks > CD-ROM, select and fill out the following fields:
Operation - Clone from Image Service
Image - Citrix_Virtual_Apps_and_Desktops_7_1912.iso
Click Update > Save.
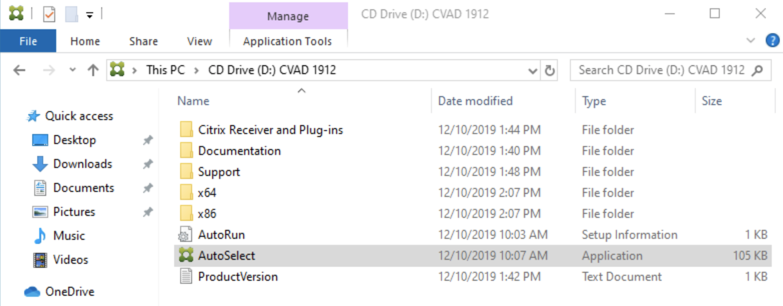
Within the VM console, open D:\AutoSelect.exe to launch the Citrix installer.
Select Virtual Apps and Desktops > Start.
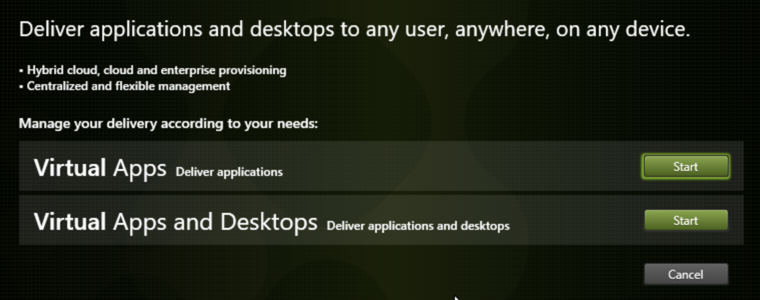
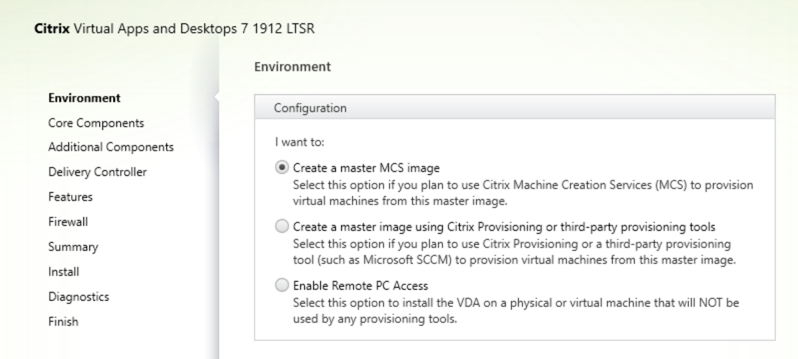
Select Prepare Machines and Images to begin installation of the Virtual Desktop Agent.
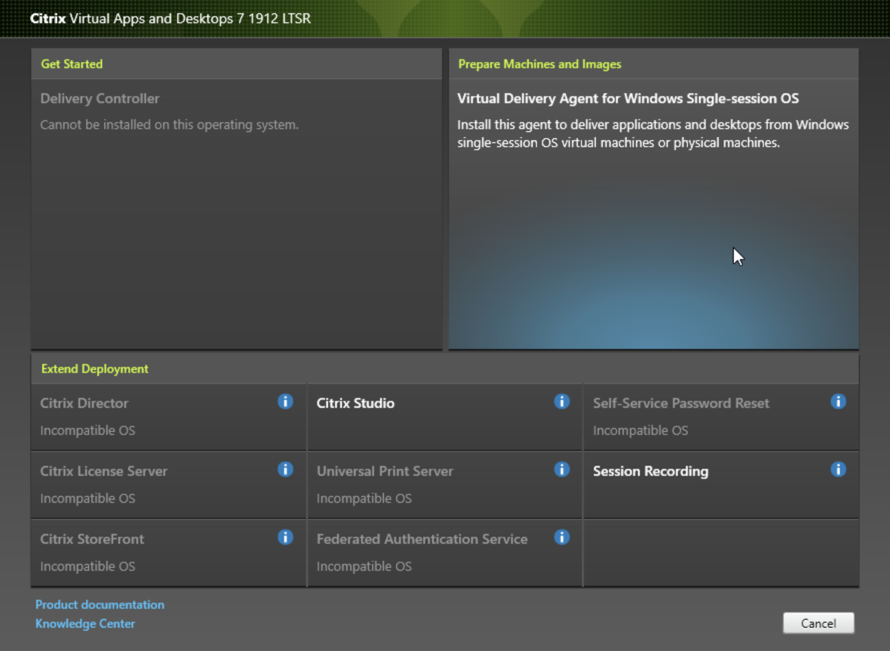
Select Create a MCS master image and click Next.
Under Core Components, select Citrix Workspace App in addition to the default Virtual Desktop Agent selection. Click Next.

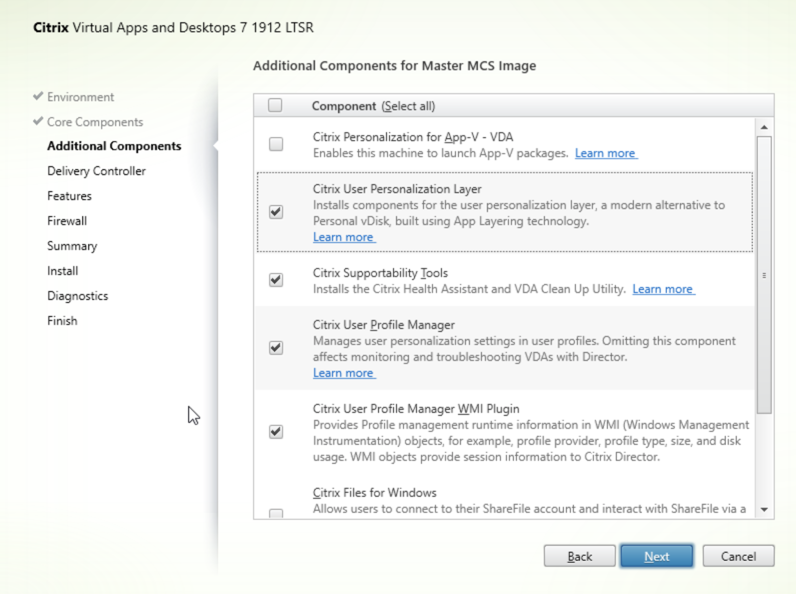
Under Additional Components, select Citrix User Personalization Layer in addition to the default selections, and click Next.
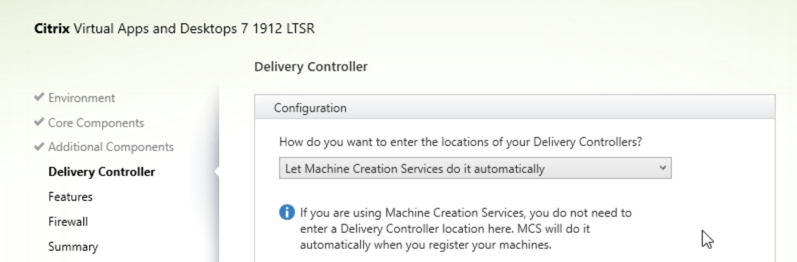
Under Delivery Controller, select Let Machine Creation Services do it automatically from the drop down, and click Next..
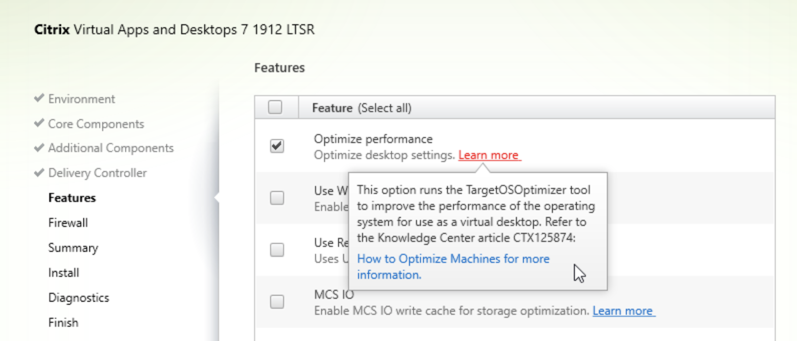
# Under Features, click Next.
Allow the installer to automatically configure required Windows Firewall port accessibility, click Next.
Click Install to begin the VDA installation. This process should take approximately 5 minutes.
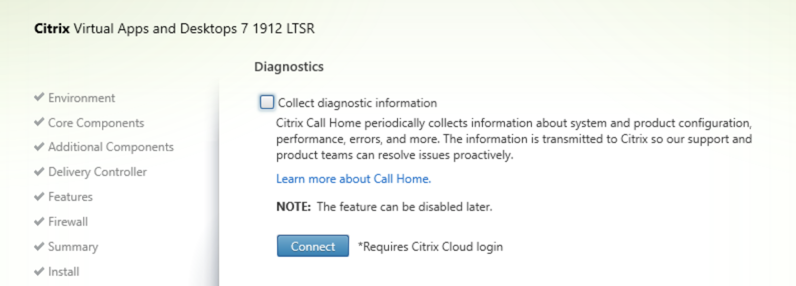
When prompted, de-select Collect diagnostic information for Citrix Call Home and click Next.
Click Finish and wait for the VM to restart.
Running Citrix Optimizer
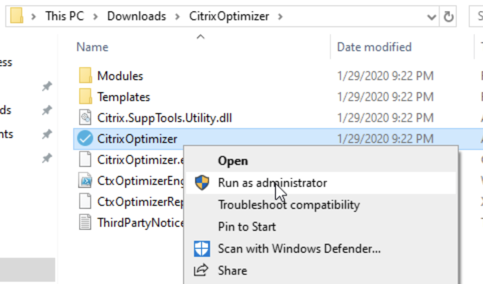
Within the VM console, download http://10.42.194.11/workshop_staging/CitrixOptimizer.zip and extract to a directory.
Right-click CitrixOptimizer.exe and select Run as Administrator.
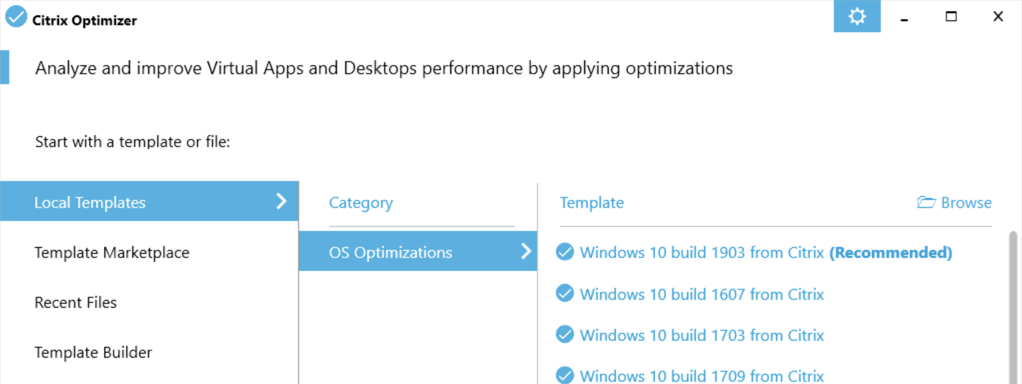
Select the recommended optimization template based on the Windows build being used for the gold image.
Click Select All to select all available optimizations and click Analyze.
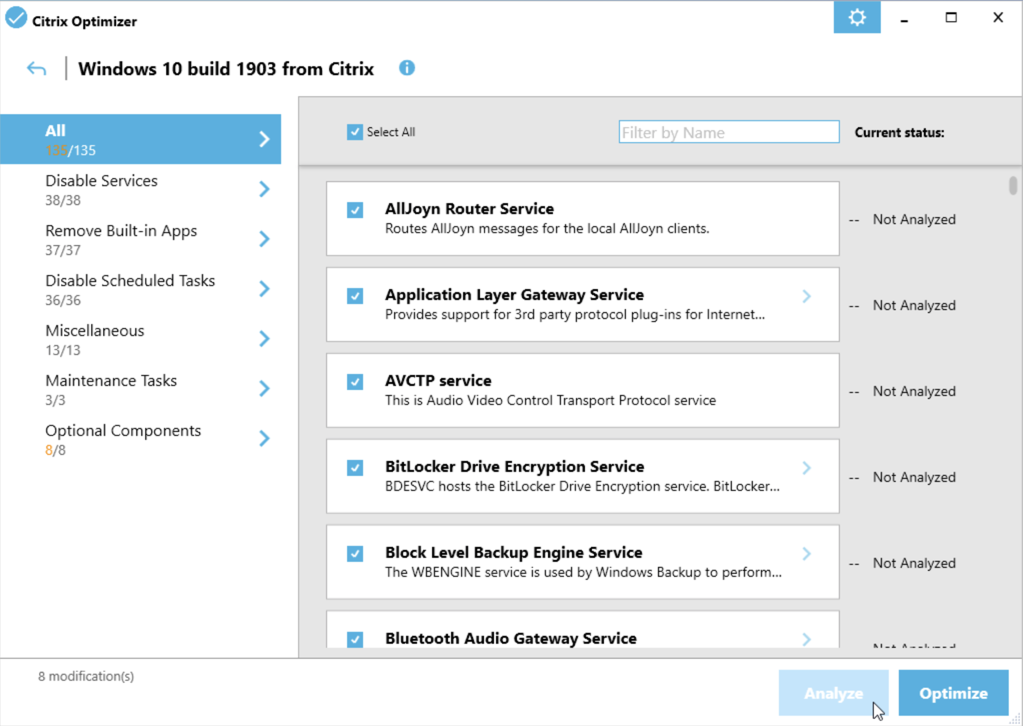
Click View Results to see a detailed report of the status of each available optimization.
Return to the Citrix Optimizer and click Done > Optimize to apply the selected optimizations.
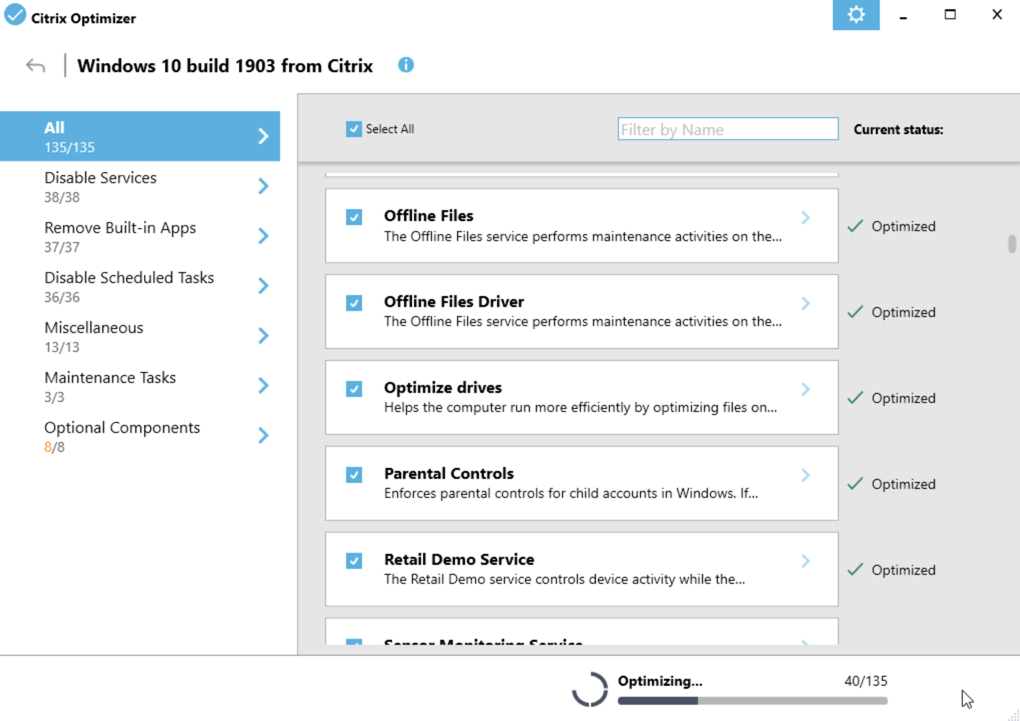
Once the tool has completed, you can click View Results to view an updated report. You can now close the tool.
Running VMware OS Optimization Tool
Within the VM console, download http://10.42.194.11/workshop_staging/VMwareOSOptimizationTool.zip and extract to a directory.
Right-click VMwareOSOptimizationTool.exe and select Run as Administrator.
Click the Select All checkbox. Scroll down to Cleanup Jobs and un-select the 4 available optimizations. Click Analyze.
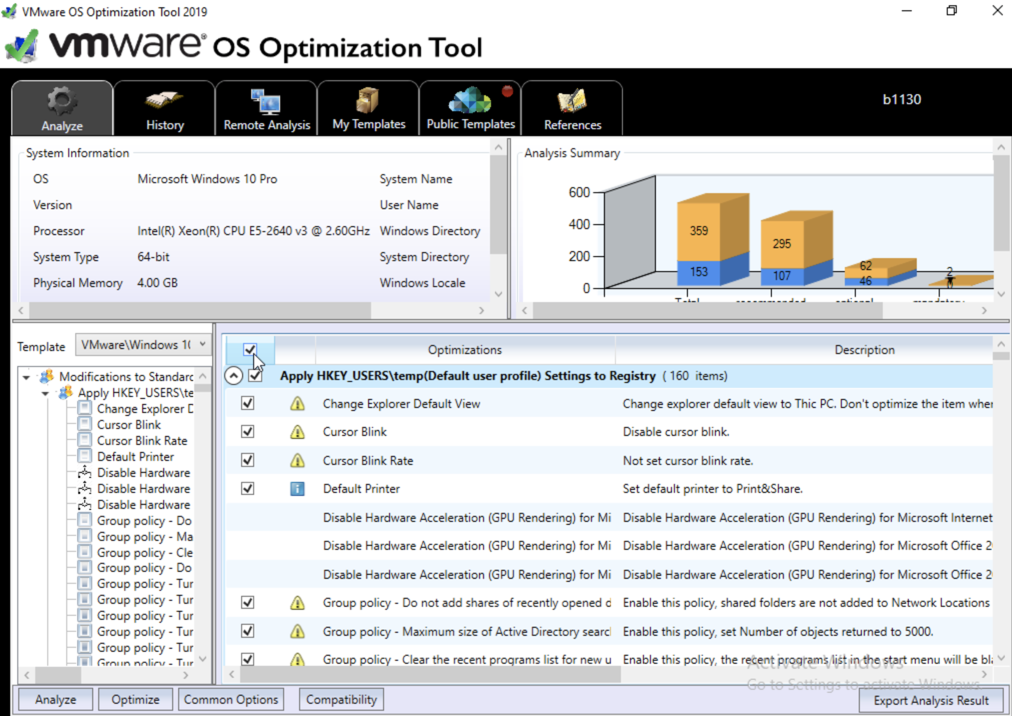
Note
The Cleanup Jobs are excluded from this exercise as they can be time consuming to apply.
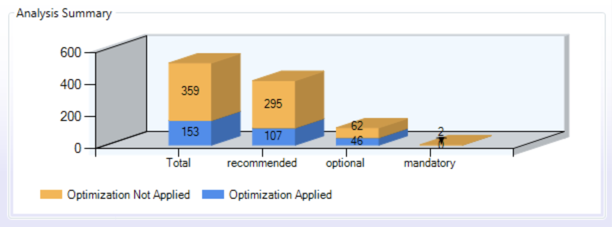
Note the outstanding optimizations not applied in the Analysis Summary pane.
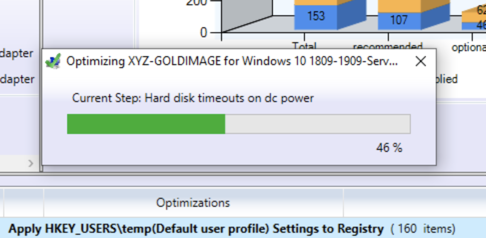
Click Optimize to apply the remaining optimizations.
Review the results and then restart your Gold Image VM.
Completing the Gold Image
XenDesktop provisions pools of desktops based on a hypervisor snapshot of the gold image. Unlike traditional hypervisors which can experience performance degradation from traversing long snapshot chains, Nutanix’s redirect-on-write algorithm for implementing snapshots has no such drawback. This difference allows for flexibility in using gold image snapshots to maintain many gold image versions from a single VM. Watch this video for additional details on how Nutanix implements snapshots and cloning.
Once restarted, Perform a graceful shutdown of the VM from within the guest.
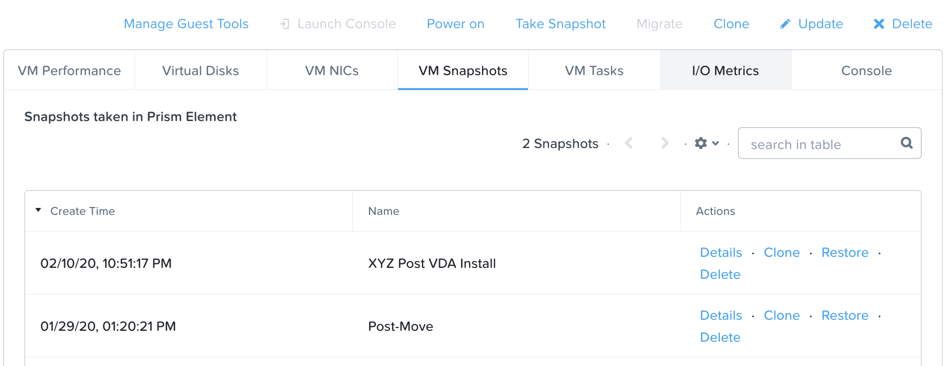
From Prism Element, take a snapshot of the VM (e.g. Initials Post optimization and VDA install)
Note
This snapshot must be taken from Prism Element in order to be recognized by the Citrix AHV plug-in.
Takeaways
What are the key things learned in this exercise?
Using MCS helps simplify the gold image by not having to manually specify (or depend on Active Directory to specify) what XenDesktop Delivery Controller(s) with which the image should attempt to register. This allows more flexibility in having a single gold image support multiple environments without external dependencies.
EUC image optimization tools are not solution or hypervisor specific and can be easily applied to improve virtual desktop performance and increase host density.