Deploying Task Manager
The estimated time to complete this lab is 10 minutes.
Overview
This exercise walks you through importing and launching a Calm blueprint to deploy a simple Task Manager application used in multiple labs. You do not need to complete this exercise unless directed to do so as staging for another lab.
Verifying the Default Project
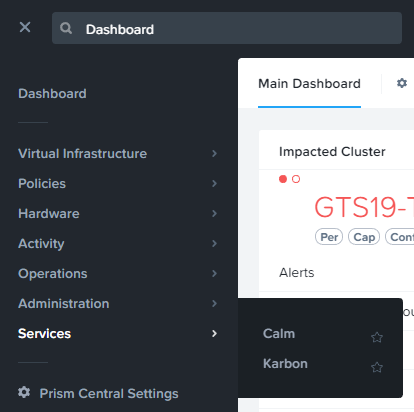
In Prism Central, select > Services > Calm.
Click  Projects in the left hand toolbar and select the default project.
Note
Mousing over an icon will display its title.
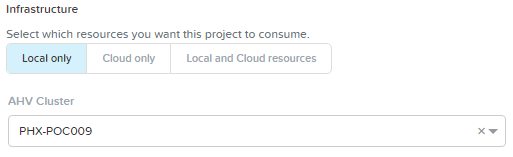
Under AHV Cluster verify your assigned cluster is selected from the drop-down list, otherwise select it.
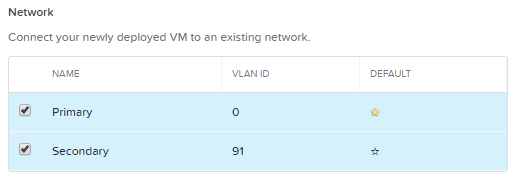
Under Network, verify the Primary and Secondary networks are selected and the Primary network is the default. Otherwise, make the selections as shown below.
If changes were made, click Save.
Importing the Blueprint
Right-click on this link and Save Link As… to download the blueprint for the example application used in this exercise.
Click  Blueprints in the left hand toolbar to view available Calm blueprints.
Click Upload Blueprint and select the TaskManager.json file previously downloaded.
Fill out the following fields:
Blueprint Name - Initials-TaskManager
Project - default
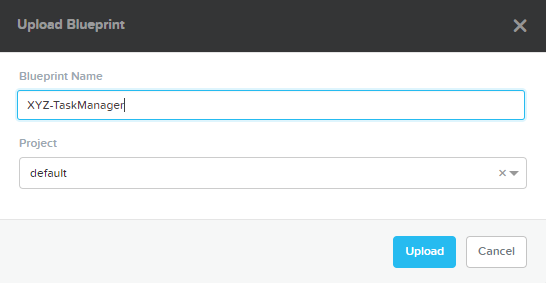
Click Upload.
Note
If you receive an error trying to upload the blueprint, refresh your browser and try again.
Configuring the Blueprint
Before you can launch the blueprint, you must first provide specify the information not stored in exported Calm blueprints, including credentials.
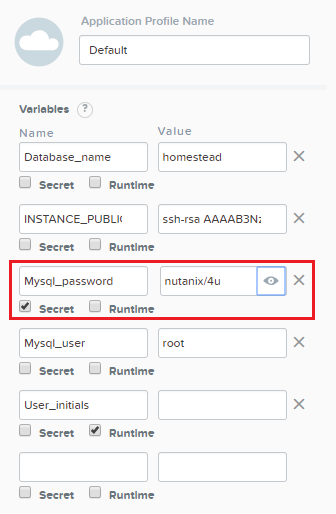
In the Application Profile pane on the right, fill out the following field:
Mysql_password - nutanix/4u
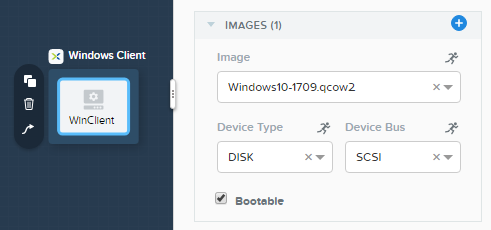
Select the WinClient service and in the pane on the right, under the VM tab, ensure the Image is set to the Windows10 disk image as shown below.
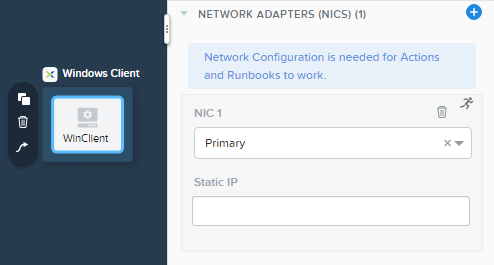
Under Network Adapters (NICs), ensure that NIC 1 is set to Primary as shown below.
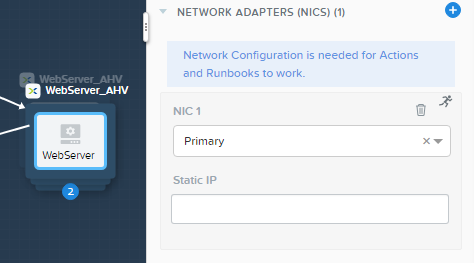
Select the WebServer, HAProxy, and MySQL services and ensure each has NIC 1 set to Primary.
Click Save.

Click Credentials.

Expand the CENTOS credential by clicking its name. Copy and paste the following key into the SSH Private Key field:
-----BEGIN RSA PRIVATE KEY-----
MIIEowIBAAKCAQEAii7qFDhVadLx5lULAG/ooCUTA/ATSmXbArs+GdHxbUWd/bNG
ZCXnaQ2L1mSVVGDxfTbSaTJ3En3tVlMtD2RjZPdhqWESCaoj2kXLYSiNDS9qz3SK
6h822je/f9O9CzCTrw2XGhnDVwmNraUvO5wmQObCDthTXc72PcBOd6oa4ENsnuY9
HtiETg29TZXgCYPFXipLBHSZYkBmGgccAeY9dq5ywiywBJLuoSovXkkRJk3cd7Gy
hCRIwYzqfdgSmiAMYgJLrz/UuLxatPqXts2D8v1xqR9EPNZNzgd4QHK4of1lqsNR
uz2SxkwqLcXSw0mGcAL8mIwVpzhPzwmENC5OrwIBJQKCAQB++q2WCkCmbtByyrAp
6ktiukjTL6MGGGhjX/PgYA5IvINX1SvtU0NZnb7FAntiSz7GFrODQyFPQ0jL3bq0
MrwzRDA6x+cPzMb/7RvBEIGdadfFjbAVaMqfAsul5SpBokKFLxU6lDb2CMdhS67c
1K2Hv0qKLpHL0vAdEZQ2nFAMWETvVMzl0o1dQmyGzA0GTY8VYdCRsUbwNgvFMvBj
8T/svzjpASDifa7IXlGaLrXfCH584zt7y+qjJ05O1G0NFslQ9n2wi7F93N8rHxgl
JDE4OhfyaDyLL1UdBlBpjYPSUbX7D5NExLggWEVFEwx4JRaK6+aDdFDKbSBIidHf
h45NAoGBANjANRKLBtcxmW4foK5ILTuFkOaowqj+2AIgT1ezCVpErHDFg0bkuvDk
QVdsAJRX5//luSO30dI0OWWGjgmIUXD7iej0sjAPJjRAv8ai+MYyaLfkdqv1Oj5c
oDC3KjmSdXTuWSYNvarsW+Uf2v7zlZlWesTnpV6gkZH3tX86iuiZAoGBAKM0mKX0
EjFkJH65Ym7gIED2CUyuFqq4WsCUD2RakpYZyIBKZGr8MRni3I4z6Hqm+rxVW6Dj
uFGQe5GhgPvO23UG1Y6nm0VkYgZq81TraZc/oMzignSC95w7OsLaLn6qp32Fje1M
Ez2Yn0T3dDcu1twY8OoDuvWx5LFMJ3NoRJaHAoGBAJ4rZP+xj17DVElxBo0EPK7k
7TKygDYhwDjnJSRSN0HfFg0agmQqXucjGuzEbyAkeN1Um9vLU+xrTHqEyIN/Jqxk
hztKxzfTtBhK7M84p7M5iq+0jfMau8ykdOVHZAB/odHeXLrnbrr/gVQsAKw1NdDC
kPCNXP/c9JrzB+c4juEVAoGBAJGPxmp/vTL4c5OebIxnCAKWP6VBUnyWliFhdYME
rECvNkjoZ2ZWjKhijVw8Il+OAjlFNgwJXzP9Z0qJIAMuHa2QeUfhmFKlo4ku9LOF
2rdUbNJpKD5m+IRsLX1az4W6zLwPVRHp56WjzFJEfGiRjzMBfOxkMSBSjbLjDm3Z
iUf7AoGBALjvtjapDwlEa5/CFvzOVGFq4L/OJTBEBGx/SA4HUc3TFTtlY2hvTDPZ
dQr/JBzLBUjCOBVuUuH3uW7hGhW+DnlzrfbfJATaRR8Ht6VU651T+Gbrr8EqNpCP
gmznERCNf9Kaxl/hlyV5dZBe/2LIK+/jLGNu9EJLoraaCBFshJKF
-----END RSA PRIVATE KEY-----
Expand the WIN_VM_CRED credential by clicking its name. Enter nutanix/4u as the Password.
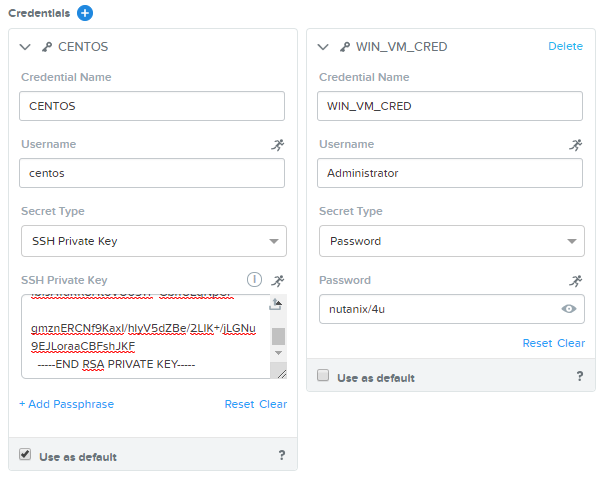
Click Save.
Once the blueprint has been saved, click Back.

Launching the Blueprint
After the credentials have been provided, Publish, Download, and Launch are now available from the toolbar. Click Launch.
Fill out the following fields:
Name of the Application - Initials-TaskManager1
User_initials - Initials
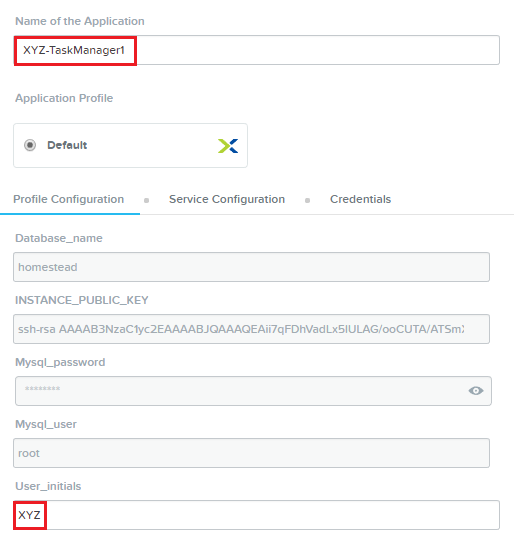
Click Create.
You can monitor the status of your application deployment by clicking  Applications and clicking your application’s name.
Provisioning the complete application will take approximately 15 minutes. Proceed to the next section of the lab while the application is provisioning.