Securing Applications with Flow
Flow is an application-centric network security product tightly integrated into Nutanix AHV and Prism Central. Flow provides rich network traffic visualization, automation, and security for VMs running on AHV.
Microsegmentation is a component of Flow that uses simple policy-based management to secure VM networking. Using Prism Central categories (logical groups), you can create a powerful distributed firewall. Combining this with Calm allows automated deployment of applications that are secured as they are created.
In this exercise you will restrict access to the Fiesta application and protect traffic between the application tiers.
Securing the Fiesta Application
Flow provides multiple System categories out of the box, such as AppType, AppTier, and Environment, that are used to quickly group virtual machines. Security policies are applied using these categories. You can start using these pre-existing categories right away, or add your own categories for custom grouping.
Defining Category Values
Prism Central uses categories as metadata to tag VMs to determine how policies will be applied.
In Prism Central, select > Virtual Infrastructure > Categories.
Select the checkbox for AppType and click Actions > Update.

Click the icon beside the last value to add an additional Category value.
Specify Initials-Fiesta as the value name.
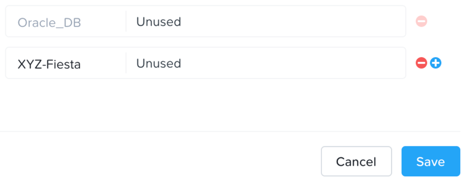
Click Save.
Select the checkbox for AppTier and click Actions > Update.
Click the icon beside the last value to add an additional Category value.
Specify Initials-Web as the value name. This category will be applied to the application’s web tier.
Click and specify Initials-DB. This category will be applied to the application’s MySQL database tier.
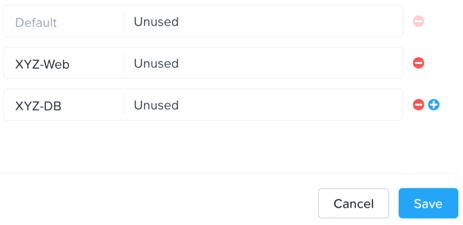
Click Save.
Creating a Security Policy
Nutanix Flow includes a policy-driven security framework that uses a workload-centric approach instead of a network-centric approach. Therefore, it can scrutinize traffic to and from VMs no matter how their network configurations change and where they reside in the data center. The workload-centric, network-agnostic approach also enables the virtualization team to implement these security policies without having to rely on network security teams.
Security policies are applied to categories and not to the VMs themselves. Therefore, it does not matter how many VMs are started up in a given category. Traffic associated with the VMs in a category is secured without administrative intervention, at any scale.
Create the security policies that will protect the Fiesta application.
In Prism Central, select > Policies > Security Policies.
Click Create Security Policy > Secure Applications (App Policy) > Create.
Fill out the following fields:
Name - Initials-Fiesta
Purpose - Restrict unnecessary access to Fiesta
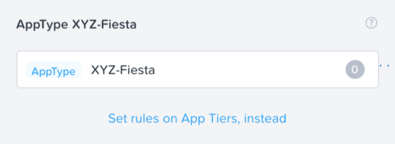
Secure this app - AppType: Initials-Fiesta
Do NOT select Filter the app type by category.

Click Next.
If prompted, click OK, Got it! on the tutorial diagram of the Create App Security Policy wizard.
To allow for more granular configuration of the security policy, click Set rules on App Tiers, instead rather than applying the same rules to all components of the application.
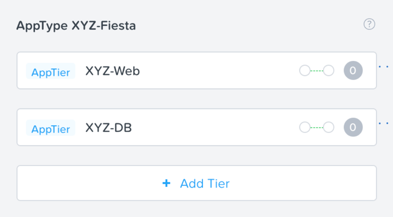
Click + Add Tier.
Select AppTier:Initials-Web from the drop down.
Repeat Steps 7-8 for AppTier:Initials-DB.
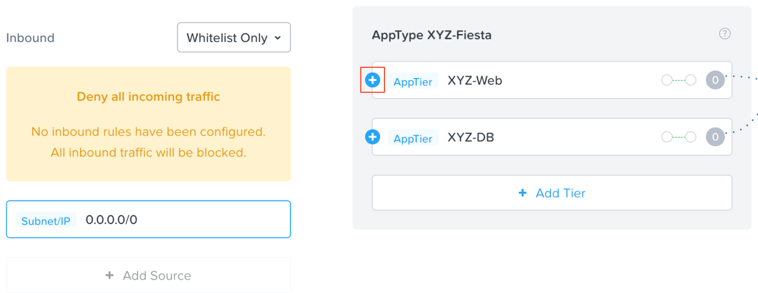
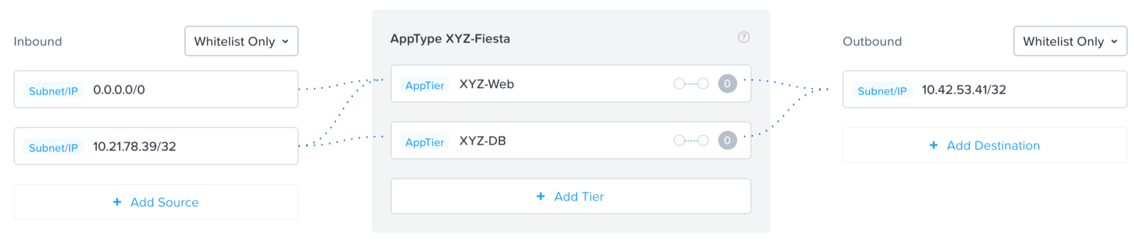
Next you will define the Inbound rules, which control which sources you will allow to communicate with your application. You can allow all inbound traffic, or define whitelisted sources. By default, the security policy is set to deny all incoming traffic.
In this scenario we want to allow inbound TCP traffic to the web tier on TCP port 80 from all clients.
Under Inbound, click + Add Source.
Fill out the following fields to allow all inbound IP addresses:
Add source by: - Select Subnet/IP
Specify 0.0.0.0/0
Note
Sources can also be specified by Categories, allowing for greater flexibility as this data can follow a VM regardless of changes to its network location.
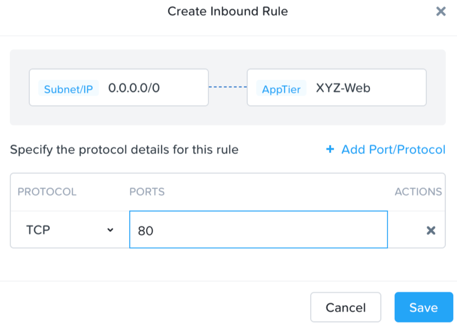
To create an inbound rule, select the + icon that appears to the left of AppTier:Initials-Web.
Fill out the following fields:
Protocol - TCP
Ports - 80
Note
Multiple protocols and ports can be added to a single rule.
Click Save.
Calm could also require access to the VMs for workflows including scaling out, scaling in, or upgrades. Calm communicates with these VMs via SSH, using TCP port 22.
Under Inbound, click + Add Source.
Fill out the following fields:
Add source by: - Select Subnet/IP
Specify Your Prism Central IP/32
Note
The /32 denotes a single IP as opposed to a subnet range.
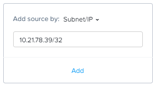
Click Add.
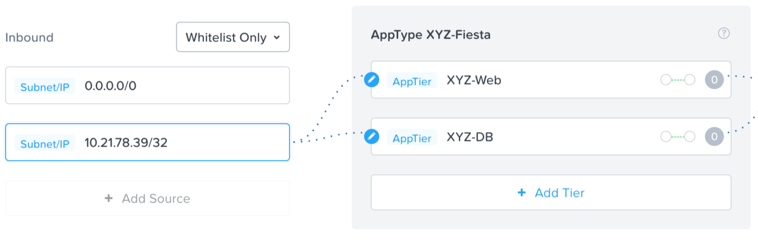
Select the + icon that appears to the left of AppTier:Initials-Web, specify TCP port 22 and click Save.
Repeat Step 18 for AppTier:Initials-DB to allow Calm to communicate with the database VM.
By default, the security policy allows the application to send all outbound traffic to any destination. The only outbound communication required for your application is to communicate with your DNS server.
Under Outbound, select Whitelist Only from the drop down menu, and click + Add Destination.
Fill out the following fields:
Add source by: - Select Subnet/IP
Specify Your Domain Controller IP/32
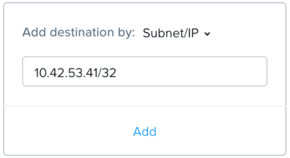
Click Add.
Select the + icon that appears to the right of AppTier:Initials-Web, specify UDP port 53 and click Save to allow DNS traffic. Repeat this for AppTier:Initials-DB.
Each tier of the application communicates with other tiers and the policy must allow this traffic. Some tiers such as web do not require communication within the same tier.
To define intra-app communication, click Set Rules within App.
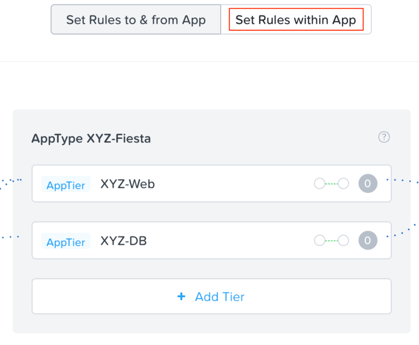
Click AppTier:Initials-Web and select No to prevent communication between VMs in this tier. There is only a single web VM within the tier.
While AppTier:Initials-Web is still selected, click the icon to the right of AppTier:Initials-DB to create a tier to tier rule.
Fill out the following fields to allow communication on TCP port 3306 between the web and database tiers:
Protocol - TCP
Ports - 3306

Click Save.
Click Next to review the security policy.
Click Save and Monitor to save the policy.
Assigning Category Values
You will now apply the previously created categories to the VMs provisioned from the Fiesta blueprint. Flow categories can be assigned as part of a Calm blueprint, but the purpose of this exercise is to understand category assignment to existing virtual machines.
In Prism Central, select > Virtual Infrastructure > VMs.
Click Filters and select the label for Initials AHV Fiesta VMs to display your virtual machines.
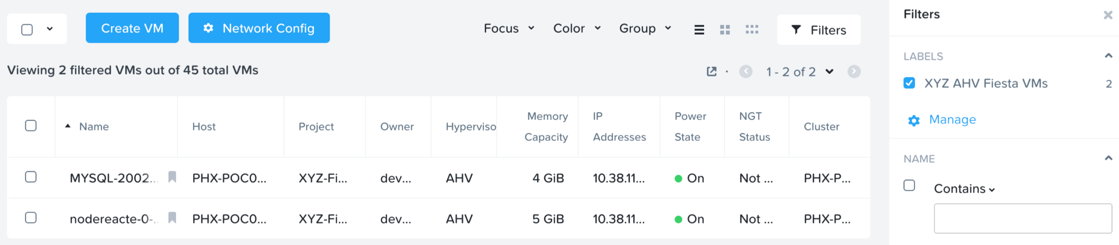
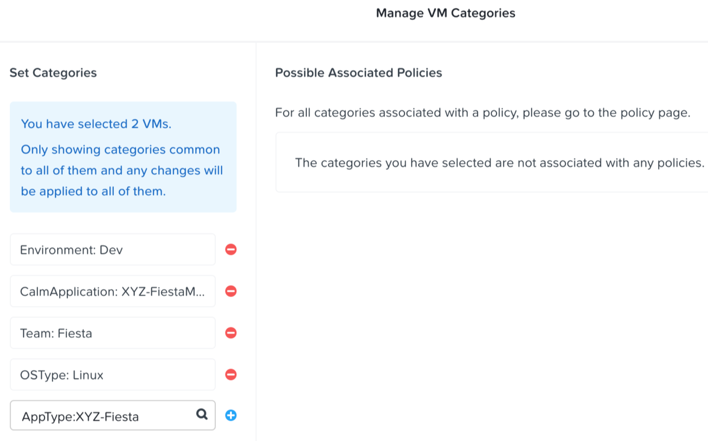
Using the checkboxes, select the 2 VMs associated with the application (Web and DB) and select Actions > Manage Categories.
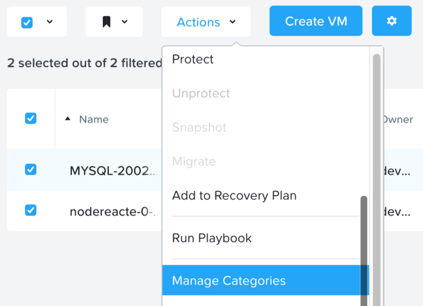
Specify AppType:Initials-Fiesta in the search bar and click Save icon to bulk assign the category to all VMs.
Select ONLY the nodereact VM, select Actions > Manage Categories, specify the AppTier:Initials-Web category and click Save.
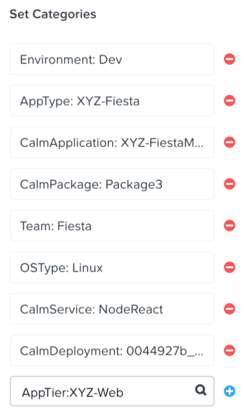
Repeat Step 5 to assign AppTier:Initials-DB to your MySQL VM.
Finally, Repeat step 5 to assign Environment:Dev to your Windows Tools VM.
Monitoring and Applying a Security Policy
Before applying the Flow policy, you will ensure the Fiesta application is working as expected.
Testing the Application
From Prism Central > Virtual Infrastructure > VMs, note the IP address of your -nodereact… and -MYSQL-… VMs.
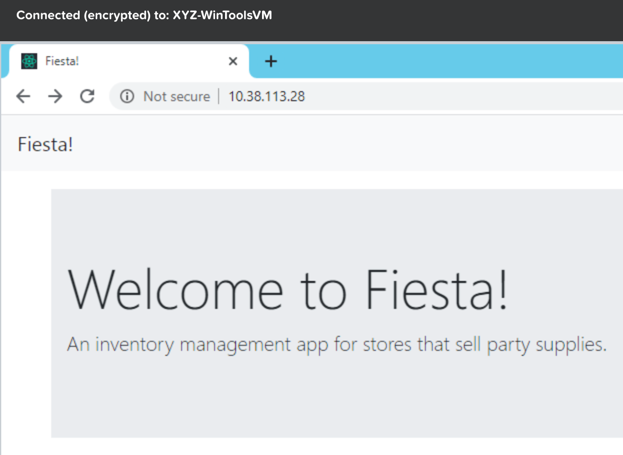
Launch the console for your Initials-WinToolsVM VM.
From the Initials-WinToolsVM console open a browser and access http://node-VM-IP/.
Verify that the application loads and that tasks can be added and deleted.
Open Command Prompt and run
ping -t MYSQL-VM-IPto verify connectivity between the client and database. Leave the ping running.Open a second Command Prompt and run
ping -t node-VM-IPto verify connectivity between the client and web server. Leave the ping running.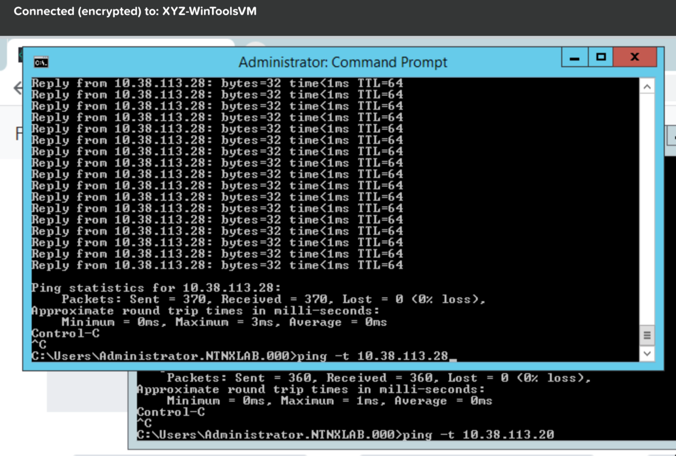
Using Flow Visualization
Return to Prism Central and select > Virtual Infrastructure > Policies > Security Policies >Initials-Fiesta.
Verify that Environment: Dev appears as an inbound source. The source and line appear in yellow to indicate that traffic has been detected from your client VM.
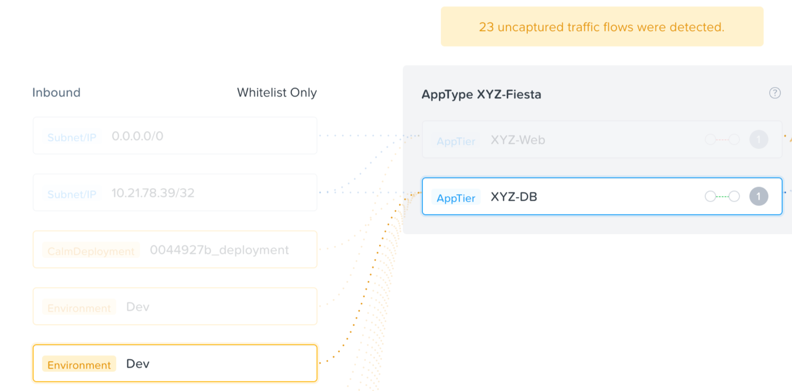
Are there any other detected outbound traffic flows? Hover over these connections and determine what ports are in use.
Click Update to edit the policy.

Click Next and wait for the detected traffic flows to populate.
Mouse over the Environment: Dev source that connects to AppTier:Initials-Web and click the icon that appears.

Click OK to complete adding the rule.
The Environment: Dev source should now turn blue, indicating that it is part of the policy. Mouse over the flow line and verify that both ICMP (ping traffic) and TCP port 80 appear.
Click Next > Save and Monitor to update the policy.
Applying Flow Policies
In order to enforce the policy you have defined, the policy must be applied.
Select Initials-Fiesta and click Actions > Apply.
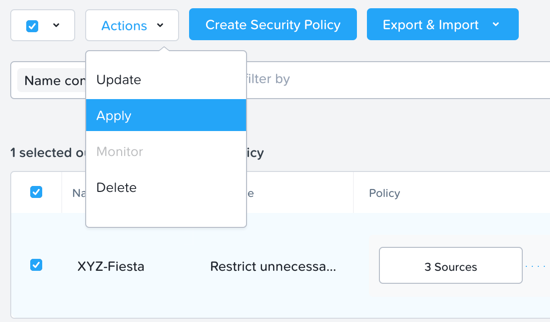
Type APPLY in the confirmation dialogue and click OK to begin blocking traffic.
Return to the Initials-WinToolsVm console.
What happens to the continuous ping traffic from the Windows client to the database server? Is this traffic blocked?
Verify that the Windows Client VM can still access the Fiesta application using the web browser and the web server IP address.
Can you still add new products under Products and update product quantities under Inventory?
Takeaways
Microsegmentation offers additional protection against malicious threats that originate from within the data center and spread laterally, from one machine to another.
Categories created in Prism Central are available inside Calm blueprints.
Security policies leverage the text based categories in Prism Central.
Flow can restrict traffic on certain ports and protocols for VMs running on AHV.
The policy is created in Monitor mode, meaning traffic is not blocked until the policy is applied. This is helpful to learn the connections and ensure no traffic is blocked unintentionally.