API: Update VM
Overview
In this exercise perfoms two VM updates in a single API call. You update you VM to associate a disk and perform a power on.
Note
Estimated time to complete: 20 MINUTES
Exercise: Update your VM
Click + in the main window to create a new tab-window
Click the dropdown and select PUT
v3 uses PUT to allow the declaration of a spec that describes the new desired final state
Enter the URL to update your VM
Copy the URL used in the third exercise: https://{{prism_central_ip}}:9440/api/nutanix/v3/vms/{{uuid}}
Replace {{prism_central_ip}} with the IP address mentioned in the lab handout

Configure basic authentication for this API call
Follow the same steps from exercise 1
v3 conforms to HTTP as a stateless protocol such that each API call is authenticated
Set the media type to application/json
Follow the same steps from exercise 1
Fill out the body
Click on the tab from exercise 3 where you retrieved the status of your VM
Copy the entire response
Click on the right-most tab for this exercise to update your VM
Paste the response from the GET as the body for the PUT
Only delete the status object from the body and keep the spec and metadata section.
Adjust the body to mount a disk and power on
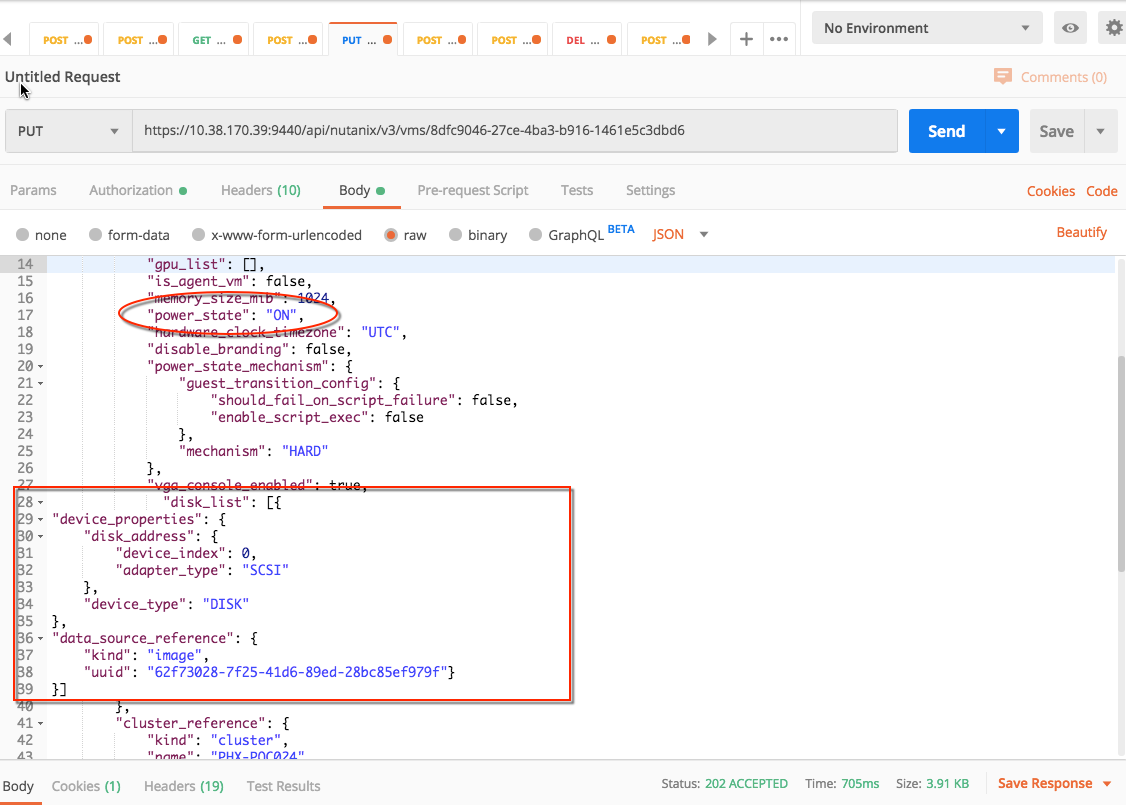
Change the power_state attribute from OFF to ON
Search for “disk_list”: [] and replace with the following disk list into the spec
  "disk_list": [{
"device_properties": {
    "disk_address": {
        "device_index": 0,
        "adapter_type": "SCSI"
    },
    "device_type": "DISK"
},
"data_source_reference": {
    "kind": "image",
    "uuid": "<imageuuid>"
}
}]
Replace <imageuuid> with the uuid of the CentOS image from exercise 4
Click Send to submit the v3 API call
v3 intentful PUTs return a 202 on success to indicate that the intent was accepted
While the response state is PENDING, the VM is being transformed to its final state
With most APIs, powering on a VM and adding a disk is two calls. With v3, both operations (generally, any number of operations) can be accomplished with one PUT
Because of this, v3 exposes dramatically fewer URLs, as all entity transformations can be requested intentfully by providing the entity spec via PUT on the URL for the entity
Get the status of your VM
Click on the tab for exercise 3 where you retrieved the status of your VM
Click Send to repeat the GET to retrieve the latest information about your VM
Once the state is COMPLETE, the status will reflect the changes made to your VM
Check it out in the Prism UI
Open a web browser to https://{{prism_central_ip}}:9440/console/
Enter the Prism Username and Password displayed in your lab handout to log in
Type the f key or click the search icon to open the search bar on the header
Enter the name of your VM (hint: your Initials)
Click on your VM in the table and click the Launch Console button under the table
A window will appear for the CentOS login prompt