Patching Oracle with Era
Maintaining consistent patch levels across database servers in a traditional environment can be a very difficult process. Era makes this simple by providing a means of database engine patching through versioned software profiles. Groups of database servers can be patched or rolled back through Era using the web interface, or via CLI or API.
Each quarter, Oracle releases a grouping of patches referred to as a PSU. In this lab you will walk through the deployment and patching of both Oracle and Grid software for an Oracle 19c database using Era.
Patching Base Oracle VM
In this exercise, you will apply the October PSU patches to your manually cloned VM, register the database server with Era, and then use it as the basis for creating a new version of your Initials_ORACLE_19C Software Profile.
In Prism Central, note the IP address of your Initials_oracle_patched VM.
Connect to your Initials_oracle_patched VM via SSH using the following credentials:
User Name - root
Password - Nutanix/4u
Execute the following script to download and install the Oracle and Grid October PSU patches:
cd Downloads
./applypsu.sh
Observe that the script will first display the current patch level of the VM, note the April dates on the displayed releases. Press any key to continue the patch installation.
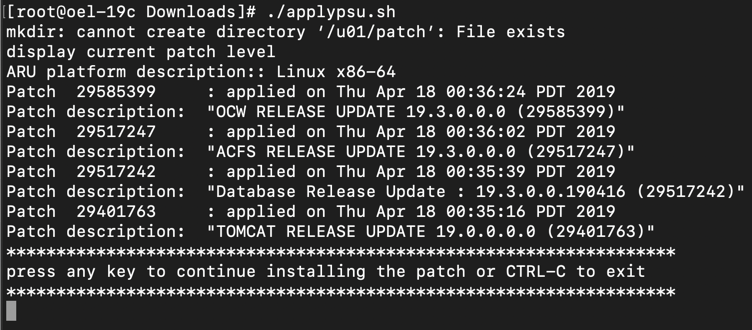
If prompted, type A to overwrite any existing files while extracting the patch and follow any prompts to press any key to continue. The script should run for approximately 20 minutes.
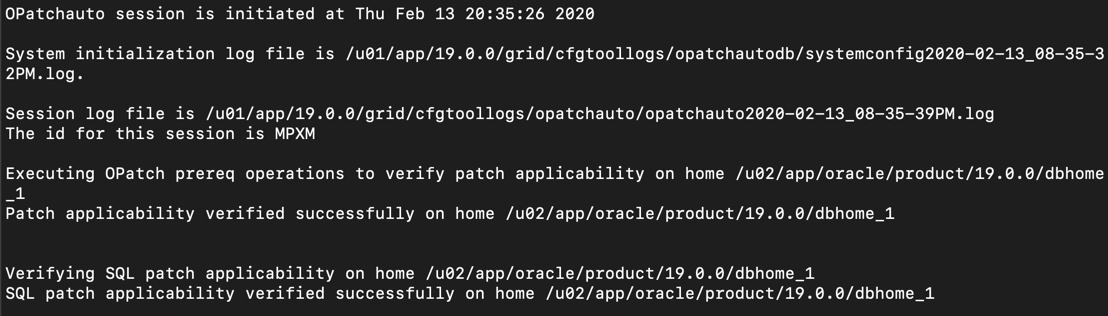
Once the script has finished, return to Era > Database Servers > List.
Click + Register and fill out the following Database Server fields:
Engine - Oracle
IP Address or Name of VM - UserXX-MSSQLSourceVM-Patched
Database Version - 19.0.0.0
Era Drive User - oracle
Oracle Database Home - /u02/app/oracle/product/19.0.0/dbhome_1
Grid Infrastructure Home - /u01/app/19.0.0/grid
Provide Credentials Through - Password
Password - Nutanix/4u
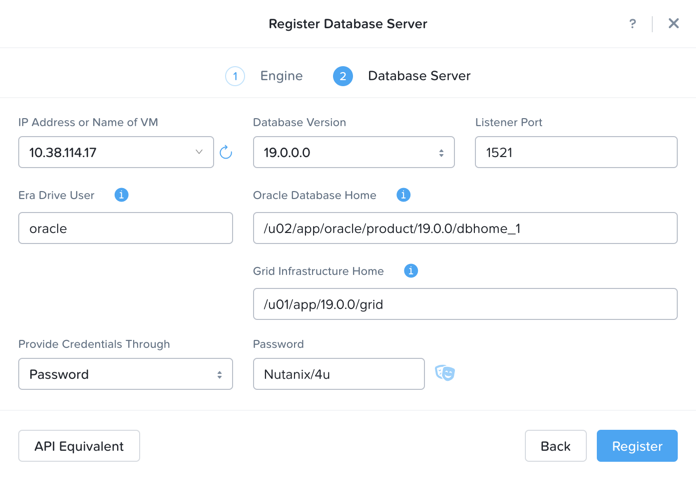
Click Register
Monitor the progress on the Operations page. This process should take approximately 5 minutes.
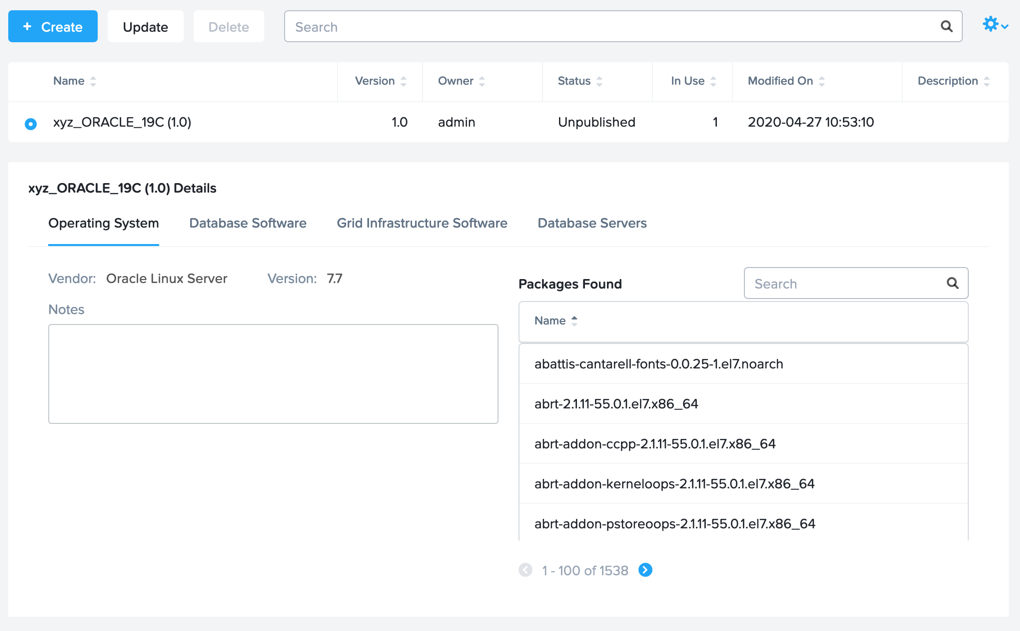
Once registration completes, select Era > Profiles > Software and click your Initials_ORACLE_19C Software Profile. Observe that Era provides complete introspection into the packages installed within the operating system, including the Database Software and Grid Software. Note the Patches Found under Database Software.
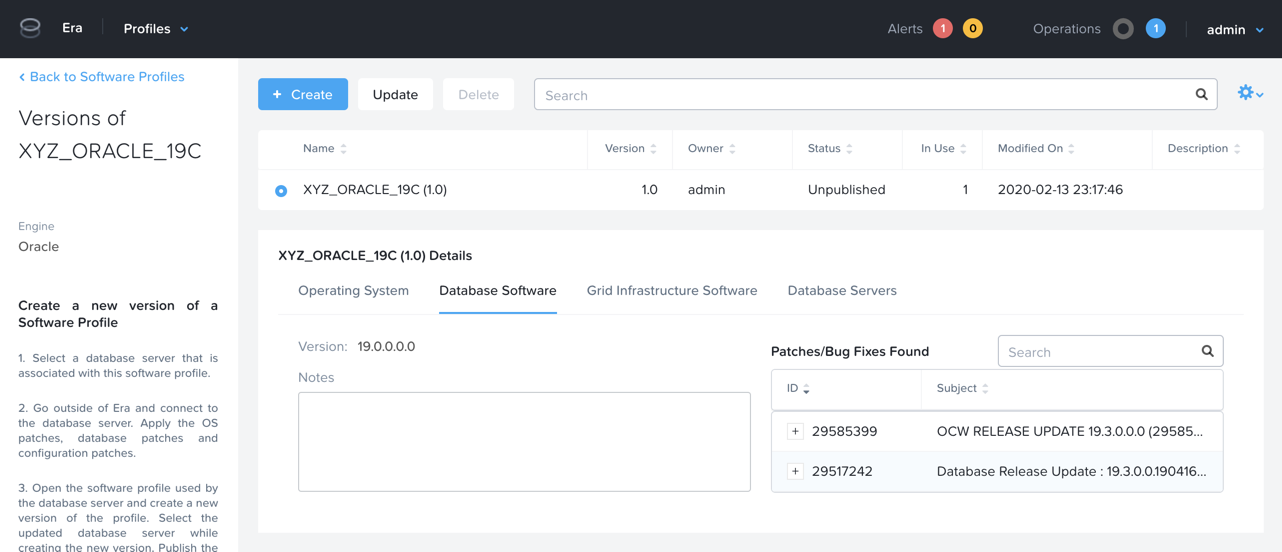
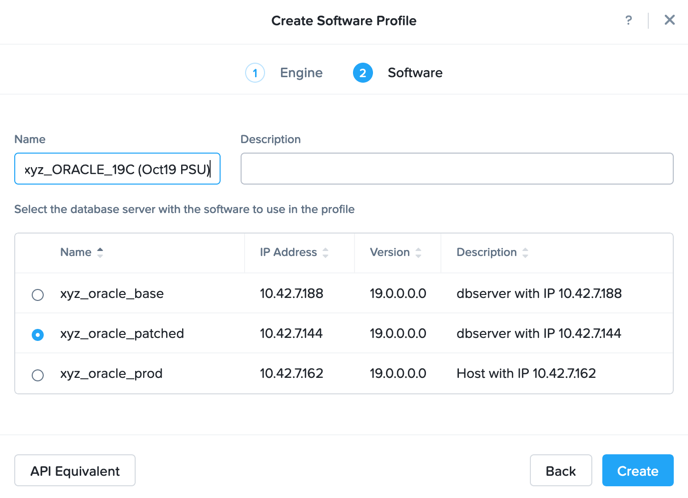
Click into your Initials_ORACLE_19C Software Profile, and click + Create to create a new version based on the Initials_oracle_patched VM you registered in the previous step.
Fill out the following fields and click Create:
Name - Initials_ORACLE_19C (Oct19 PSU)
Select Initials_oracle_patched
Monitor the progress on the Operations page. This process should take approximately 5 minutes.
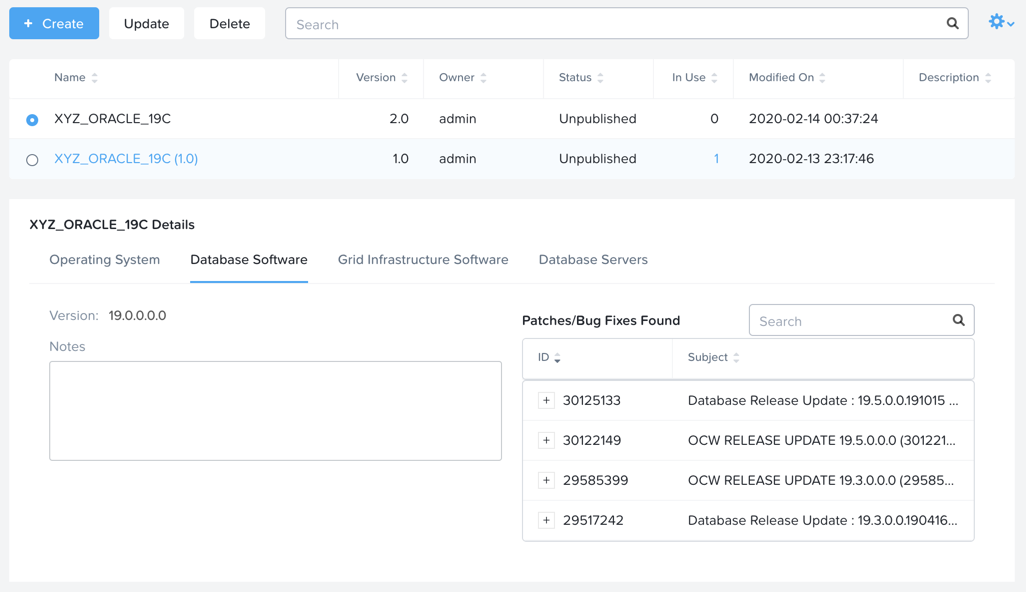
Return to Era > Profiles > Software and click your Initials_ORACLE_19C Software Profile. Note the 2.0 version now appears, with additional patches found under Database Software and Grid Infrastructure Software.
Before you can apply to patched Software Profile to your Initials_oracle_prod VM, the Software Profile must first be published, otherwise Era will not show the version as available or recommended for updating.
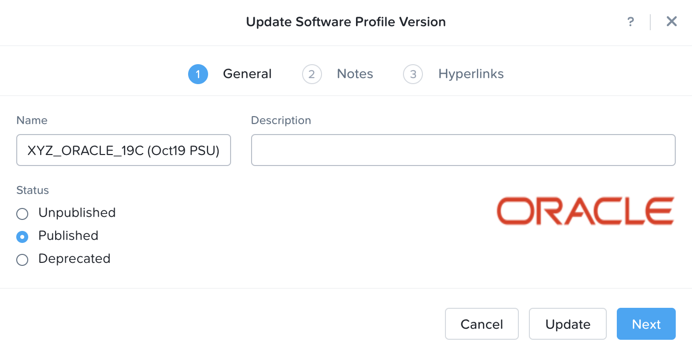
Select the 2.0 profile and click Update.
Under Status, select Published and click Next.
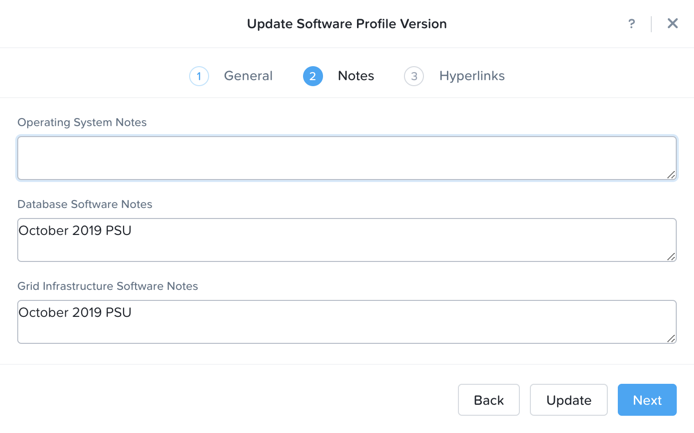
Optionally, you can provide notes regarding patches applied to Operating System, Oracle, and Grid software. Click Next > Update.
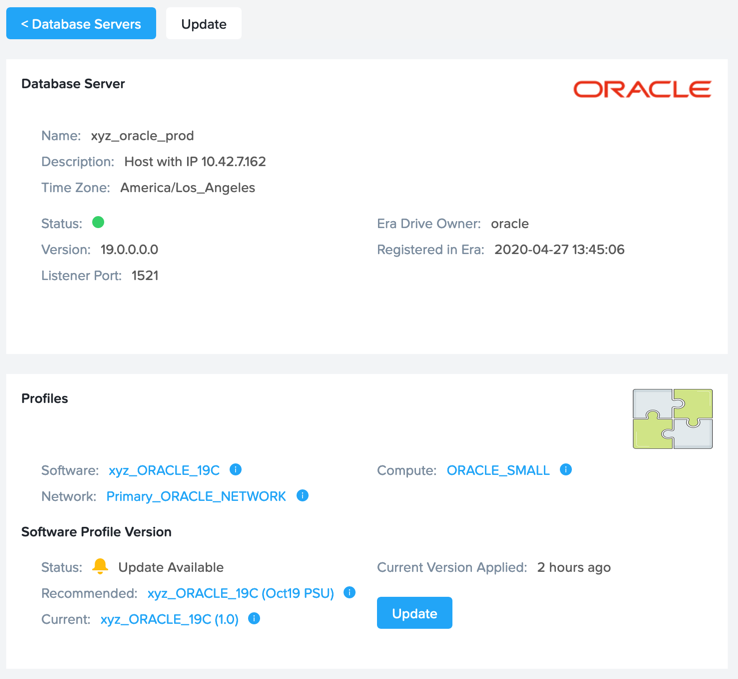
Return to Era > Database Servers > List and click your Initials_oracle_prod database server.
Under Profiles, note that the newer, published software profile is being recommended as an available update to the database server. Click Update.
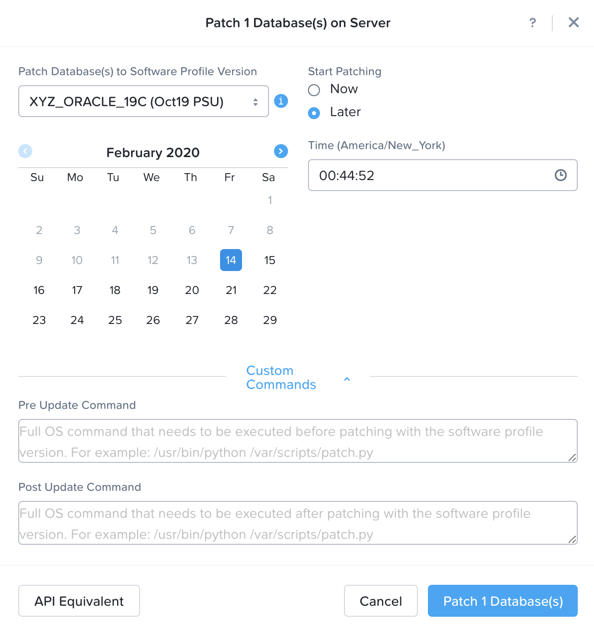
Select the desired patch profile from the drop down menu (in a real environment you could potentially publish several options) and click Patch 1 Database to begin the update process.
Note
Era also offers the ability to schedule patching application, allowing you to select a pre-determined maintenance window. For clustered database deployments, Era supports rolling updates, ensuring database accessibility throughout the update process.
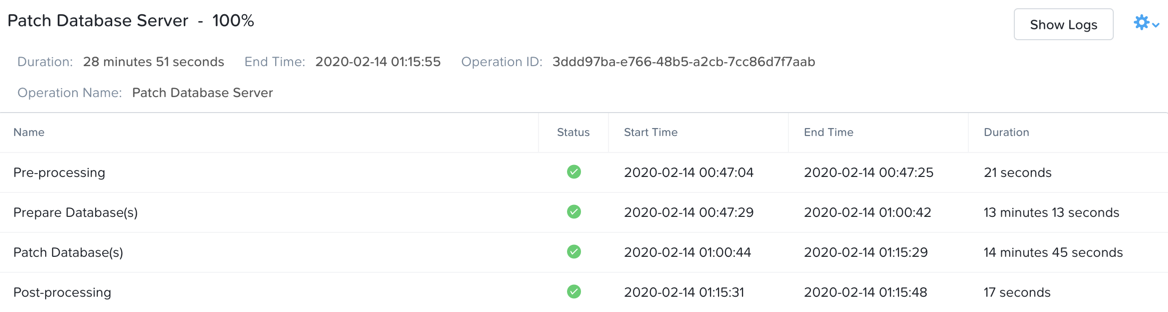
Monitor the progress on the Operations page. This process should take approximately 25 minutes.
During the patching process, Era will gracefully bring down database and Grid services, shut down the VM, replace the relevant virtual disks with thin clones from the 2.0 Software Profile, and bring the database server back online.
Once the patching operation has completed, you can easily validate the VM is running with the patched software outside of Era. SSH into your Initials_oracle_prod VM with the following credentials:
User Name - oracle
Password - Nutanix/4u
Execute the following command to display installed patch versions:
$ORACLE_HOME/OPatch/opatch lsinventory | egrep 'appl|desc'

Takeaways
What are the key things we learned in this lab?
Software Profiles can be versioned and used to deploy consistent updates to existing database servers
Software Profiles also simplify the patching process reducing the amount of manual patching needed in an environment
Scheduling updates can be used to hit change windows or SLA uptime windows.